For 46 days, I’m trying to spend less than $2.50 a day on food. This is an
account of the food, the costs, the science, and the fun of that experiment.
I love food and I love to cook. I love to study the science of cooking.
I’m very lucky—I’m not in a position that I have to strongly
limit my food expenses, but I have always wanted to see how well I could
cook and eat on a limited budget. It would encourage me to think about new
ingredients, new techniques, and new dishes. I love cooking competition
shows like Iron Chef, and enjoy cooking with limited
ingredients, or cooking with a lot of a specific ingredient that someone
dumps in my lap.
Okay, that’s only part of my inspiration. I used to have a huge box of
Richie Rich comic books that I bought from my friend for $3. In
case you’re not familiar with all of the employees of the Rich family,
their chef was Chef Pierre, the world’s greatest chef. One time, Chef
Pierre was kidnapped and held by a bunch of criminals. The criminals told
Chef Pierre that he had to cook for them—but they only had potato
chips and ketchup!. Not a problem for the world’s greatest chef! He
created food that was so delicious that the criminals quickly got
fat—so fat that they couldn’t get through the entrance to their
hideout! Chef Pierre then escaped by simply walking out unchallenged!
(After which, Mr. Rich’s security force swept in and cut all the criminals’
heads off.)
In any case, I always wanted to be that good, and be that
versatile with ingredients: so good that I could make a good meal out
of whatever’s on hand. I’d love to be on a cooking challenge show, and see
how well I could do with constraints and surprises, and with limited
ingredients (like whatever’s on a great sale, or your neighbor drops on
your doorstep.) I consider this my preparation.
It seemed like a fairly challenging target; enough so that I’d have to
think harder and perhaps learn more. When I started this challenge for the
first time in 2014, a friend of mine noted that in nursing school, they
were challenged to eat on $5/day. (And record their nutrition and caloric
intake.) I estimated some of my meal costs, and decided that $2.50/day
would be challenging, but safe and still fun.
Play Along
I encourage you to try challenging yourself to make meals for whatever
price you care to choose, for whatever duration you choose, whether it’s
for 45 days, or once a week, or whatever. Please let me know what you do,
either by email at eliasen@mindspring.com
or on Twitter at @aeliasen.
I’ll share good recipes and recommendations on here. Also, share food with
others and donate to your local food banks!
I’ve set some rules and guidelines for myself to follow:
- Have Fun! This is a fun experiment. I get to make
yummy food that I’m proud of and that I’m happy to eat! If I’m not having
fun and eating great food, I’m doing it wrong. - $2.50 a day. I could do this a lot of different ways, such as
averaging food costs over 45 days. However, I think that setting
an approximate limit of $2.50 each and every day is a stricter
constraint. (As an engineer, I find strict constraints freeing. It
reduces the number of possibilities you have to consider.) I feel I’ll
have to think a bit more and learn more with the stronger constraint. If I
have money left over after a day, I’m generally not going to let that “roll
over” to the next day. This doesn’t mean that I can’t make a big
batch of something that costs $10 to make, and then eat it for 4 days! - Be Safe! Maintain and track nutrition, get enough calories, and
don’t eat rotten food. (I would say “I’m not going to dumpster dive” but
after watching the fascinating Documentary Dive!, I
think that’s a valid approach!) - Share Food! I’m going to share the food I make with others.
That’s part of the fun. So I’m going to report my costs as single-person
costs here. That said, I’m not going to “cheat” by buying bulk
ingredients in huge quantities that I can’t properly preserve and use.
When I find good deals, I’m going to buy more for food banks, too. - Share Recipes and Techniques! That’s the point of this blog. I
hope if you have good recipes and ideas, you’ll share them with me. - Track and Minimize Waste. Food that I don’t use needs to be
factored into my costs. Plan meals to prevent spoilage. Learn to
preserve. - Gifts are Free! If someone gives me food (like the awesome
canned fruits my Aunt gives out for Christmas,) I consider it free. If
you have excesses of food, give them to your friends and neighbors. - Don’t make myself tired of my favorite foods. I don’t have a
membership to a Costco or other membership warehouse, and I’m not planning
to get one for this experiment. I used to have one, but with 1 or 2 people,
there was hardly anything in quantities that I could use in time.
(Especially when sharing a freezer between 4 guys in college.) I’m going
to buy what I can conveniently buy and store, (and not eat tater tots for a
solid month straight like I did in college. I loved tater tots before that
and couldn’t stand them for years afterwards.) - Be realistic. I’m not going to drive across town because they
have a slightly cheaper deal on chicken wings. I’m not going to spend all
day clipping coupons. I’m going to shop pretty much like I always have.
I will look into ways of getting food cheaper, though. - Be efficient. Especially with my time. Making big batches and
eating the same thing for several meals is one of the secrets of
efficiency. Spending part of a day making freezable food that will feed
you for weeks is incredibly efficient. - Keep on Sciencing! Yes, I’ve built my own sous vide cooking
apparatus. I made molecular gastronomy kits for my relatives for
Christmas. I buy sciencey cooking books. I will not apologize
for busting out the science or a cool apparatus. - Don’t burden others. If I want to go with friends to dinner, I
will! I will order whatever I’d normally order. I won’t make my friends
worry about my experiment, and I certainly don’t want people not to invite
me. I won’t be a food snob or a martyr. This is a fun
experiment. - Demonstrate Calculating Costs and Nutrition. I’ve developed an
awesome calculating tool and programming language called Frink that helps make calculations with units of
measure easy. Interspersed with this document will be calculations that
demonstrate how easy Frink makes it to calculate things! - Exceeding my budget is not failure. As an engineer, I know that
everything you try isn’t a success the first time. Every day, I’ll try to
analyze and point out how I could have done better, and can do better the
next time. In science, a negative result is every bit as important as a
positive result. To quote Thomas Edison, when asked why thousands of his
experiments on batteries didn’t produce a working result: “Results! Why,
man, I have gotten a lot of results! I know several thousand things that
won’t work!” –Edison: His Life and Inventions, 1910.
The first day, not coincidentally, coincided with Ash Wednesday, the first
day of Lent. Since that’s typically a date of fasting, I’m having a single
meal. But one of my favorites—good old Campbell’s tomato soup and a
couple of toasted cheese sandwiches! And they were proper toasted
cheese sandwiches. Butter the bread on the outsides, fill them with good
cheese, and cook them in an electric frying pan at 350 °F for a couple
minutes on each side.
I forgot to take pictures, but you know what a toasted-cheese sandwich
and tomato soup looks like.
Measuring Ingredients
I’m not always going to remember to measure and weigh my ingredients, but I
did today, so I’ll describe the process briefly. A digital kitchen scale
is very very useful for many types of cooking.
I like my tomato soup made with milk, so I added 1 can of milk. Now, a
digression:
Ounces vs. Fluid Ounces
A quick digression: Ounces (and pounds and kilograms) are a unit of
mass. “Fluid ounces” (also written fl.oz.) are a unit of
volume. Don’t confuse them.
The labels on liquids and semi-liquids (like mayonnaise) is usually
indicated in fluid ounces (volume.) The labels on solids and canned goods
is usually labeled in ounces (mass.)
(By the way, if you think that a pound or an ounce is a unit of
weight, and not mass, that’s a common (but potentially dangerous)
misconception. Read the full discussion of this in this
Frink FAQ entry.)
Okay, back to the topic. I buy my milk by the gallon (volume) but the can
of soup is marked by the mass it contains. I wanted to measure
the volume of the can. The easiest way to do that, using just a scale, is
to weigh the can filled with water, and then weigh the can empty and
subtract the weights. This gives you the weight of water that filled the
can. Fortunately, our units of mass and volume are calibrated around water.
The following are all basically equivalent statements:
- 1 gram of water fills 1 milliliter.
- 1 gram of water fills 1 cubic centimeter, or 1 cc, or 1 cm3.
(That is, a cube 1 centimeter on a side. Note that this is the same as a
milliliter.) - 1 kilogram of water fills one liter.
- 1 kilogram of water fills a cube 10 cm on a side (this is the same as a
liter.) - 1 ounce of water fills 1 fluid ounce.
- 1 pound of water fills one (U.S.) pint. (a pint is 16 fluid ounces.)
- The density of water is 1 kilogram / liter.
- The density of water is 1 gram / cm3.
- The density of water is 1 ounce / floz.
These rules make it easy. The can, filled with water, was 10.7 ounces
heavier than the empty can, so it contained 10.7 fluid ounces of water.
Since a gallon of milk cost $2.99, the total milk cost was $0.25.
I used up the last of a bit of fancy yummy shredded Tillamook Italian
3-cheese (mozzarella, smoked Provolone and Parmesan!) that I still had
open, so the cheese price was higher than some cheaper cheese that I bought
later. (Again, no waste!) We’ll call it $6 / lb. But how do you weigh
shredded cheese? You can’t weigh the cheese first and then put it on the
sandwich, because how will you know how much you’re going to need? I
weighed the cheese by weighing the plate + bread before and after putting
cheese on the bread and subtracting the difference. It turned out to be 58
g of cheese (total) for 2 sandwiches.
I even measured the butter on the bread! I didn’t remember until buttering
the last sandwich, and I didn’t want to get butter all over my scale, so I
weighed the butter dish + butter before and after buttering the last
sandwich. There was 16 g of butter for one sandwich (2 pieces of bread),
so a whopping 32 grams for 2 sandwiches. That amount surprised me. When
butter is $3.69 / lb, that comes to $0.26 of butter. Surprising. Hidden
costs like this can add up! I have to be careful not to miss them!
Thoughts
- A big part of eating inexpensively is watching for stuff to go on sale.
Results that I can obtain today, I may not be able to obtain tomorrow! - Dollar Tree sells 41% larger cans of Campbell’s tomato soup (15.2 oz
vs. 10.75 oz) for $1.00. (Safeway’s advertised “everyday price” is $0.91,
making Dollar Tree’s offering 1.29 times as efficient.) - Look into house brands or giant cans of soup?
- I can make huge batches of amazing soup much cheaper. Stay
tuned! - I’m using up existing food in my fridge for the first few days. My
costs should decrease as I start planning and buying better. - A good part of this exercise will be to develop and memorize “rules of
thumb” to estimate how much a portion of food costs. - Rule of thumb: A cup of milk costs about $0.20.
- Rule of thumb: A stick of butter can cost around $1.00.
- Rule of thumb: A tablespoon of butter costs about $0.12 (there are 8
tablespoons in a stick of butter.) - Where is the “cent” sign on my keyboard? My TRS-80 used to have one!
Day 1 Costs
| Item | Cost |
|---|---|
| 1 Bowl Tomato Soup | |
| 1/2 can Campbell’s Tomato Soup | $0.46 |
| Milk, half of 10.7 floz | $0.13 |
| Soup subtotal | $0.59 |
| 2 Toasted Cheese Sandwiches | |
| 4 slices white bread | $0.20 |
| Tillamook Italian 3-Cheese, 58 g | $0.77 |
| Butter, 32 g | $0.26 |
| Sandwiches subtotal | $1.23 |
| Homemade Kimchi (73 g) | $0.14 |
| Daily Total | $1.96 |
Note: The half can of milk and half can of soup was because I wasn’t
eating alone! Again, the costs that I’m going to list here are for
the portions that I personally eat, even if I share the meal with others.
I also probably paid less for the tomato soup, but I don’t have that old
receipt.
I mentioned homemade kimchi here, but I’ll describe that another day when
I have less to write about!
Frink Calculations
I mentioned before that I’ve created a calculating tool / programming
language called Frink which is
great for helping with physical calculations. I’m including some sample
calculations so you can see how easy Frink makes calculating costs. The
above calculations were:
    milkcost = 2.99 dollars / gallon
10.7 floz milkcost
0.2499453125 dollar (currency)
    cheesecost = 6 dollars/lb
58 g cheesecost
34800000/45359237 (approx. 0.76720867240337398) dollar (currency)
    buttercost = 3.69 dollars/lb
2 * (272 - 256) g buttercost   // Multiply by 2 sandwiches
0.26032183918790344732 dollar (currency)
An important thing to note is that you specify the units of measure in each
Frink calculation, and Frink automatically does the right thing with them.
It contains a large data
file of physical quantities, freeing you from having to look them up,
and freeing you to make effortless calculations without getting bogged down
in the mechanics.
Note that in the above calculations, Frink already knows about units of
measure such as dollars, gallons, pounds, grams, and allows you to
transparently mix those units of measure in calculations. For example, in
the cheese calculations, the cost was specified in dollars per pound, while
the cheese was weighed and had its mass specified in grams. Nevertheless,
you can transparently multiply these and Frink helps ensure the results
come out right.
Frink runs on your computer
(Windows, Mac, Linux) or on your Android device with the app Frink
Programming Language. You can use Frink in a web-based
interface. Give it a try! It’ll make you look smarter.
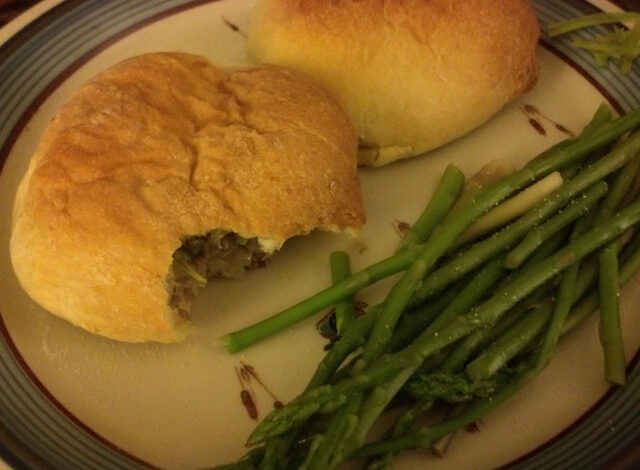
I actually started preparing for this experiment a few days in advance, and
readied my secret weapon: Cabbage Burgers! These are also variously
known as “Krautburgers” (although that gives the incorrect impression that
there’s sauerkraut inside; it’s just cooked unfermented cabbage,) or known
as “Cabbage Rolls” or “Runza” or “The Best Food You Can Prepare in Advance
and Freeze.” They’re a bun filled with cabbage, onions, and ground beef.
They’re delicious, nutritious, filling, inexpensive, and they freeze and
microwave incredibly well, so you can make a giant batch and have cheap
food ready in minutes!

The previous weekend, I made a gigantic batch of these little delights,
using 4 pounds of ground chuck, 2 heads of cabbage, 5 onions, 13 cups of
flour, 13 egg yolks (which left me 13+ egg whites for breakfast for 4 days)
and a few other ingredients. It was a huge undertaking, but it produced 61
delicious krautburgers that went into the freezer and should provide about
30 meals! Each krautburger cost, by my estimate, about
$0.41, $0.47 (see cabbage roll
cost update), and two of them make a good meal for only about
$0.82 $0.94! I’ve learned that making a huge batch will
last for weeks or months, and is as easy as making a smaller batch.
Because I’m going to be eating Krautburgers many times over the next 45
days, I’ll publish the recipe and the cost breakdown later. Update:
the recipe was published on day 13 and the cost
breakdown on day 16.
To combine my “Reduce Waste” and “Gifts are Free” rules, I ate half of the
orange that I got in my Christmas stocking (I’ve never cared that much for
most fruit, and I might have let it go to waste if not for this
experiment,) and 6 cherries that my aunt canned this year and gave as
Christmas presents. These were delicious! I also ate 1/8 of the pound of
asparagus I bought for $0.99 / pound. (Put in microwave-safe ventable
casserole dish, add 1/4 inch water, put the lid on, open the vent, and
microwave for 7 minutes.) Later, I had a bowl of vanilla pudding that I
made a few days earlier. A good day of eating, and quite cheap!
Personal Notes
I have to admit that I went to bed the previous night feeling rather
hungry. I expected this. The more I eat, the more I need to eat
to feel satisfied. The less I eat, the less I need to eat to feel
satisfied. My super-scientific hypothesis is that my stomach “shrinks” a
bit when I don’t eat. Since I had a semi-fasting day yesterday, I felt
hungry. And I found it hard to sleep. Hope I adjust.
It’s weird, but if I go to sleep hungry, I usually wake up not
feeling hungry. It was hard not to snack before bed, but I managed to pull
through.
About my usual eating schedule: I very rarely eat breakfast. Never have,
at least since college. I’m usually not hungry in the morning, I’m always
grumpy in the morning, (okay, I’m grumpy all day, always) and I’d
always, always choose sleeping 5 more minutes over spending time
eating! I’m usually fine with eating just one meal a day in the evening,
and maybe a snack later. Everybody’s schedule and needs are going to be
different.
Thoughts
- A very inexpensive day! $1.48, far below my target! Planning ahead by
making a large batch of great krautburgers definitely pays off. I
didn’t feel hungry when going to bed, and I could have eaten twice as many
krautburgers and still made my target! - Krautburgers combine two of the great inexpensive “fillers”: flour and
cabbage. (Another is potatoes.) There’s not a lot of calories in cabbage,
but it’s delicious and filling, and figures in a lot of low-cost recipes. - In old prison films, prisoners only get “bread and water” or maybe
“bread and cheese.” Should I try this one day? Can I make bread cheaper
than I can buy it? - I’m glad I’m not addicted to coffee or caffeine any more. I never
drank coffee but I used to drink at least 4 caffeinated soft drinks a
day. A roommate of mine was once quite surprised that a majority of his
daily costs went to coffee. If you shop carefully, you can get a can of
soda for $0.33 or so, or it can be much more if you buy it from a vending
machine! - It’s not a stated goal of this experiment, but I have a few extra
pounds of fat around my gut that I don’t mind losing. I’m down about 2
pounds already, which isn’t unwelcome. Should I graph my weight? - I’m probably not at the calorie total I need to be sustaining
long-term.
Day 2 Costs
| Item | Cost |
|---|---|
| Krautburgers | |
| 2 Krautburgers (total 10.1 oz) (revised) | $0.94 |
| Asparagus | |
| 1/8 pound asparagus @ $0.99/lb | $0.13 |
| Vanilla Pudding | |
| 1/6 box instant pudding, Kroger house brand | $0.16 |
| 1/2 cup milk | $0.10 |
| Pudding subtotal | $0.26 |
| Homemade Kimchi (76 g) | $0.15 |
| Daily Total | $1.48 |
Egg Salad Sandwiches
Egg salad sandwiches are one of my favorite sandwiches ever—they’re
rich and luxurious and filling. I always considered them to be rather
expensive and difficult, but they’re quite the opposite. They’re
especially cheap if you have cheap eggs (Albertson’s had a dozen eggs for
$0.99, which is considerably cheaper than the average $2.19/dozen.) And if
you have eggs that are already hard-boiled, as I did, it’s even easier.
(I didn’t actually boil the eggs, though. I steamed them in my Breakfast Machine, which I love. It’s a toaster that
can also cook 1 to 4 eggs, either poached/steamed, soft-boiled, or
hard-boiled. (There’s also a 4-slice, 8 egg model.) Fill it with the appropriate
amount of water (it comes with a cup marked with the right amounts of water
for hard, medium, soft, and poached eggs,) and push the button, and you have
perfectly-cooked eggs. This is good because I’ve never been good at getting
eggs cooked just right; I live at more than a mile above sea level, and
water boils at the lower temperature of 204°F (95°C), so none of
the “never fail” egg-boiling recipes you hear ever work right for me. A
“3-minute egg” is still basically uncooked.)
I made egg salad by mashing 3 hard-boiled eggs with 80 grams of mayonnaise,
a tiny squirt of mustard, and some salt and pepper. That’s it! I should
note most strongly that if you put anything else (like celery) into
your egg salad, you are a terrible monster. Also, egg salad is best on
plain old soft cheap white bread. (There’s also nothing more elegant and
delicate for your afternoon tea than an egg salad sandwich with the crusts
cut off!)
Each sandwich only used about 3/4 of an egg, (about $.06 at my good egg
prices,) $0.08 of mayonnaise, and $0.10 of plain old white bread, for a
total of $0.24 per sandwich. I had one and a half sandwiches, a few chips
that I still had open (I weighed them to see how much they would cost) and
felt like a king.
(By the way, I saw an egg salad sandwich at the grocery store for $4!)
Surprise Salmon
Today, I went shopping at Albertson’s, with a carefully-selected shopping
list based on their weekly advertisement. Since it’s a Friday during Lent,
I planned on making a fish dish. (I’ve never understood how eating fish
was in any way a sacrifice, though.) I had an interesting recipe for fish
chowder (which I’ve never made before,) which sounded filling (it had
potatoes and milk). Albertson’s advertised frozen tilapia, swai, and
pollock on sale for $2.99/lb. These fish can be somewhat bland, but that’s
a pretty good price for fish. This was my plan.
However, when I looked at the frozen fish, I saw that they had whole
frozen pink salmon for $1.99/lb! Salmon is one of my very favorite
fish, and that is a fantastic price for salmon, which is usually 7
to 10 dollars per pound, so I made the decision on the spot to buy a whole
salmon and eat plain salmon instead! (They had the same deal on whole
salmon a year ago, and I didn’t buy one, and I was sad for the whole year!)
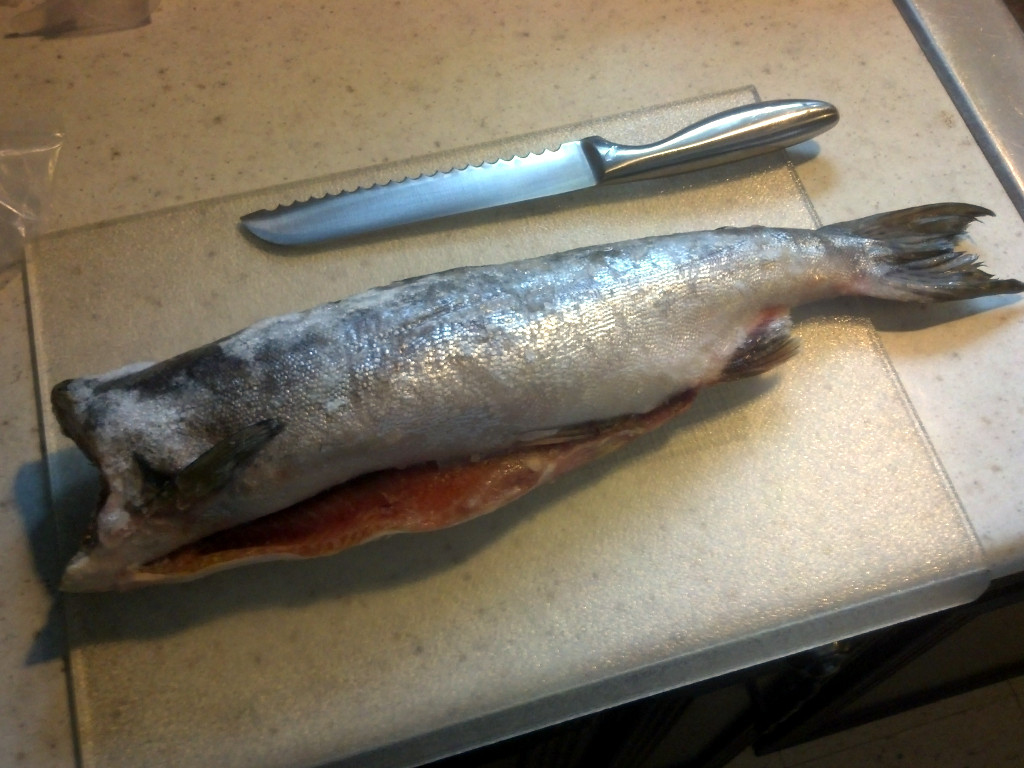
2.25 pounds of salmon for only $4.48!
It was kind of scary, because the fish I picked was rather large (2.25
pounds) and frozen solid. I hoped I’d be able to cut it and save portions
for later. Luckily, a rough serrated knife sawed through the
completely-frozen fish quite easily, allowing me to separate it into
portions for freezing:
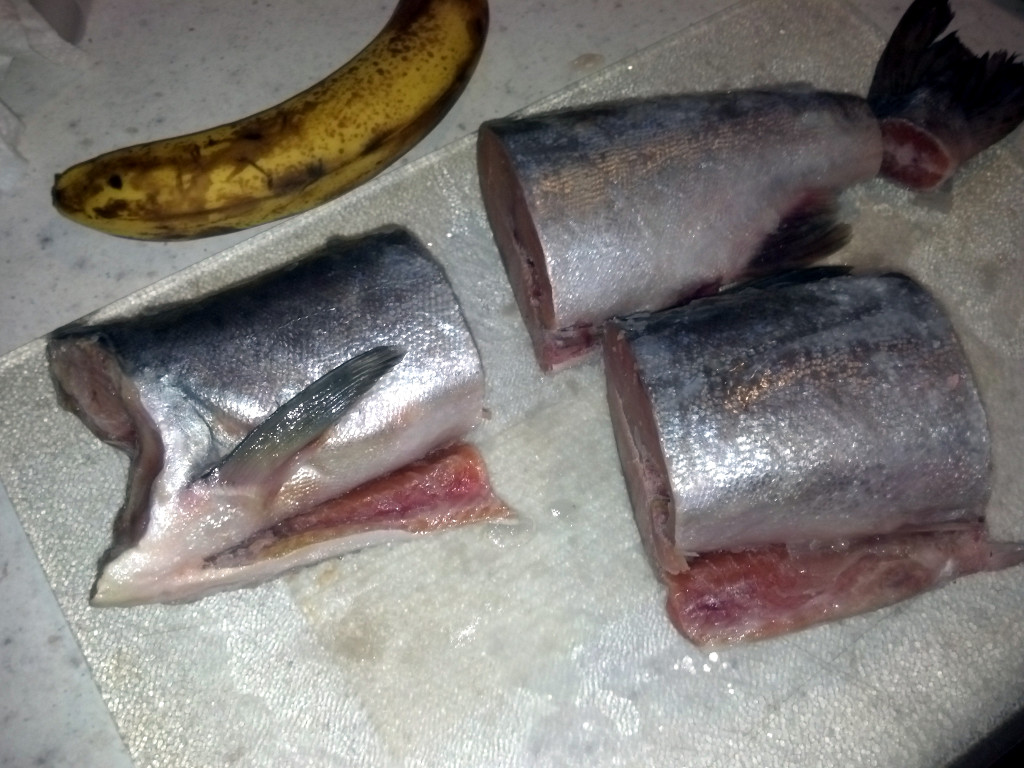
I’m not good at butchering whole fish, but a long, thin, flexible knife let
me remove the backbone and fins without much problem.
I prepared a couple of baked potatoes by first microwaving them (using the
“potato” button) and then brushing them with a bit of olive oil and kosher
salt and finishing them in a 400°F oven (for crispiness.)
While the potatoes were cooking, I brined and thawed the salmon in cold
water for 30 minutes with some sugar and salt. You know sometimes when you
cook salmon and the yellow, buttery-looking albumin comes out in blobs on
the surface of the fish? It doesn’t look great, but brining prevents the
albumin from leaking out and adds flavor to the fish. This is extremely
important when smoking salmon, too!
Since the oven was not at the right temperature for cooking salmon (I
either bake it low and slow or under a hot broiler,) I decided to pan-fry
the salmon using a technique that I learned from Eric Ripert that gives you
super-crispy, yummy skin. You dry the skin very well, and sprinkle the skin
with a bit of salt, pepper and a fine dusting of Wondra flour. Then
pan-fry, skin down, with a little bit of oil and butter, pressing the fish
down, cooking for 80% of the time on the skin side, and turning over
briefly to finish.
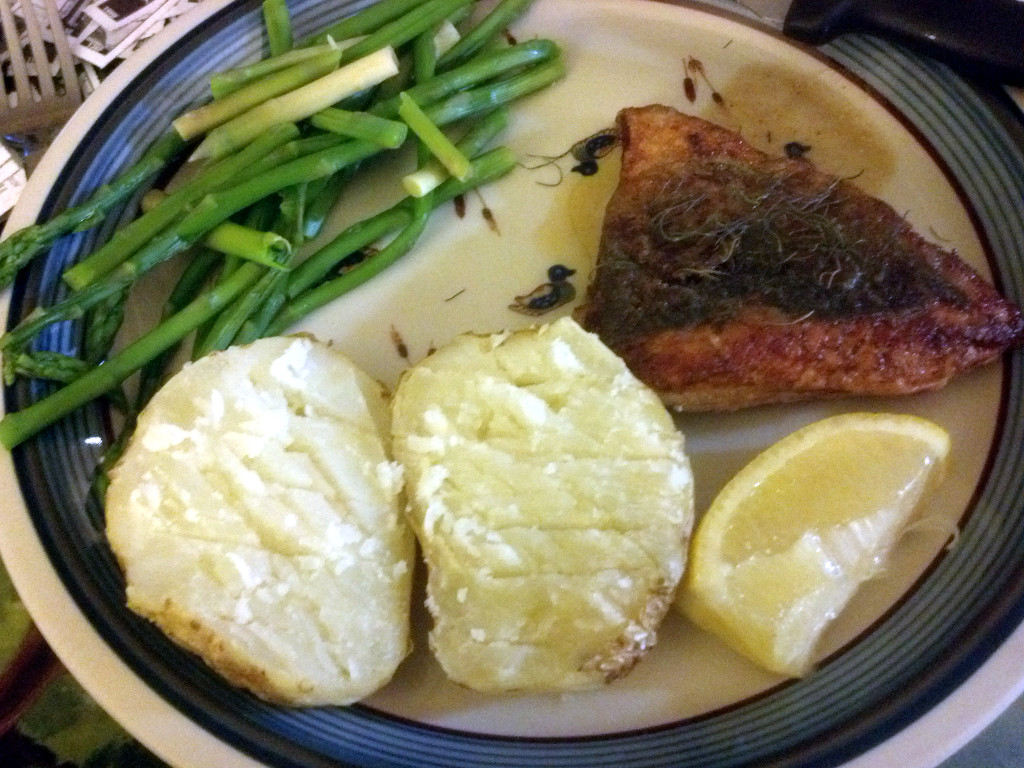
As you can hopefully see, the salmon skin was gorgeous and crisp. I had
salmon, 2 baked potatoes (with butter and sour cream, not pictured,)
asparagus, and a slice of lemon. The 6.25 ounce portion of salmon itself
only cost $0.77! Amazing! Oh, and that’s free dill from my aunt’s garden
on top of the salmon! Note the additional costs below.
Thoughts
- I checked the weekly supermarket advertisements very carefully for
sales before shopping, and planned several meals to avoid waste. - The moral of this story is: read the ads, and plan your meals around
deep discounts. - The moral of this story is: don’t be afraid to adjust your plan based
on what you see at the store. - Much of the hidden costs of cooking salmon and baked potatoes is in the
olive oil and butter, as I was too lazy to walk 30 feet to grab some plain
vegetable oil for cooking. I’ll do better next time. - The butter and sour cream on the baked potatoes are more expensive than
the potatoes! I cut back a bit on them, but could cut back more and still
be happy. Are there other things that are good on baked potatoes? - The cost for potatoes calculated above is for the potatoes I had left
over in the pantry. I bought potatoes much cheaper ($3 / (10 lb)) today,
so I will do even better in the future on potatoes. - I thought potato chips would be too cost-prohibitive, but a small
amount of house-brand chips doesn’t cost a lot. I like my salt! - Whenever you’re cooking baked potatoes, cook a few extra and
refrigerate them. This lets you make fried potatoes the next day. Fried
potatoes are much quicker and better when the potato is already
mostly cooked! If they’re not cooked already, it’s hard to get the inside
of the potato cooked without overcooking the outsides. - I have to say that Albertson’s advertisements had at least ten times as
many great deals than the other stores, which made me decide to go there.
There were far, far more deep deals. The other grocery stores (King
Sooper’s and Safeway) didn’t even begin to compete on advertised bargains.
You’ll be impressed with some of the deals I got in the next days or weeks! - Almost every single thing on my receipt was on deep discount. The only
things not on sale were milk and butter. - Margarine is 1/4 the price of butter, but I’m sticking with butter.
(Partially to avoid trans-fats.) A bit of vegetable oil for cooking is
even more cost-effective. - Answering my questions from the other day, big “family-sized” cans of
tomato soup are actually more expensive per ounce than small
cans! - I had bought 2 dozen eggs a week ago for the amazing price of
$0.99/dozen, (they’re normally $2.19/dozen) and I was sad that they were
running out. However, I was surprised to see eggs at Albertson’s today
for the incredible price of $0.50/dozen! Yes! I bought 2 dozen. That’s
barely more than $0.04 an egg! - Eggs are amazing. If someone asked you, as an engineer, how
much you would charge to create an egg in a laboratory, how much would it
cost? - When buying whole fish, you have to assume some waste from bones and
fins and such. There wasn’t too much waste at all, but you have to factor
this into your costs. I still feel a little bad that I didn’t try making
fish stock from the bones and tail. I will next time. (Saving stock is
great for other recipes or the best ramen ever.) - I didn’t eat the salmon tail. I’ve hosted cajun food parties almost
every year for the past 20 years. The first year, I asked the butcher
to save me salmon tails, which I heard were good breaded and deep-fried.
They ended up just being all bones and basically inedible.
Day 3 Costs
| Item | Cost |
|---|---|
| Egg Salad Sandwich (prices are for 1 sandwich) | |
| 3/4 Egg | $0.06 |
| Mayonnaise | $0.08 |
| 2 slices white bread | $0.10 |
| 1 sandwich subtotal | $0.24 |
| 1.5 sandwich subtotal: | $0.36 |
| Chips | |
| Fritos | $0.08 |
| 1/2 oz potato chips | $0.09 |
| Chips subtotal: | $0.17 |
| Salmon | |
| 6.25 oz salmon at $1.99/lb | $0.77 |
| Olive oil for cooking | $0.20 |
| 1/8 large lemon | $0.11 |
| Salmon subtotal: | $1.08 |
| Asparagus | |
| 1/8 pound asparagus @ $0.99/lb | $0.13 |
| 2 Baked Potatoes | |
| 2 potatoes, approx 12 oz total | $0.30 |
| Butter, 3 Tbsp | $0.24 |
| Sour cream, 2 oz at $1.69/(16 oz) | $0.21 |
| Baked potato subtotal | $0.75 |
| Daily Total | $2.49 |
The total of $2.49 is very close to my target! I would have never thought
I could have salmon on this budget, but it worked out wonderfully, and I
have several more portions of salmon in the freezer!
How is it possible that one of the most delicious cuts of meat you can buy
is also one of the most inexpensive? Nothing is more luxurious than a
falling-apart-tender pork shoulder with its delicious mix of meat, fat, and
gelatin. The only trick is to cook it correctly, and that’s not even a
trick. Pork shoulder requires low and slow heat for a long time to become
tender. This is where your slow cooker (also known as a crock pot) comes
in. A slow cooker is almost fool-proof. In the morning, you can drop in
your roast with some onions, seasonings, and liquid, set it to low, and
come back 9 hours later for meat that’s as tender as any you’ve ever tasted.
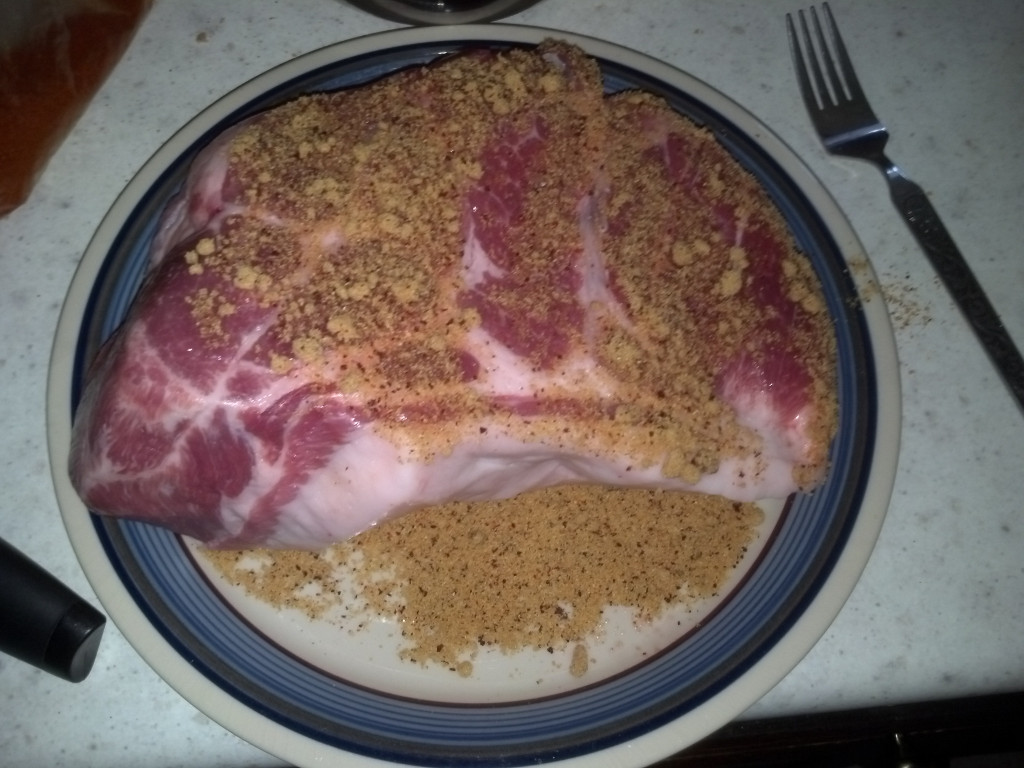
I rub you, my delicious pork shoulder.
And that’s what I did. In the morning, I took out the crock pot, set it to
low, put in 3 chopped onions, took a pork shoulder and covered it with my
homemade spice rub, and set it
on top of the onions, and added hot water to cover. I then walked away.
(Okay, I came back to add water as it warmed up. More about that tomorrow
when I discuss the science of meat temperatures.)
Nine hours later, the house smelled amazing, the roast was tender, and the
crock pot was filled to the top with rich, delicious broth. Let me make a
very, very important point:
Save that broth!
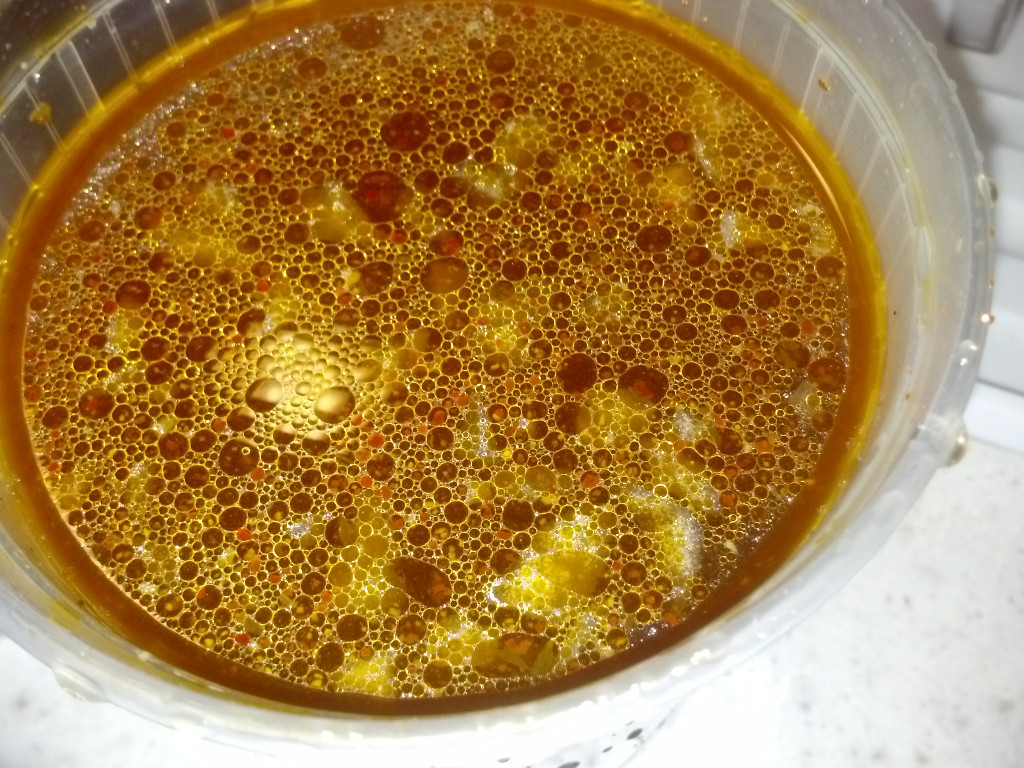
I will repeat that:
Save that broth! I had 4 quarts of dark, delicious, flavorful pork
broth into which the fat, gelatin, meat juices, onions, and spices had
mingled. You can freeze this broth and make the most amazing ramen you’ve
ever tasted. Which I’m going to do soon.
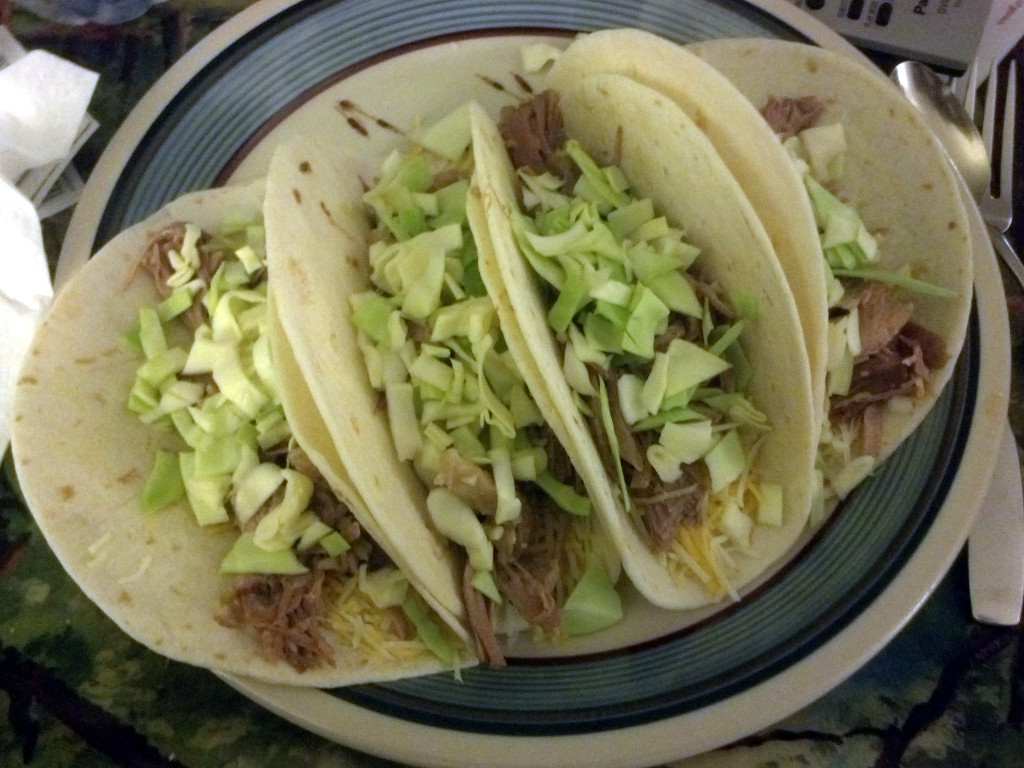
The pork shoulder was 3.41 lb at $1.99/lb, and it will make several meals
of pork tacos. Shredding the pork for tacos is easy. Put some of it in a
bowl, and take two forks and shred it. It just pulls apart. The tacos had
shredded cheese (which I got for the very good price of $2.88/lb,) soft
flour tortillas, and shredded cabbage.
It’s a bit difficult to estimate the cost of the pork that went into each
taco until all the pork is gone (which will take several days.) Much of
the original pork’s mass went into the broth in the form of melted fat,
gelatin, and meat juices, so weighing the final pork isn’t enough to get a
cost estimate. I weighed all the other ingredients, though, and estimated
a final cost of about $0.51 per big yummy taco. I ate 4 tacos, so the
estimated total for dinner was $2.04, for a very satisfying and balanced
meal.
The tacos have all your major food groups: grains, dairy, meat, and
vegetables. Nothing more is required!
For lunch, I had one and a half egg salad sandwiches and some kimchi, like
yesterday.
Thoughts
- Next time, make sure to warm up the tortillas, cheese, and cabbage
before putting the pork in the taco. It’ll all come out warmer and nicer. - Save a little of the pork broth to reheat tomorrow’s pork shoulder in,
just as gently as your crock pot cooked it. Don’t boil or microwave it! - The pork and broth comes out of the crock pot quite hot. Before I put
it in the refrigerator or freezer, I put it into a container (a ziploc bag
for the pork roast and tubs for the broth) and cool them in a cold water
bath in the sink. (Add ice to make it even faster.) This reduces the
time that the food spends in the so-called “danger zone” between 40°F
and 140°F where bacteria can grow. (I’ll write more about food safety
one of these days.) - Plan your pork and broth usage so that you’re done eating it within 3-4
days, unless you freeze it. - The cabbage was quite hard. I’m thinking of salting a bit of the
cabbage before adding it to the tacos tomorrow. This rapidly softens the
cabbage, (and makes it delicious!) as I’ll describe when I describe how to
make kimchi! - Some fancy pork tacos these days are made with kimchi instead of raw
cabbage. Try that?
Day 4 Costs
| Item | Cost |
|---|---|
| Egg Salad Sandwich (prices are for 1 sandwich) | |
| 3/4 Egg | $0.06 |
| Mayonnaise | $0.08 |
| 2 slices white bread | $0.10 |
| 1 sandwich subtotal | $0.24 |
| 1.5 sandwich subtotal: | $0.36 |
| Homemade Kimchi (76 g) | $0.15 |
| Pork tacos (prices are for 1 taco) | |
| 0.5 oz cheese at $2.88/lb | $0.09 |
| 1 6″ flour tortilla | $0.08 |
| Cabbage | $0.02 |
| Shredded pork (revised) | $0.24 |
| Onion | $0.04 |
| 1 taco subtotal: | $0.47 |
| 4 taco subtotal: | $1.88 |
| Daily Total | $2.39 |
Wow! Very close to my goal, but 5 cents over.
Update: The price of pork was recalculated
after the pork was done, bringing me back under budget. Some of the
costs that I’ve charged to this meal are actually in the 4 quarts of broth
that are going to be used in future meals. Saving the broth effectively
makes these future meals cheaper or free! I’m not going to try to do
“creative bookkeeping” here, but track my costs honestly and
conservatively. I consider today a success.
Breakfast/lunch was french toast and fried potatoes. As I mentioned on day 3, whenever you’re baking potatoes, make
another one or two for fried potatoes the next day. Fried potatoes are
much quicker and better when the potato is already mostly cooked!
If they’re not cooked already, it’s hard to get the inside of the potato
cooked without overcooking the outsides. The fried potatoes cost $0.12 for
about 4 ounces of potatoes.
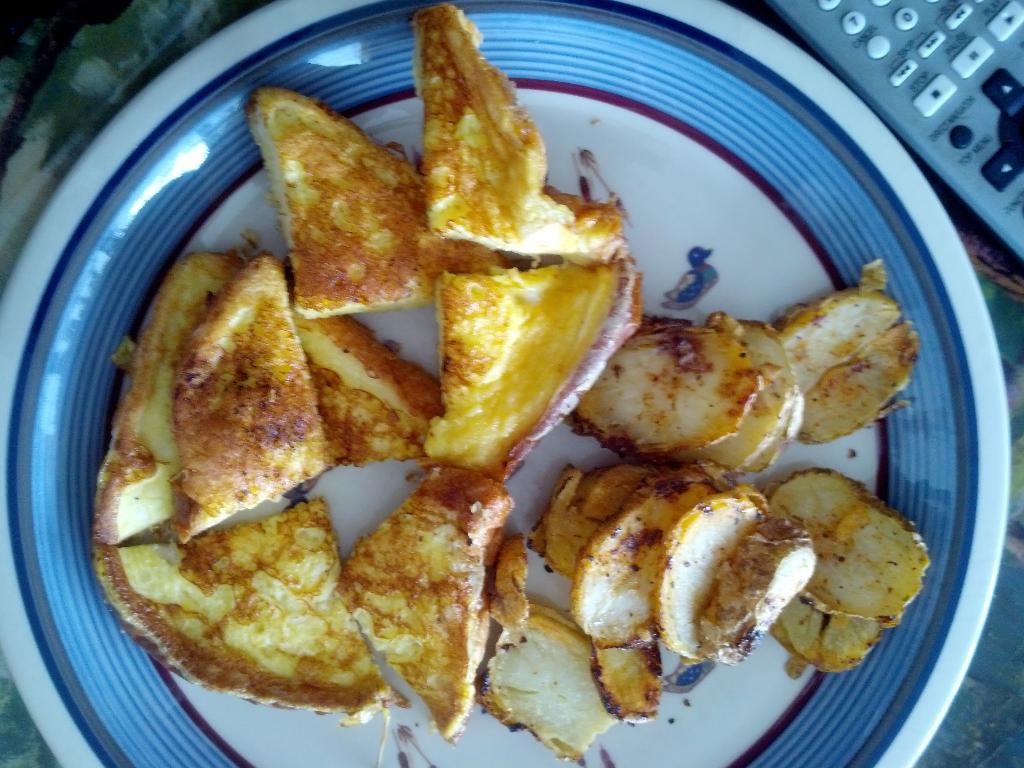
French toast is easy, and contains two inexpensive ingredients: eggs and
bread. (And a little milk and sugar.) It turns out that each slice of
toast uses 1/2 of an egg, so the total cost per slice was $0.10. I had two
slices. Breakfast/lunch cost $0.32.
Dinner was exactly like day 4—more delicious pork tacos! I believe
that I greatly overestimated the amount of pork that I used on day 4, so I
may go back and revise the cost of these meals after all the pork is gone,
and I can divide the cost of the pork by how many tacos it made.
Since I wrote about the pork tacos on day 4, as
promised, I’m going to drop some meat science on you!
Meat Science!
A pork shoulder, uncooked, is a rather unruly chunk of meat. It’s a mix of
intermingled muscle and fat. As you may know, whenever muscle connects to
fat, or muscle connects to bone, there’s some connective tissue (commonly
known as gristle when not cooked correctly) which is unchewable and
not good eats. However, when a pork shoulder is slow-cooked for 9
or more hours at low temperature, you can eat every single bit of the
shoulder, and it’s smooth and delicious! The connective tissue is no
longer a problem. What happened to it?
The connective tissue is made mostly of collagen, a tough protein. You can
think of collagen as a three-stranded rope, which it strongly resembles.
It’s a helix of three strands wound around each other. When you cook
collagen above about 145°F (63 °C), the three strands begin to
unwind from each other. Each strand is gelatin. Gelatin is an interesting
protein that can hold up to 10 times its mass in water. However, there’s
not much water originally in this gelatin strand. With enough time and
moisture, these gelatin strands will absorb water from the surrounding
cooking liquid and muscle fibers (which squeeze out their own moisture as
they heat up.) This makes a rich gel that keeps the meat moist and
delicious.
Breaking down collagen into gelatin and making the gelatin absorb water is
a process that takes both heat and time. Collagen breaks down into
gelatin and absorbs water well at temperatures around 174°F
(79°C), which is the temperature that a good slow cooker on low setting
should hold. Collagen will break down and absorb water at even lower
temperatures, but it takes significantly more time.
(My slow cooker gets significantly hotter than this, eventually boiling (at
the altitude I live, that’s 204°F (95°C)) at the edges even on the
low setting, so I like to start cooking with just enough water to cover the
roast, and add more water as it gets too hot (as measured by a probe
thermometer) eventually filling it to the top so I have lots of good broth.
Starting with a small amount of water is smart because a crock pot heats
quite slowly. (My simple crock pot heats at only 215 watts on low and 335
watts on high.) Before your crock pot reaches 140°F (60°C), you are
in the so-called “danger zone” where bacteria can grow. You thus want to
start with hot water to minimize time in the danger zone.)
Note: Collagen also holds muscle fiber to muscle fiber, which is why you
can shred individual fibers of the pork shoulder apart with a fork after
breaking down the collagen with long, slow cooking. This further
tenderizes the meat, and holds moisture in the gelatin between muscle
fibers.
So Why Don’t We Cook All Meat This Way?
Cooking a pork shoulder at 174°F to 190°F for 9 or more hours makes
it moist and luxurious. This is a cut of meat with lots of collagen, which
turns to gelatin, which holds liquids in the meat and keeps it moist and
tender.
However, if we tried to cook a lean piece of meat (without much connective
tissue) this way, we would absolutely murder it and turn it into a dry,
tight brick. As meat gets much warmer than about 140°F (60°C), the
muscle fibers and connective tissue contract and squeeze moisture out,
making the meat very dry. A piece of lean meat cooked at these
temperatures for this amount of time would be tough and dry, especially
because there’s no gelatin to hold 10 times its mass in moisture in the
meat.
(For comparison, beef is a nice medium-rare at 131°F (55°C) and
lean pork is “done” and no longer pink at 145°F (62.7°C).)
“Stew meat” that cooks a long time in stews or chilis is usually something
like pork shoulder or beef brisket with lots of collagen. You won’t
improve your stew by putting in filet mignon or ribeye steak. But pork
shoulder or beef brisket are actually made better by long, slow,
moist cooking at temperatures that would tie leaner meats into tough knots.
I’ll write more later about the two major proteins in meat, and why
breaking one down protein (myosin) is good, and breaking the other protein
(actin) down is bad, and how you can have the best of both worlds with the
right cooking technique. (Hint: it’s called “sous vide”.)
Thoughts
- I’ll write more later about how surprisingly much energy it takes to
heat water, which is one of the hardest substances in the universe to
heat. - I actually ate the French toast without butter nor syrup to save a few
cents. The secret to keeping it moist may be to undercook the eggs
slightly, which is what happened. - I ate the potatoes without Sriracha sauce nor Mae Ploy sweet chili
sauce, which I usually like on anything. I’ll have to calculate
what a small amount of these costs. These are two sauces that are usually
surprisingly inexpensive at Asian markets. - Another reason that Sriracha is surprisingly inexpensive is that the
founder, David Tran, is
unbelievably awesome and just cares about making great hot sauce. Read
that article and you’ll be a fan too. - Note to self: Next time I’m at Taco Bell, “liberate” some free
sauces. I actually had a ton of sauce packets that I recently threw away
because some had been creased and started to leak.
Day 5 Costs
| Item | Cost |
|---|---|
| French Toast (per slice) | |
| White bread, 1 slice | $0.05 |
| 1/2 egg | $0.04 |
| 1 tablespoon milk | $0.01 |
| 1 slice subtotal | $0.10 |
| 2 slice subtotal: | $0.20 |
| Fried Potatoes | |
| Potatoes, ~4 oz | $0.10 |
| Vegetable oil | $0.02 |
| Potatoes subtotal | $0.12 |
| Pork tacos (prices are for 1 taco) | |
| 0.5 oz cheese at $2.88/lb | $0.09 |
| 1 6″ flour tortilla | $0.08 |
| Cabbage | $0.02 |
| Shredded pork (revised) | $0.24 |
| Onion | $0.04 |
| 1 taco subtotal: | $0.47 |
| 4 taco subtotal: | $1.88 |
| Daily Total | $2.20 |
Again, I won’t know the pork cost per taco until all the pork is gone, so I
may revise these figures. The pork cost for day 4 was almost certainly
overestimated, and I’m easily back within my budget today.
Update: The price of pork was recalculated
after the pork was done.
After shoveling heavy snow and breaking ice for almost two hours at very
cold temperatures, I had 3-inch-long icicles of sweat hanging from my hair,
and I was ready for a shower and a huge hot bowl of ramen noodles!
Luckily, as you may remember from day 4 when I made
Pork Tacos, I saved the delicious broth from the slow cooker, which is the
secret for the best ramen you’ll ever have:
That broth paid off. It’s rich and thick and delicious. So rich, in fact,
that I diluted it to half-strength. The 4 quarts of broth that I saved
will go quite a long way.
The other secret ingredient for making ordinary ramen extraordinary is your
refrigerator’s friend, Bok Choy! I hadn’t used Bok Choy much in the
past, but it’s an incredibly tolerant and long-lasting vegetable. It will
stay fresh in your refrigerator for far longer than you’d ever expect.
Just buy a big head for about $1.00/lb and break off what you need. (Baby
bok choy is beautiful and cute, but it costs about 5 times as much in my
local supermarket. You may be able to buy it cheaper in Asian
supermarkets, which may have 10 different types of little bok choys,
sometimes in huge bags.)
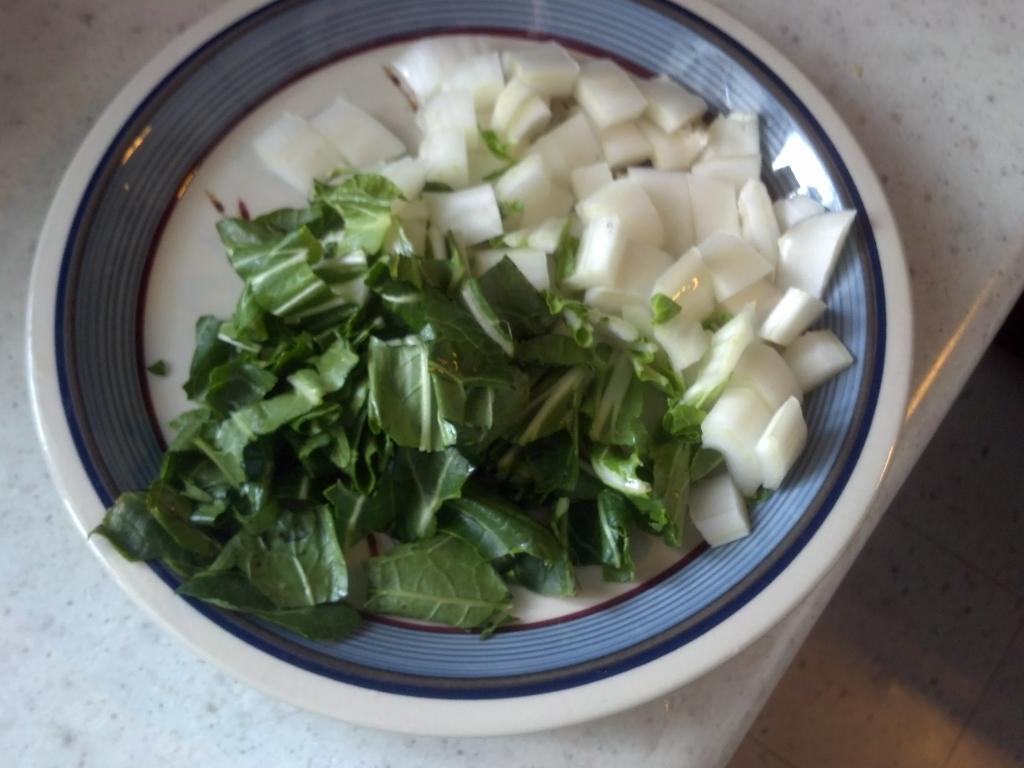
Long after cabbage and lettuce and other vegetables have wilted or molded
in your fridge, the Bok Choy will still be good. Chop it into pieces, and
boil it in your broth for about 7-10 minutes. It maintains a very nice
crisp texture even if you under- or over-cook it, and it absorbs the flavor
of the broth, making it quite delicious. 3.2 ounces of bok choy cost
$0.20.
After the bok choy cooked, I boiled a packet of cheap ($0.16)
chili-flavored ramen in the broth for the usual couple minutes. I then put
it in a giant bowl (29 fluid ounces!) and, for an extra bit of flavor and
protein and richness, I cracked a raw egg ($0.08) into it, which cooked in
the hot liquid.
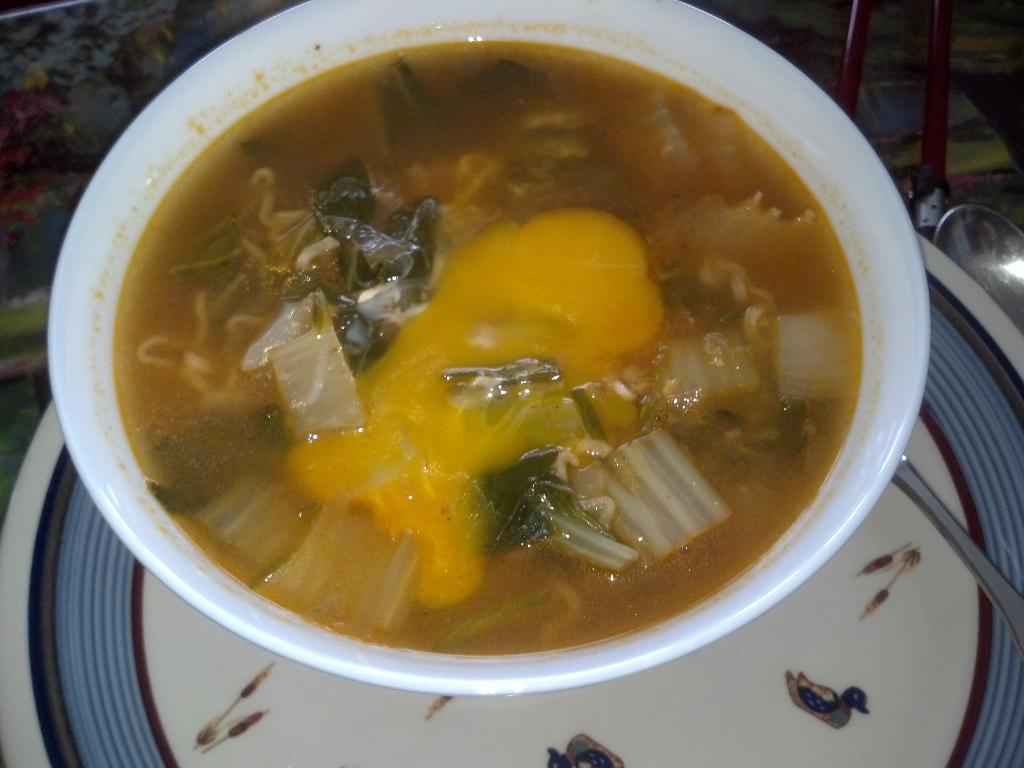
That was unbelievably delicious and rich. Look at that broth! That’s
nothing like your usual ramen-seasoning-packet broth, and there was more
than twice as much of it! There was even broth left over after re-filling
my bowl partway. More than two pounds of hot, delicious ramen soup in my
belly made me feel a lot warmer.
While I ate my ramen, I watched a Simply Ming episode in which chef Ming
Tsai makes elaborate, super-expensive ramen with a new Japanese Iron Chef.
They used A-5 grade Kobe beef, smoked maitake mushrooms, dried scallops,
mussels, and many more super-expensive ingredients. I’ll bet I was every
bit as satisfied with my delicious bowl of ramen that cost about $0.54.
(For this price I could only buy about 1.5 grams of A-5 kobe beef. For
comparison, a U.S. dollar bill has a mass of about 1 gram.)
By the way, I forgot to account for the cost of the spice rub that I put on
the pork shoulder in day 4, which made the broth so
delicious, so I’ll account for it below.
Making Spice Rub and Buying Spices
Tiny little jars of commercial spice rub for cooking meat are incredibly
expensive (maybe $4 for a 1.75-oz jar) and meat takes a lot of
rub! I make my own spice rub with some inexpensive ingredients I have in
my cupboard. I usually make a fairly large batch and have some left over,
because it’s good to sprinkle on anything from meat to fried or baked
potatoes to vegetables. The proportions for my spice rub are somewhat
like:
Spice Rub (very) approximate recipe
- 3/4 cup brown sugar
- 1/4 cup chicken bouillon powder
- 1 tablespooon garlic powder
- 1/2 tablespoon cumin
- 1/2 tablespoon black pepper
- Every other spice you like including:
- Cayenne pepper
- Paprika
- Chili Powder
- Onion Powder
Brown sugar is relatively cheap. A good rule of thumb is that it’s
$1.00/lb, or about twice as expensive as white sugar. A cup of brown sugar
costs $0.50. I’m going to wildly overestimate the total cost of the big
batch of rub that I made as $1.50, about half of which went into the broth
(and I have half left over.) Since there’s enough broth for about 8 huge
bowls of ramen, I’ll call it $0.10 in spices per bowl.
Dinner was pork tacos again. I definitely have overestimated how much the
pork cost, so I’ll revise the above calculations when I’m done. There’s
still enough for a few more pork tacos.
Buying Spices
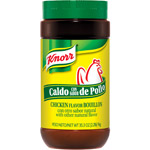
By the way, a good way to buy spices more inexpensively is to go to what
Walmart calls the “Hispanic Foods” aisle. This is especially true for
bouillon powder. Walmart sells a giant jug that they call “Knorr Hispanic
Chicken Granulated Bouillon, 35.3 oz” for $4.98. This is a fraction of the
cost of bouillon in the spice aisle. I use this in a lot of
recipes, and it lasts me many months.
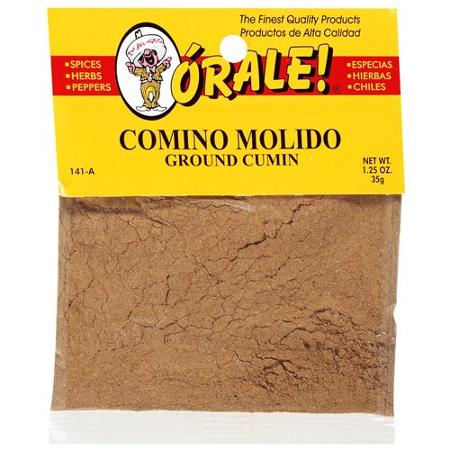
The “Hispanic Foods” aisle of your grocery store may also contain other
spices much cheaper. I usually get cumin, chili powders, and
other spices in this aisle, usually under the “Órale!” brand. These
spices come in bags instead of jars, and cost about 1/3 what they do a
couple aisles away.
Another great place to buy inexpensive spices in bulk is Indian markets.
These often have bags of spices like cardamom, cumin, coriander, cinnamon,
mustard seeds, sesame seeds, and a wide variety of chili powders for
drastically lower prices than you can find them elsewhere.
Thoughts
- Since the cabbage for the pork tacos has been somewhat hard, I salted
some cabbage and let it stand in the fridge for several hours. This
softened the cabbage (and made it tastier.) - Rule of thumb: 1 pound of brown sugar costs $1.00
- Rule of thumb: 1 pound of white sugar costs $0.50
- Rule of thumb: 1 cup of brown sugar costs $0.50
- Rule of thumb: 1 cup of white sugar costs $0.25
- Rule of thumb: 1 tablespoon of brown sugar costs $0.03
- Rule of thumb: 1 tablespoon of white sugar costs $0.015
- Learning these rules of thumb has been very helpful for me to estimate
food costs in advance and avoid blowing out my budget. I can
already estimate the cost of a meal more accurately and quickly in my head.
Day 6 Costs
| Item | Cost |
|---|---|
| The World’s Best Ramen | |
| Broth, spices | $0.10 |
| Bok choy, 3.2 oz | $0.20 |
| 1 egg | $0.08 |
| Ramen (1 pkg) | $0.16 |
| Ramen subtotal: | $0.54 |
| Pork tacos (prices are for 1 taco) | |
| 0.5 oz cheese at $2.88/lb | $0.09 |
| 1 6″ flour tortilla | $0.08 |
| Cabbage | $0.02 |
| Shredded pork (revised) | $0.24 |
| Onion | $0.04 |
| 1 taco subtotal: | $0.47 |
| 4 taco subtotal: | $1.88 |
| Daily Total (revised) | $2.42 |
A few cents over budget again, but I’ll recalculate when all the
pork is finished.
Update: The price of pork was recalculated
after the pork was done, bringing me just back under budget!
Breakfast was a bowl of quick oatmeal. I can count on one hand the number
of times I’ve eaten oatmeal in my life, but it was very good (once you
add brown sugar.) Total cost: $0.16.
Containers are starting to sprout strange new labels:
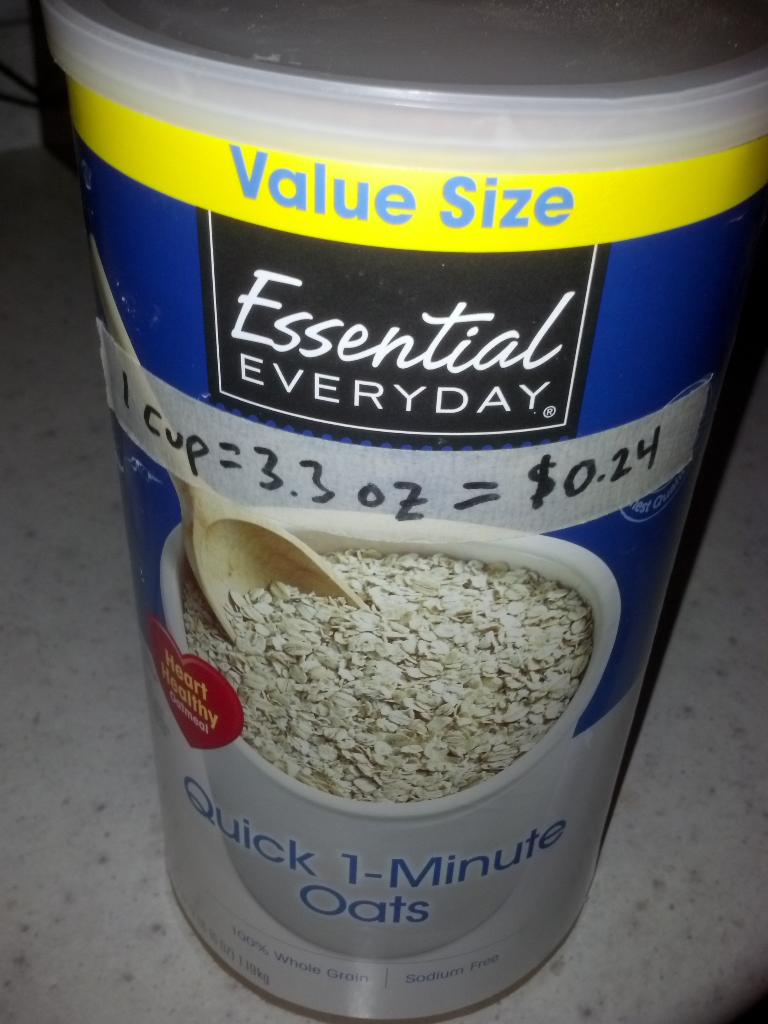
That gigantic container cost less than a much smaller can of Quaker brand
oats. ($2.99)
For lunch, I had a hot dog on a bun. Unfortunately, the purchase of these
hot dogs (Oscar Meyer Classic Bun-Length, my favorite) predated this
experiment, so they weren’t the most cost-effective. I have newer hot dogs
that cost 1/3 the price. A hot dog was $0.32, and a bun was $0.16, for a
total of $0.48 for a single hot dog. (I have cheaper hot dogs that I could
eat on bread for a total $0.15, less than 1/3 the price.) However, my
rules for this experiment are that anything I have to throw away, I have to
charge myself for, so chow down, wide load.
Colcannon
It’s sort of funny how upset I get when I see something in an advertisement
that’s much cheaper than I just paid for it. For example, last week I
bought 10 pounds of potatoes for $2.99, which I thought was a pretty good
deal. But yesterday I saw the same bag at the same store for $0.99! That
made me sad. I started thinking, “well, I could still eat 8.3 pounds of
potatoes a day at the old price. Or 25 pounds a day at the new
price.” At this moment, I became enlightened. If I were ever hungry, I
could eat a bunch of potatoes. The only thing I’d have to be wary of is
spending too much money on stuff like butter, sour cream, or sauce (Mae
Ploy sweet chili sauce is really good on boiled potatoes!)
So how could I make a bunch of ready-to-eat, delicious long-lasting
potatoes? The answer came from a recipe I’ve made for many a St. Patrick’s
Day party: Colcannon.
Colcannon is an Irish dish (in Irish Gaelic, cál ceannann, meaning
“white-headed cabbage”,) made with mashed potatoes mixed with cabbage.
Other variations use kale, leeks, onions, and scallions, in addition to
possibly ham or bacon.
Since a stick of butter costs around $1.00, I decided to try to use the
cabbage to keep the mashed potatoes moist, and eliminate butter or cream
entirely. I boiled/steamed some cabbage with water and salt, and saved the
cabbage water. This got added to 3.5 pounds of mashed potatoes. The
result was still far too dry, so I added 2 cups of milk (which was probably
a bit too much.) This made 4.5 pounds of finished Colcannon, all for the
price of $1.96! I’ll have this ready to eat with any meal.
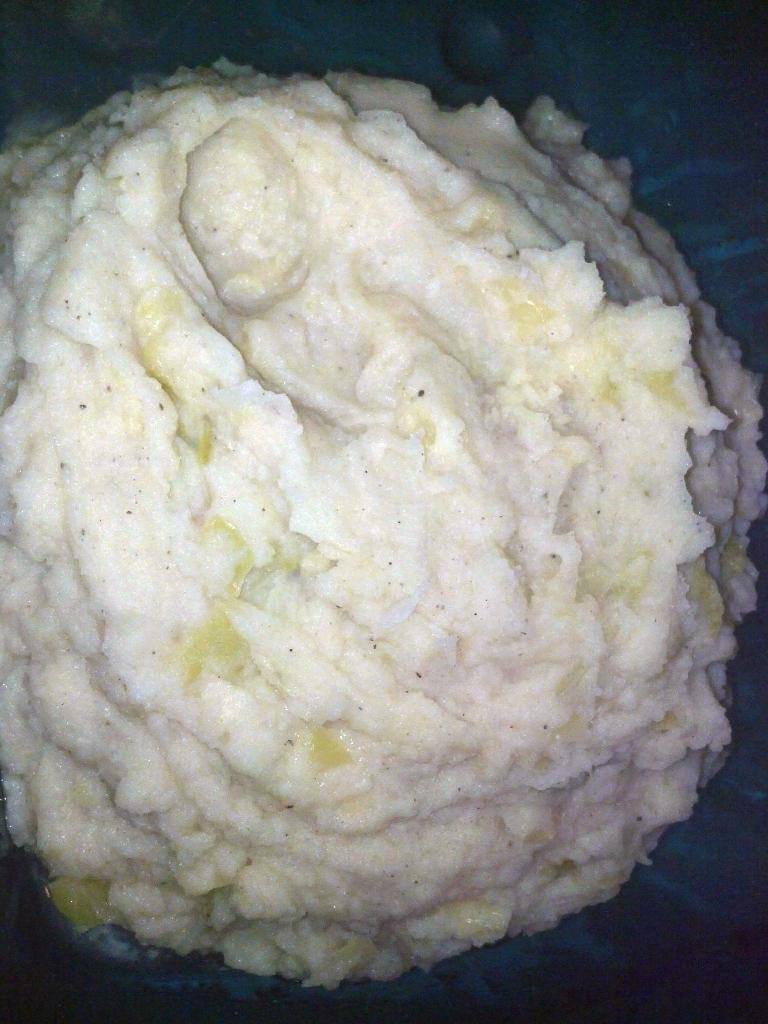
Colcannon, or, Life Discovered on Jupiter’s Moon Europa
By the way, a big
potato ricer makes making mashed potatoes immensely easier and more
repeatable. A potato ricer is basically an extruder press that you put
boiled potatoes in and squeeeeeeze them through little holes.
(It’s like a Fuzzy
Pumper Barber Shop (which I always wanted as a kid) but instead of
being for Play-Doh, it’s for food!) No mashing! You don’t even need to
peel the potatoes! The potato skins stay in the ricer. And when you cut
up the potatoes for boiling, you can cut them into very large, coarse
pieces. All of these benefits make mashed potatoes in a ricer much simpler
than the traditional method.
Pork Pancakes
The original plan was to finish up the pork tacos for dinner, but I
happened to see an episode of Simply Ming in which chef Ming Tsai’s
dad used a bunch of leftover pork and onions and some simple dough to make
crispy pancakes! So that became the new plan.
The “hot water dough” was simple enough:
Hot Water Dough
- 2 cups flour
- 3/4 cups hot tap water
- 3/4 teaspoon salt
Mix the three together, knead them for about 6 minutes, and then let it
rest, covered, for about an hour. There’s no leavener, so they don’t rise,
so you could probably skip this step if you’re in a rush. The dough cost
$0.32.
Pork Pancake Assembly
Roll the dough out as thin as possible on a well-floured surface, spread a
thin layer of vegetable oil over the whole surface, and then spread
leftover cooked pork, cooked onions, and cooked cabbage over the whole
surface. Roll tightly like a jelly roll into a long cylinder. Cut the
cylinder into about 4-inch (10 cm) lengths, try to twist the ends shut
(just try) and then twist and squish the cylinders from end to end into a
thin, flat pancake:
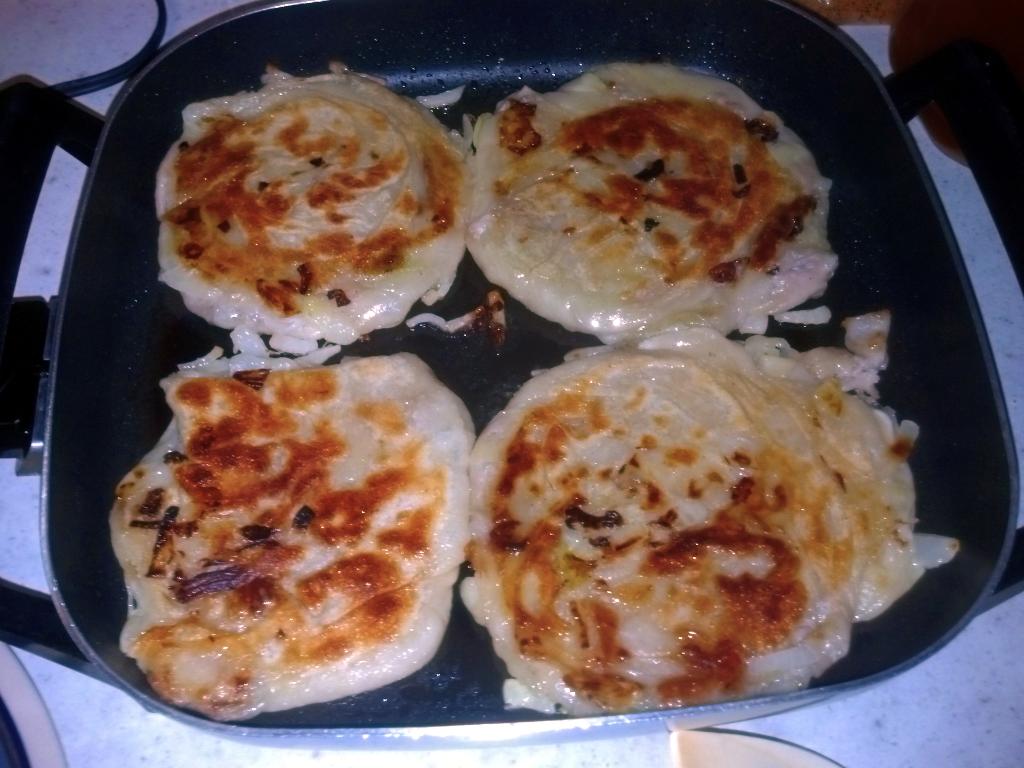
Fry them with a bit of oil in a hot skillet, about 375°F (190°C)
for about 3 minutes on each side or until crisp and brown.
These were quite good! I’d definitely make them again with leftovers. The
breading is very inexpensive ($0.32 for the entire batch) and it stretches
the remaining pork nicely. This was the first dinner that I’ve actually
felt full after eating (along with 6 oz Colcannon.)
Pork Revision
As noted before in the last 3 days, it was difficult to estimate how much
pork cost per serving until I was done with the pork. The pork shoulder,
which cost $6.79, made 28 portions, which is 7 more portions than I
originally estimated. Thus, I’ve revised the last few days’ pork prices
downward to $0.24 per portion, a reduction of $0.04 per portion. This
actually means that the last few days were under budget as I’d hoped!
Thoughts
- The pork shoulder went farther than I thought, so I was able to
recalculate some earlier days’ costs, which puts me back under budget for
every day! W00t! - I’m starting to think I should keep track of everything in my head as
its cost per pound. If something costs much more than about $2.00/lb, it’s
hard to fill up on it. - I need to add an example here of converting per-mass costs into
per-volume costs (for example, how do you calculate how much a cup of flour
costs when you bought it by the pound?) My language Frink helps here, because it knows
the densities of a lot of common materials, for example:
    flourcost = 2.50 dollars/(5 lb)
1 cup flour_scooped flourcost
0.15625 dollar (currency)
Note that Frink knows the average density of flour in many forms,
including scooped or sifted.flour_scoopedis the density
of scooped flour. - See what Frink knows about different forms of flour by entering
??flourin its interactive interface. (Or just click that link.) - See what Frink knows about different forms of sugar by entering
??sugarin its interactive interface. (Or just click that link.)
Day 7 Costs
| Item | Cost |
|---|---|
| Oatmeal | |
| Oatmeal, 1/3 cup (uncooked volume) | $0.08 |
| Milk, 1/4 cup | $0.05 |
| Brown sugar, 1 tablespoon | $0.03 |
| Oatmeal subtotal: | $0.16 |
| Hot Dog | |
| Hot dog (Oscar Meyer Classic Bun Length) | $0.32 |
| Hot dog bun | $0.16 |
| Hot dog subtotal: | $0.48 |
| Colcannon (price for 73 oz) | |
| Potatoes, 3.5 lb | $1.05 |
| Cabbage, 8.3 oz | $0.51 |
| Milk, 2 cups | $0.40 |
| Colcannon, 73 oz subtotal | $1.96 |
| Colcannon, 6 oz subtotal | $0.16 |
| Pork Pancakes (prices are for 1 pancake.) | |
| 2/7 cup flour | $0.05 |
| 1/7 yellow onion | $0.04 |
| Cabbage | $0.04 |
| Oil | $0.01 |
| 1 pancake subtotal: | $0.38 |
| 3 pancake subtotal: | $1.14 |
| Daily Total | $1.94 |
Today was a simple lunch of a Braunschweiger (liverwurst) sandwich, one of
my all-time favorites. The Braunschweiger component of the sandwich cost
$0.31 out of about $0.42 total, so it’s a fairly economical sandwich. (The
Braunschweiger I got was $2.50/lb which is fairly good for a meat product.)
I didn’t have any lettuce, so I put on a few cabbage leaves I had left over.
I also had some homemade kimchi, a very small amount of potato chips, and
half of some sort of lovely pear (Bosc, I believe) that was in the fridge
from before this experiment began (again, if it goes to waste, I have to
charge myself for it.) I don’t remember how much it cost, but fruit can be
very expensive and blow my budget easily. (A single honeycrisp
apple, for example, can be $1.79!) I’m going to take the worst-case
scenario and estimate the whole pear at $1.00, which is the current selling
price of fancy Asian pears in the advertisements. This could easily wreck
my budget, and I may revise the price when I go back to the grocery store.
(I lived in Germany for 6 months on a youth exchange
when I was 21, and dinner in all of my families was almost always a cold
dinner of good, dense German bread along with cold cuts of meat and cheese
and butter, and something like tomatoes. The meats were always delicous,
but Leberwurst was always my favorite (until I got the courage to try the
steak tartare, which then became my favorite. Sorry, liverwurst.))
Dinner was the last of the pork pancakes and colcannon, and a bit more
asparagus. See day six for the cost breakdown of the
pork pancakes and colcannon.
Thoughts
- Luckily, the day’s meal was quite under my budget, even with the
expensive pear estimate. The potential sky-high price of pears stressed me
out, though. - I have expensive honeycrisp apples in the fridge from before the
experiment which also gnaws at me. One of these days, I may have to eat an
apple and nothing else! Stupid pre-experiment lavish lifestyle. - Walmart’s price for Bosc pears is $1.67/lb, quite a bit cheaper than I
estimated. How much did my pear weigh? 6 oz? The half that I ate would
be $0.31 then. - Whenever I don’t know the price of something, or want to
comparison-shop, I like to look at delivery.walmart.com which allows you to get actual
current prices (from the luxury of your home,) on almost everything that
Walmart carries. (You can even have someone put together an order for you
that you’ll pick up or have delivered in some markets.) Put in a zip code
for the Denver area (say, 80112) to check prices if they don’t have this
service in your region. This is very useful for price comparisons! (Note:
The site doesn’t work for me in Firefox, probably because of my aggressive
ad-blocking. All searches just silently return no results.) - I have hard-working friends who like Walmart’s service. They fill
their cart online, and pick up their order at the store. I haven’t heard
how well their grocery delivery works, but I know people who could use
that. The ability to choose very specific products, quantities, and prices
from their whole selection is a very nice feature compared to other
shop-at-home systems which allowed the store’s shoppers to easily blow out
your budget with a poorly-chosen subsititution. - Thinking about lunchmeats, I was wondering what the cheapest would be.
I haven’t eaten bologna for a long time, but that looks pretty
cheap. You can get Oscar Meyer brand for $2.00/lb and Bar-S for
$1.28/lb. I’ll probably stick with Braunschweiger, though. - That pork shoulder lasted 5 days! Sometimes pork can start tasting or
smelling “off” to me after 3 days. I’m very sensitive to that. I hope
that cooling it rapidly in the water bath after cooking and before
refrigerating helped to prevent any spoilage. It was recooked each time
it was served, too. I didn’t notice any “off” tastes. - If you’re old-school, you might think you have to cook pork to very
high temperatures to avoid trichinosis. Trichina is a parasitic roundworm
that was historically spread through pork. In 1943, 1 out of 6 people in
the U.S. were infected with trichina. However, due to better pork-raising
practices and screening, it has been virtually eliminated in pork in the
United States and much of the world. Jeff Potter notes in his excellent
O’Reilly book Cooking for Geeks that “a century ago, ~1.4% of pork
was infected [with trichina]; in 1996, of 221,123 tested animals in the
United States, 0 were infected.” - Want to know more about pork safety? Want to try to convince your
friends that they don’t need to overcook their pork? Here’s the USDA’s Fact Sheet on Trichina! - I’ve seen some recipes that tell you to cook pork chops to 180°F
(82°C)! Poor, dry, crispy pork chop. - Cooking for Geeks is really an awesome book. It
discusses why you’re doing what you’re doing when cooking, which
allows you to generalize your knowledge and predict outcomes. It also goes
into a fun variety of interesting techniques including sous vide cooking,
molecular gastronomy, and much more. Very highly recommended. Perhaps my
favorite cooking book of all time. It’s an O’Reilly book. For
cooking! (For nerds, that’s all you have to say.) - I’ll write up my kimchi recipe one of these days.
- Sorry, no pictures today!
Day 8 Costs
| Item | Cost |
|---|---|
| Braunschweiger sandwich | |
| Braunschweiger (Kroger house brand), 2 oz @ 2.50/lb | $0.31 |
| White bread, 2 slices | $0.10 |
| Cabbage | $0.03 |
| Braunschweiger sandwich subtotal: | $0.42 |
| Homemade Kimchi (76 g) | $0.15 |
| 1/2 oz potato chips | $0.09 |
| 1/2 Bosc? pear (estimated) | $0.50 |
| Colcannon, 6 oz subtotal | $0.16 |
| 1 pork pancake subtotal: | $0.38 |
| 1/8 pound asparagus @ $0.99/lb | $0.13 |
| Daily Total | $1.83 |
Before shoveling lots more snow in the morning, I wanted some quick energy
so I ate half of a banana ($0.14) and a quick egg sandwich on two pieces of
dry white toast from my Breakfast Machine. Why dry? Since I noticed the other
day that buttering bread for grilled cheese sandwiches was rather
expensive, I decided to save a few cents. I don’t know how Elwood Blues
eats dry white toast. Next time I’ll butter it. Sandwich cost was $0.18.
For lunch, I had the most amazing ramen again, as described on day 6.

Saving the pork broth from day 4 keeps paying off.
Look at that broth! I used up my bok choy, so the total cost was about
$0.62. I was very full and had broth left over afterwards, which went
to good use again, as you will see below.
Also, here’s a loaf of my mom’s award-winning banana bread, which is the
best thing ever (and it’s a great use for 3 bananas that were getting
overripe):
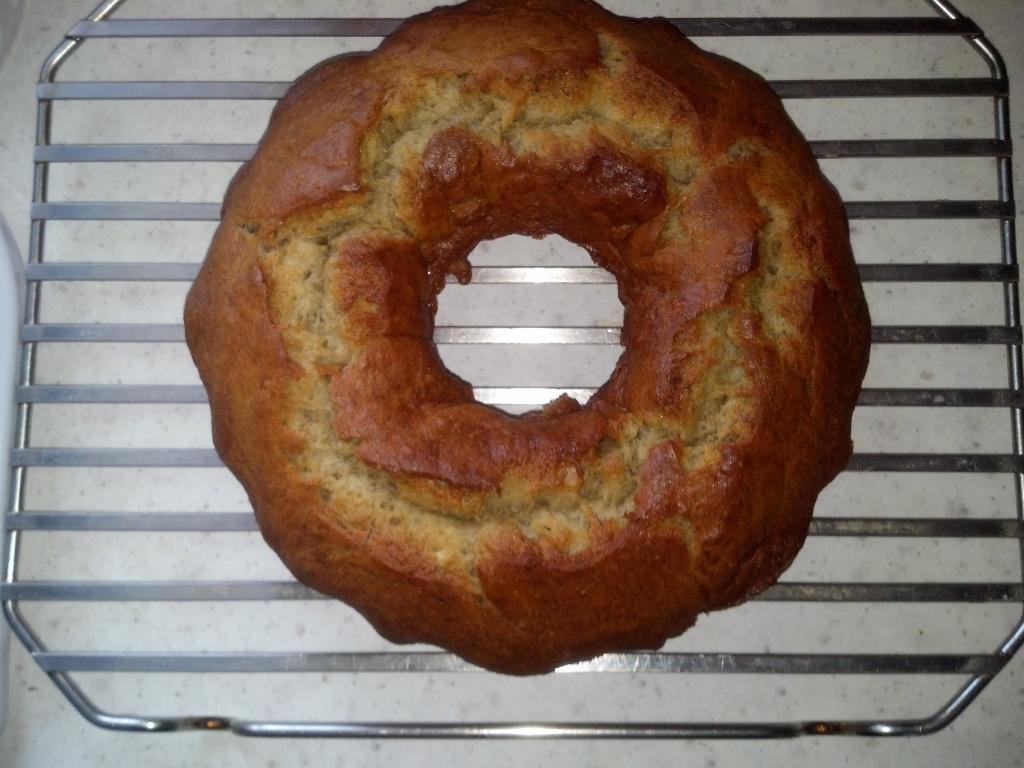
The whole loaf cost $2.52 to make. I ate about 1/16 of it, (I could have
eaten the whole thing,) which cost $0.16. I ate the banana bread without
butter. It was very good and moist. You can see a slice on the
right-hand-side of the ramen picture above.
Many people have suggested dried beans as a cost-effective meal. I had
some Urad Dal (a small, white lentil-like bean, also called “matpe bean” in
English) from an Indian market.
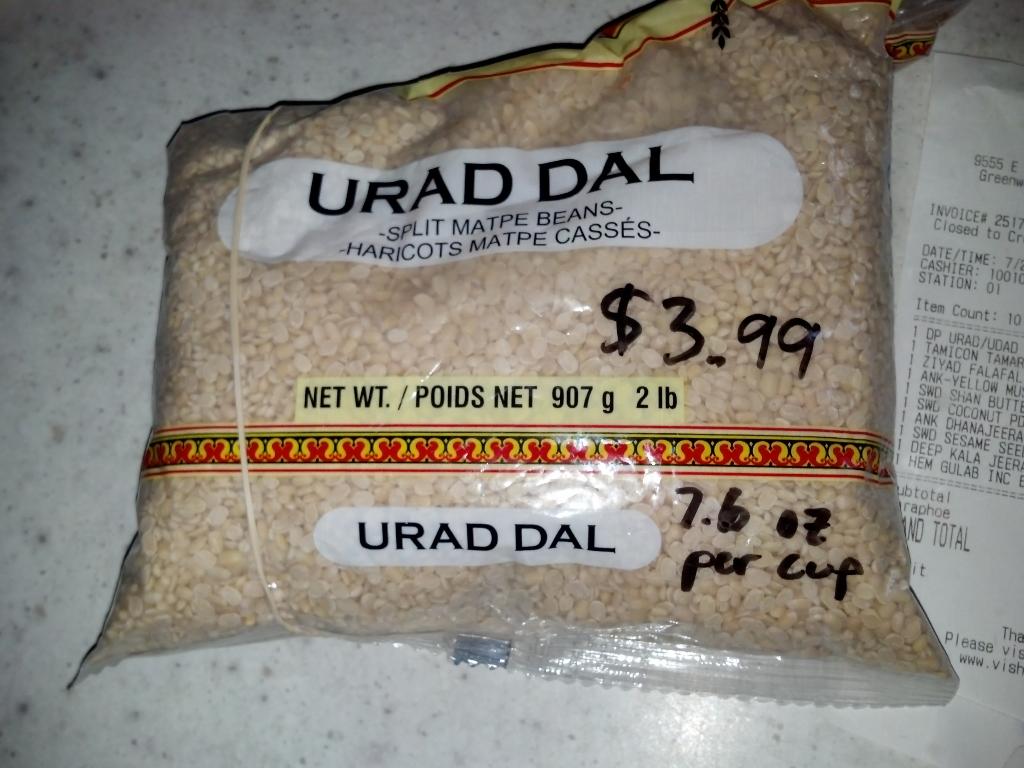
I’ve never used them before, so these became an experiment. 1 cup of dry
beans (7.6 oz, cost $0.95) were brought to a boil in the leftover pork
broth from lunch, reduced to a simmer and covered, and then simmered for
about 45 minutes until they were soft.
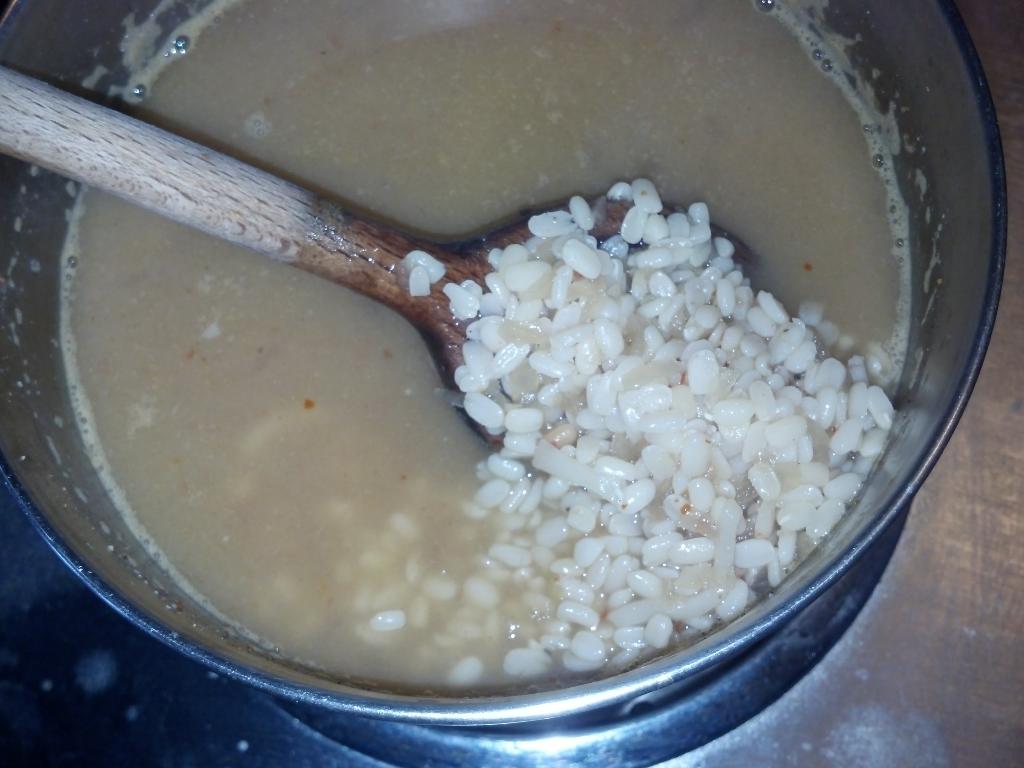
While they were cooking, they smelled exactly like Campbell’s Bean and
Bacon soup (which is one of my favorites!) Must have been the pork broth.
When finished, they were slightly gelatinous and slippery. They were quite
delicious and filling. I ate approximately 1/4 of the final product, for a
cost of $0.25.
I tried adding other spices to the Urad Dal, such as garam masala and tikka
masala powders, but it really didn’t need it. The pork broth again worked
its miracle!
Since I wasn’t too hungry for dinner after the huge bowl of ramen, I also
had a (relatively expensive) hot dog and some colcannon. After calculating
my costs for the day, I was at $1.99, so I decided to have a bonus piece of
banana bread, this time with butter (the butter cost only $0.03), which
brought me to $2.12 for the day. Yum.
By the way, so far I haven’t tried to eat as close to $2.50 as I can. I
haven’t needed to, as I haven’t been significantly hungry.
A Picture Puzzle
This was the day that the internets exploded with the “What
color is this dress?” debate, in which some people saw the the dress as
white and gold, and others saw it as blue and black. In that spirit,
here’s another picture puzzle, which I took after making the ramen:

What color are the burners? Do you see them as blue and black (or white and
gold?) I tell you that both burners are in fact, both the same
color. Why do I say that? Send me your guesses ether on Twitter at
@aeliasen or by
email at eliasen@mindspring.com.
Thoughts
- I’ve wondered about accounting for costs of very small quantities of
things like salt and baking soda. Even in inefficient quantities, these
are usually less than a cent in most recipes. (1 teaspoon of baking soda
for banana bread was about 0.6 cents, so I’m not going to worry much about
these tiny costs from here on out.) - Rule of thumb: 1 teaspoon baking soda: 0.6 cents.
- Again, I’m finding that foods that cost less than $2.00/lb are
efficient for filling you up. Too much more than this, and you may have
trouble getting enough at this price level. - Useful link: Walmart price search.
- I watched Martha Stewart cooking some blueberry crisp and a couple of
other recipes, and I was able to easily estimate the cost of the dry
ingredients (not the blueberries) in my head simply using the rules of
thumb that I’ve listed here. I think that’s quite useful!
Day 9 Costs
| Item | Cost |
|---|---|
| Dry egg sandwich | |
| 1 egg | $0.08 |
| White bread, 2 slices | $0.10 |
| Dry sandwich subtotal: | $0.18 |
| 1/2 banana | $0.14 |
| The World’s Best Ramen, Again | |
| Broth, spices | $0.10 |
| Bok choy, 4.3 oz @ $0.99/lb | $0.27 |
| 1 egg | $0.08 |
| Ramen (1 pkg) | $0.17 |
| Ramen subtotal: | $0.62 |
| Banana Bread (cost for 1 loaf) | |
| 1 stick butter | $0.92 |
| 1 cup sugar | $0.27 |
| 2 eggs | $0.16 |
| 3 bananas | $0.84 |
| 2 cups flour | $0.32 |
| 1 teaspoon baking soda | $0.01 |
| Banana bread subtotal (1 loaf): | $2.52 |
| Banana bread subtotal (1/16 loaf): | $0.16 |
| Urad Dal ~2 oz of dry @ $3.99/(2 lb) | $0.25 |
| Hot Dog | |
| Hot dog (Oscar Meyer Classic Bun Length) | $0.32 |
| Hot dog bun | $0.16 |
| Hot dog subtotal: | $0.48 |
| Colcannon, 6 oz subtotal | $0.16 |
| Bonus banana bread | $0.10 |
| Butter, 3.5 g | $0.03 |
| Daily Total | $2.12 |
Lunch was 1.5 fried egg sandwiches with mayonnaise. See the calculations
below for calculating the cost of mayonnaise (which is sold by volume, but
I measured it by mass.) Total cost: $0.38. My stomach must be shrinking,
because I was full after 1.5 sandwiches.
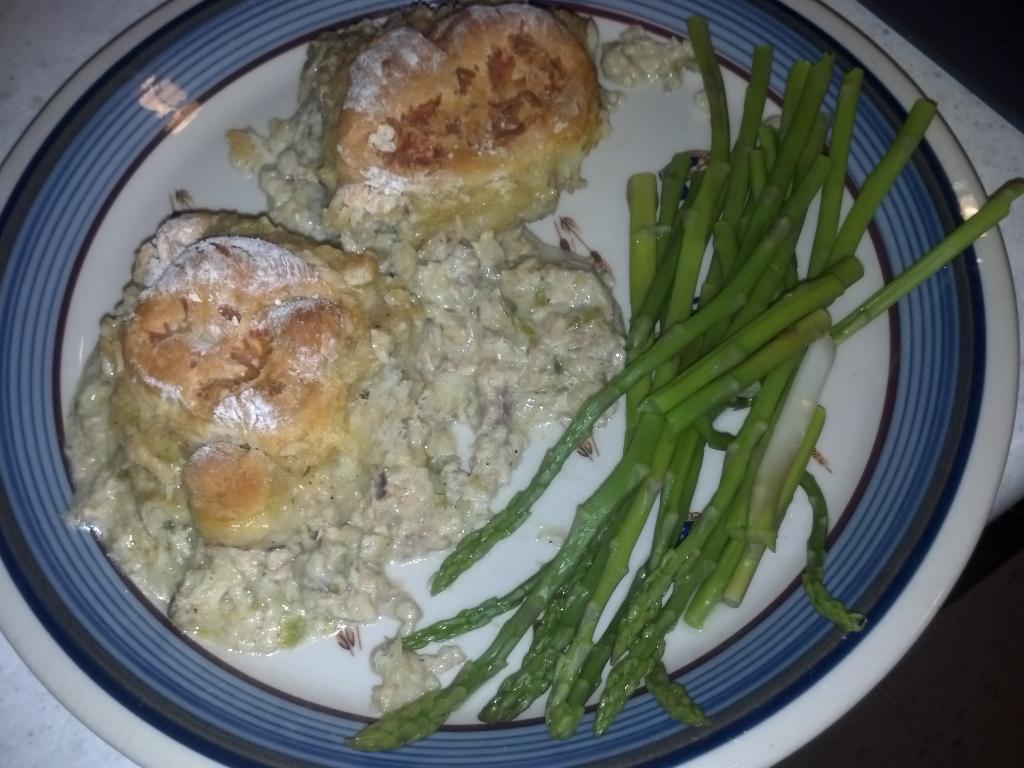
Since it was a Friday during Lent, a fish dish was in order for dinner. It
was time to break out a delicious recipe that’s at least 80 years old for
Tuna Casserole! I obtained this recipe from my friend Richard who made it
for a potluck, and everyone loved it. He generously gave me the old family
recipe, which noted that his mother made it for his father on their
honeymoon in 1935, and they ate the whole batch in one sitting!

It’s a tuna casserole that’s covered with bready pinwheels, and is really
delicious and filling. It’s quite easy to make, and may last more than one
sitting if you can restrain yourself. There is no sacrifice in eating this
dish; it’s a year-round family favorite of more than one family! (By the
way, if you do it right, your pinwheels will be prettier and actually look
like pinwheels.)
The most expensive part of the dish is 4 cans of tuna, which I bought for
$0.79/can, which is a fairly good price. You don’t need whole chunk fancy
tuna, as you’re going to break it up anyway! I looked at large cans of
tuna, but they were more expensive per ounce than small cans on sale. The
body of the casserole is onions, green bell peppers, and tuna in a flour and
milk sauce. (You can call it Béchamel sauce if you’re fancy.) The
rolls are made from Bisquick and milk, with a bit of cheese rolled in.
I modified the original recipe in a few ways: I reduced the amount of
cheese in the rolls from 8 oz to 3.5 ounces (you can never taste it
anyway), used one bell pepper instead of 2 (because I only had one) and
eliminated the jar of pimientos that are usually sprinkled over the top
(they’re pretty, but I could never taste them.) Also, I had no nutmeg.
The whole casserole cost $7.98 to make (great!) so each of the 15
“pinwheels” marks a serving that cost $0.53 to make. I ate 3 pinwheels,
and the last of the asparagus. Finding inexpensive tuna makes this quite
an inexpensive recipe (the tuna was $3.16 of the total cost.)
Since I’ll probably be eating this casserole for another couple of meals,
I’ll post the recipe another day. Update: The recipe is posted on
day 11.
After calculating my costs for the day, I had money left over, so I had
another slice of banana bread with butter. Total daily expense: $2.23.
Thoughts
- Useful link: Food density
database. - Rule of thumb: 1 tablespoon mayonnaise costs $0.06.
- Rule of thumb: 1 cup mayonnaise costs $0.93.
- Rule of thumb: 1 pound mayonnaise costs $2.00.
- Rule of thumb: Light mayonnaise on both sides of a sandwich costs $0.09.
- Bisquick is about 2.7 times as expensive as the same quantity of flour,
but it has oil, dextrose, baking soda, baking powder, and salt in it,
so the convenience may make it not worth the time to reproduce yourself
from flour and other ingredients. The rolls on top are simply 3 cups of
Bisquick and one cup of milk. Couldn’t be easier.
Frink Calculations
I mentioned before that I’ve created a calculating tool / programming
language called Frink which is
great for helping with physical calculations. Here’s how to calculate the
cost of mayonnaise (which is labeled by volume) but weighed by my scale.
To do this, we either have to measure or look up the density of mayonnaise.
We can easily search for the density of mayonnaise which gives “0.91 g/ml”). Each
sandwich took a total of 0.75 oz (this is a mass) of mayonnaise:
     mayocost = 3.48 dollars / (30 floz)
mayodensity = 0.91 g/ml
0.75 oz mayocost / mayodensity
0.0916 dollar (currency)
So light mayonnaise on (both sides) of a sandwich costs about $0.09.
Day 10 Costs
| Item | Cost |
|---|---|
| Fried Egg Sandwich (prices are for 1 sandwich) | |
| White bread, 2 slices | $0.10 |
| 1.5 eggs | $0.06 |
| Mayonnaise, 0.75 oz | $0.09 |
| 1 sandwich subtotal: | $0.25 |
| 1.5 sandwich subtotal: | $0.38 |
| Tuna Casserole | |
| 15.75 oz (3 cups) Bisquick @ $4.94/(60 oz) | $1.30 |
| 3.5 oz cheese @ $2.88/lb | $0.63 |
| 4 cans tuna @ $0.79/can | $3.16 |
| 1 green bell pepper | $0.79 |
| 1 yellow onion | $0.30 |
| 1 stick butter | $0.92 |
| 1/2 cup flour | $0.08 |
| 4 cups milk | $0.80 |
| 1 casserole total (15 portions): | $7.98 |
| 1 portion subtotal: | $0.53 |
| 3 portion subtotal: | $1.59 |
| 1/8 pound asparagus @ $0.99/lb | $0.13 |
| Bonus banana bread | $0.10 |
| Butter, 3.5 g | $0.03 |
| Daily Total (revised) | $2.23 |
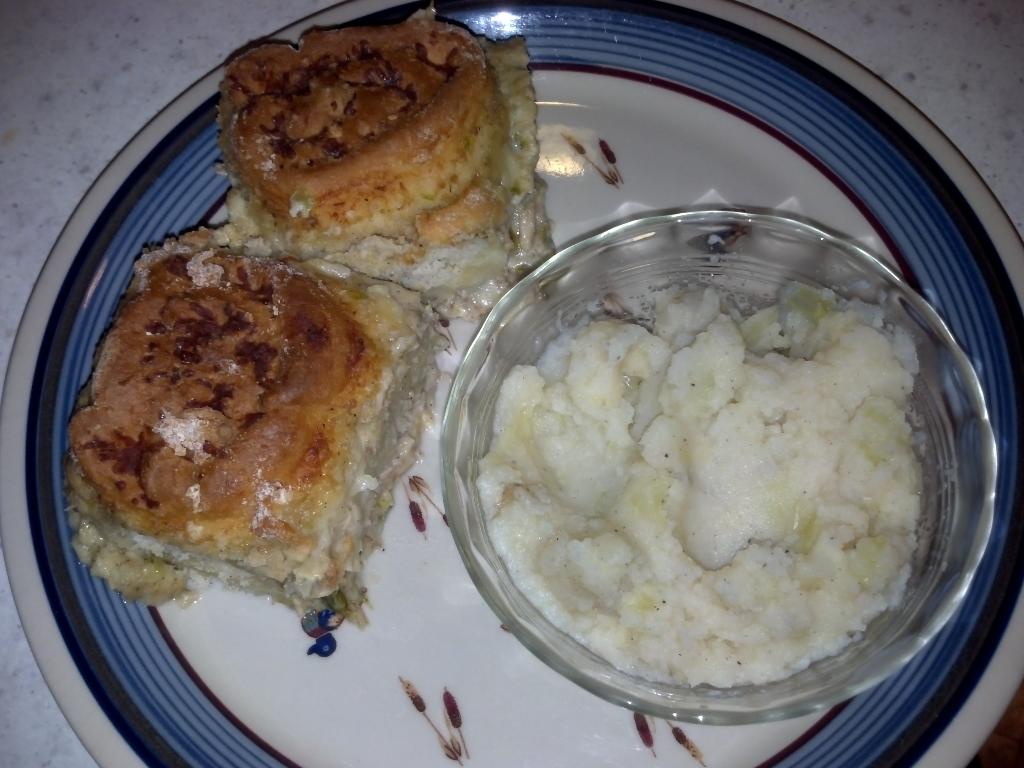
Lunch was a Braunschweiger sandwich with kimchi and a few chips. Total
lunch cost, $0.66. Dinner was the tuna casserole from day
10 and some more colcannon.
As promised, here’s the recipe for the Tuna Casserole!
Tuna Casserole Recipe
This is the original 80-year-old recipe for the tuna casserole. My
suggestions follow.
Chop 1 large onion and 2 green peppers. Sauté in a melted stick of butter
until glossy. Add 1/2 tsp salt, also pepper and nutmeg to taste. Add 1/2
cup flour and stir together well. Slowly, and over medium heat, add and
stir in enough milk for a thinnish white sauce. Add 3 or 4 cans of drained
tuna, stir, put into a 9×13 inch cakepan. Prepare a biscuit mix using 3
cups Pioneer or Bisquick mix with one cup of milk. Roll out into a
rectangle 3/8 inch thick. Sprinkle 1/2 lb. shredded cheddar and one large
jar of chopped pimientos over the biscuit mix. Roll up and cut into 12
equal-sized rolls. Place the rolls on top of the tuna mix. Bake at
350°F for 45 minutes.
Alan’s suggestions:
- I find it better to cook at 350°F for 20 minutes, then lower the
temperature to 325°F for another 20 minutes. The rolls get a bit too
dry otherwise. - After cooking, cover with aluminum foil and let rest for 5-10 minutes
for the filling to set. This steams the rolls a bit further. - I found that 15 rolls fit better in a 13×9″ pan.
- As mentioned in day 10, I reduced the cost a bit by
using less cheese and no pimientos.
Thoughts
- Today’s total was $2.49, very close to my target. I didn’t realize
that I was quite this close! - I went to King Soopers today to pick up some items like bread and
butter. Butter was on sale for $1.99/lb, almost half the price that I’ve
been paying, so I got a couple of pounds. Butter prices are at an
all-time high. - During WWII when butter was rationed, people would “extend” butter by
whipping it with either water or another kind of oil, then refrigerating it
to solidify. If using water, a bit of emulsifier like soy lecithin would
help keep it together. I might experiment with this. Emulsifiers keep oil
and water from separating in solutions. - There weren’t many other good sales at King Soopers (nor in
the other grocery store advertisements) this week. Quite a change from
last week’s many good deals at Albertson’s. - As I unpacked all the food, I labeled each item with its prices (and
per-serving cost when applicable) with a permanent marker. - I also got a few inexpensive experimental items like lard, chicken
livers, and bologna. Perhaps I will use them all in the same dish!
Day 11 Costs
| Item | Cost |
|---|---|
| Braunschweiger sandwich | |
| Braunschweiger (Kroger house brand), 2 oz @ 2.50/lb | $0.31 |
| White bread, 2 slices | $0.10 |
| Cabbage | $0.03 |
| Braunschweiger sandwich subtotal: | $0.42 |
| Homemade Kimchi (76 g) | $0.15 |
| 1/2 oz potato chips | $0.09 |
| Tuna casserole, 3 portions: | $1.59 |
| Colcannon, 9 oz. | $0.24 |
| Daily Total | $2.49 |
Today was like some days before — oatmeal and half a banana for breakfast
($0.35), a braunschweiger sandwich and a very small amount of potato chips
for lunch ($0.42), and the last of the tuna casserole for dinner. Daily
total: $2.35.
That tuna casserole is excellent. I highly recommend it even if you’re not
trying to eat inexpensively. It’s worth every penny.
At the end of the day, I had $0.15 left in my budget, so I had a small
piece of banana bread with butter. Final total: $2.48.
Thoughts
Day 12 Costs
| Item | Cost |
|---|---|
| Oatmeal | |
| Oatmeal, 0.57 cup (uncooked volume) | $0.14 |
| Milk, 1/4 cup | $0.05 |
| Brown sugar, 1 tablespoon | $0.03 |
| Oatmeal subtotal: | $0.22 |
| 1/2 banana | $0.13 |
| Braunschweiger sandwich | |
| Braunschweiger (Kroger house brand), 2 oz @ 2.50/lb | $0.31 |
| White bread, 2 slices | $0.10 |
| Cabbage | $0.03 |
| Braunschweiger sandwich subtotal: | $0.42 |
| 1/2 oz potato chips | $0.09 |
| Tuna casserole, 2.5 portions: | $1.33 |
| Colcannon, 6 oz. | $0.16 |
| Bonus banana bread | $0.10 |
| Butter, 3.5 g | $0.03 |
| Daily Total | $2.48 |
Cabbage Rolls Recipe
As promised on Day 2, here’s the Cabbage Rolls /
Krautburger recipe! They’re a bun filled with cabbage, onions, and ground beef.
They’re delicious, nutritious, filling, inexpensive, and they freeze and
microwave incredibly well, so you can make a giant batch and have cheap
food ready in minutes!
This recipe is for a single batch but you
should always plan on making at least a triple batch because they
freeze extremely well, and it’s just as easy to make a large batch. I made
a larger-than-quadruple batch. A single batch will make about 15
krautburgers.
Breading
- 1 package active dry yeast
- 1 cup lukewarm milk (110 to 115 degrees)
- 2 tablespoons sugar
- 1 teaspoon salt
- 3 cups all-purpose flour
- 3 egg yolks
- 4 tablespoons butter, softened
Sprinkle the yeast into 1/2 cup of the milk. Add the sugar and salt and
stir until dissolved (actually it will stay clumpy because of the milk.
Just let it sit for a while and it will unclump.) Place the mixture in a
warm draft-free place for 5 to 8 minutes or until the mixture has begun to
bubble. (It may take longer than that.)
Pour the flour into a large bowl and make a well in the center. Drop in
the yeast mixture, egg yolks, remaining 1/2 cup of milk, and butter, and
with a large wooden spoon, gradually stir the flour into the other
ingredients until a fairly firm dough is formed. Cover the bowl and let
rise in a warm place for an hour. (Over a bowl of warm water is good.)
Punch down, let rise for another 45 minutes.
Preheat the oven to 375°F (190°C).
Filling
- 2 finely chopped onions
- 1/2 head finely chopped cabbage
- 2 tablespoons vegetable oil
- 1 pound ground beef, (80% Lean/20% fat preferable)
- Garlic or garlic powder to taste
- Salt to taste
- Pepper to taste
- (Optional) Cumin to taste.
- (Optional) other spices you like. Paprika is good! Taco seasoning
would be really good too!
In a large pot with a lid, heat oil and cook onions with some salt for 5
minutes. Add cabbage, some salt and pepper (or bouillon powder for even
more flavor,) and about 1/2″ of water, cover pot and steam until cabbage is
tender, stirring occasionally. Add small amounts of water if necessary
while cooking. A little bit of onion and cabbage juice left in is good!
Lightly brown ground beef with garlic and do not drain.
Mix beef with cooked cabbage and onions and season to taste. The filling
will be easier to work with and less wet if cooled somewhat before using.
Assembly
Cut dough into manageable sections and roll out on lightly floured surface
(or unfloured on a dough sheet.) Roll thin using rolling pin. Cut dough
into pieces (whatever size you like, about 4″ square is good). Roll out
again with a rolling pin for efficient use of your dough! Fill with a
couple spoonfuls of filling. Fold corners of dough together, pinch closed,
and turn over with seam down on cookie sheet. Bake in oven for 10-12
minutes or until golden. Cool on rack. Can freeze after cooled. These
reheat very nicely in the microwave.
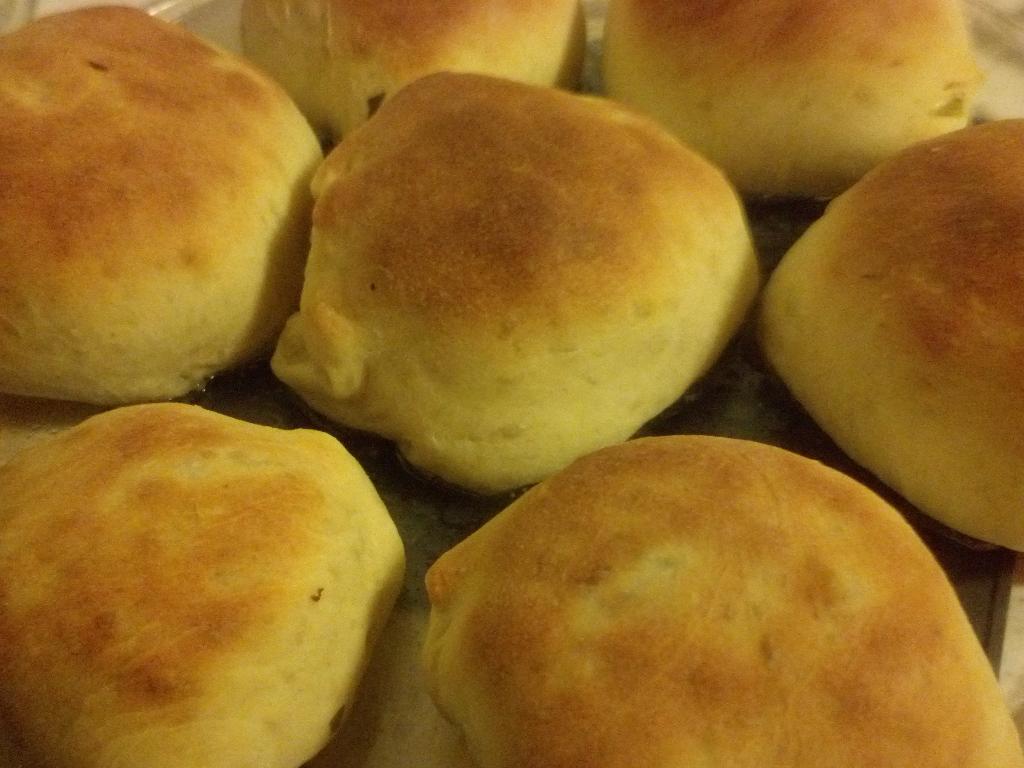
Update: I broke down the cabbage roll
costs in day 16. Note that the final cost was about $0.47, an
increase of $0.06 over my estimate. In another year, when ground beef was
on sale, I made them for about $0.37 apiece with lots of filling left over!
Breakfast was a bowl of oats ($0.18). I’ve already eaten more oats in the
last week than I have during the rest of my life combined (and I’ve only
eaten about 3 bowls.) Lunch was a delicious egg salad sandwich (with the
last egg that cost $0.08 and two new new super-cheap eggs that cost $0.04
each) and 1/4 cup of the Urad Dal from day 9. The Urad
Dal was absolutely delicious. (Have I mentioned that you should
save your pork broth?) Dinner was 2 cabbage rolls, the last of
the colcannon, and, since I was well under budget, another 1/4 cup of Urad
Dal.
After dinner, I had still only spent $1.55 for the day. As an evening
snack, I had banana bread and tapioca pudding. Daily total: $1.96.
Thoughts
- If you don’t roll the dough quite thin, you will run out of dough
before you run out of filling. That’s fine! The filling is delicious by
itself, or can be packed into a freezable pan to make a delicious
meatloaf, or, covered with mashed potatoes, a cottage pie! - The first few times I made krautburgers, I didn’t have a good breading
recipe, so I used Pillsbury Grands! biscuits and rolled them out flat.
These were good (especially the buttery ones,) but rather expensive and
not as good and elastic as this outstanding breading recipe (thanks to
Jenny’s mom for the recipe.) - When tripling or quadrupling the breading, I was lazy and dumb and
quadrupled the amount of yeast that I used. This is silly because yeast is
a magical little animal that will multiply itself if you feed it
and give it a bit of time! - What I should have done is to start a package of yeast in some warm
water or milk with sugar and flour, and let it stand for several hours to
a day in a warm place. One packet of yeast would multiply enough to supply
the whole recipe. - If you keep yeast cultured and fed, it can last indefinitely, and
you’ll always have yeast available. - It’s hard to make bread cheaply if a single packet of yeast costs
at least $0.50, half the cost of a loaf of store-brand bread! - The best way to provide “free” live yeast culture is to culture your
own sourdough. A sourdough starter is very rich in yeast, and makes
gorgeous dough. - I may start another sourdough culture to see if I can
make bread inexpensively. I started sourdough last summer, but didn’t
bake often enough to make it useful. You need to bake every couple of
days (to a week if you keep it refrigerated) and constantly feed and use
it. - Oh, geez. I just convinced myself. I just got up and made a sourdough
starter. I’ll talk about that another day.
Day 13 Costs
| Item | Cost |
|---|---|
| Oatmeal | |
| Oatmeal, 0.43 cup (uncooked volume) | $0.10 |
| Milk, 1/4 cup | $0.05 |
| Brown sugar, 1 tablespoon | $0.03 |
| Oatmeal subtotal: | $0.18 |
| Egg Salad Sandwich (prices are for 1 sandwich) | |
| 3/4 Egg | $0.04 |
| Mayonnaise, 15 g | $0.07 |
| 2 slices white bread | $0.12 |
| 1 sandwich subtotal | $0.23 |
| Urad Dal (1/2 cup prepared) | $0.16 |
| Krautburgers | |
| 2 Krautburgers | (revised)$0.94 |
| Colcannon, 6 oz. | $0.16 |
| Tapioca Pudding | |
| 1/6 box pudding, Kroger house brand | $0.10 |
| 1/3 cup milk | $0.06 |
| Milk on pudding (36 g) | $0.03 |
| Pudding subtotal | $0.19 |
| Bonus banana bread | $0.16 |
| Butter, 7 g | $0.06 |
| Banana bread subtotal | $0.22 |
| Daily Total | $2.08 |
I had 3 items which were on sale—milk, butter, and potatoes. Add
peas and it becomes one of my favorite dishes—potato pea soup! I
decided to make a big batch. It ended up being about 1.4 gallons (5.4
liters). That’s a big pot! It took 5.23 pounds of potatoes, 2.2 lb of
frozen green peas, 110 fl.oz. of milk, and 1/2 lb butter (I usually use
even more butter than this!)
The whole batch cost $7.82, or about $0.35 cents per cup. I had 3 cups for
$1.05.
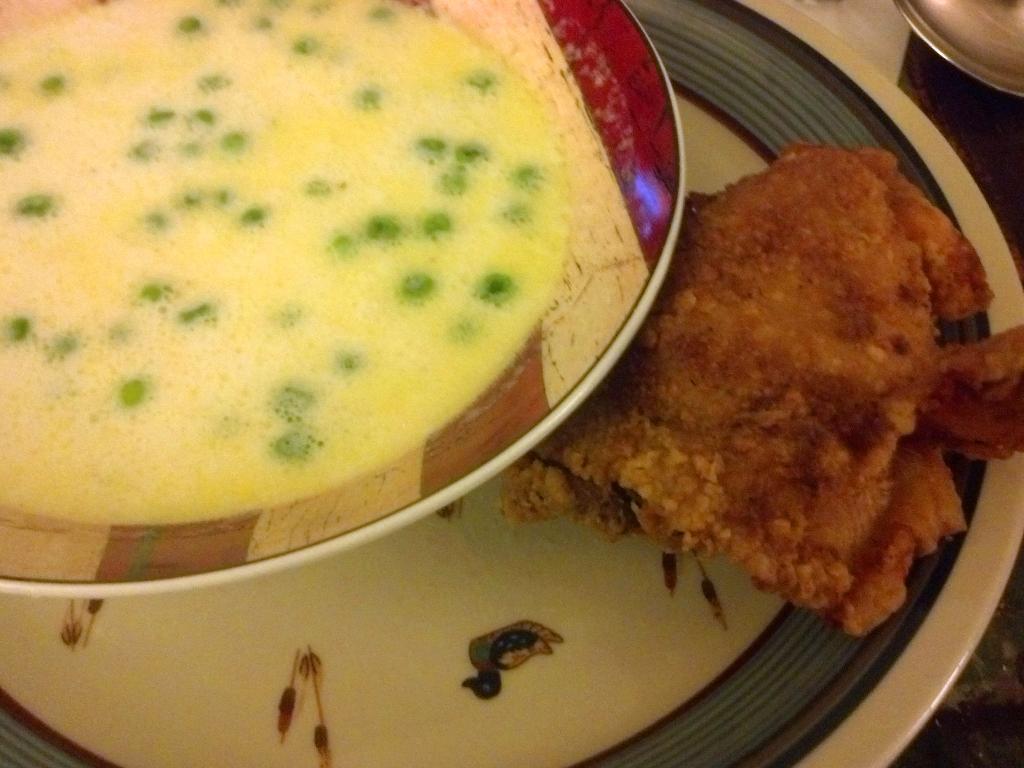
Since I also wanted some protein, I made some fried chicken! I can count
on about 2 fingers the times I’ve made actual fried chicken in my whole
life, so I wasn’t sure how it would turn out. I had some big, beautiful
chicken thighs (the best part of the bird) for the great price of $0.88/lb,
which is about as low of a price as you can get for meat. (Even cheap
bologna on sale costs more.) I basically used Alton Brown’s recipe, except I didn’t soak the chicken
in buttermilk. Since I didn’t plan ahead and the chicken was frozen solid,
I brined/thawed it in water with salt and a bit of sugar.
I’ve pan-fried fried chicken before, but it’s hard to get right. Instead,
I used my ever-ready deep fryer, which already had oil in it from many
dinners in the past. After 20 minutes at 325°F (160 °C), this is
what it looks like:
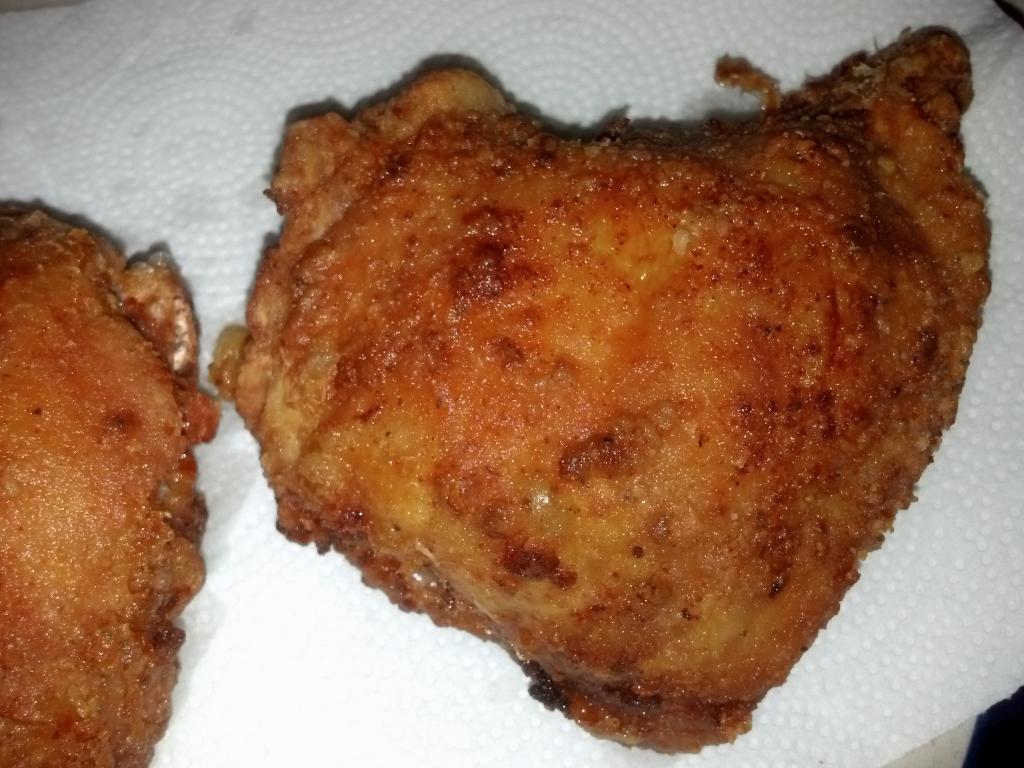
Conclusion: a deep-fryer is much more foolproof than cooking fried
chicken in a skillet with a smaller amount of oil. It was cooked through
and cooked evenly. It was much easier than the fried chicken I’ve
made before. Will do again.
Each thigh was very large and averaged about 8 ounces, and with the flour
and spices, cost $0.46. I would have gladly eaten several of them, but I
ate one and I’m saving one for tomorrow. Or later tonight.
Lunch was an egg salad sandwich and the last of the Urad Dal. Since I had
$0.45 left over, I had a late-night snack of a $0.25 frozen burrito. Daily
total: $2.30.
Thoughts
- I woke up very hungry and a bit weak. I had about $0.54 left
over yesterday, so I should have eaten more. I ate a late-night burrito
today to fill out my total. - I’m not quite sure how to account for the oil, but it has already
cooked many meals and I plan on re-using it for as long as it stays good. - I even counted a couple of bad potatoes that I had to throw out into my
costs.
Day 14 Costs
| Item | Cost |
|---|---|
| Egg Salad Sandwich (prices are for 1 sandwich) | |
| 3/4 Egg | $0.04 |
| Mayonnaise, 15 g | $0.07 |
| 2 slices white bread | $0.12 |
| 1 sandwich subtotal | $0.23 |
| Urad Dal (3/8 cup prepared) | $0.12 |
| Potato Pea Soup | |
| Potatoes, 5.23 lb @ ($2.99/(10 lb)) | $1.57 |
| Bouillon, 30 g @ ($4.98/(35.3 oz)) | $0.15 |
| Green peas, 2.2 lb @ $2.49/(2 lb) | $2.74 |
| Milk, 110 floz | $2.36 |
| Butter, 1/2 lb @ $1.99/lb | $1.00 |
| Potato pea soup subtotal (23 cups) | $7.82 |
| Potato pea soup subtotal (1 cup) | $0.35 |
| Potato pea soup subtotal (3 cups) | $1.05 |
| Chicken thigh | $0.43 |
| Flour, spices | $0.03 |
| Chicken thigh subtotal | $0.46 |
| Tapioca Pudding | |
| 1/6 box pudding, Kroger house brand | $0.10 |
| 1/3 cup milk | $0.06 |
| Milk on pudding (36 g) | $0.03 |
| Pudding subtotal | $0.19 |
| Frozen burrito | $0.25 |
| Daily Total | $2.30 |
For lunch, I had a couple of extremely cheap hot dogs (Bar S Classic Bun
Length Franks, $0.75 for 8) that I had bought on sale 2 weeks ago. Each
hot dog was only $0.09, and I ate them on ordinary white bread instead of a
bun, which made them quite cheap: only $0.15 apiece. Compare this to $0.48
for my previous hot dog plus bun! I could have 3 hot dogs for the price of
1, but only ate 2.
Dinner was more potato pea soup (3 bowls) and another piece of delicious
fried chicken from yesterday.
When serving the potato pea soup from the refrigerator, there was a huge
crust of butter that had solidified on top of the soup which had to be
broken apart and carefully portioned into the soup. I got to thinking
about ways to improve this, and decided I would do a little experiment with
an emulsifier.
Emulsifiers help to prevent oil and water from separating. Look how the
droplets of butter separate into large droplets in ordinary soup, within
seconds of stirring:

My mom and I made molecular gastronomy kits for several friends and family
this Christmas, and I had an emulsifier, soy lecithin, in my kit. I added
1.2 g of soy lecithin to a bowl of soup (this is a concentration of 0.5% by
mass, cost $0.05) and stirred it vigorously and heated it in the microwave.
After re-stirring, this is what the soup looked like:

Note that the butter no longer separates into large droplets. The
emulsifier helps disperse the butter more evenly into the soup. Would this
make my soup easier to serve and more uniform? Since butter is less dense
than milk, it will still try to float to the surface of the liquid, so it
probably won’t solve my refrigerator storage problem. But it’s an
interesting experiment nevertheless! I’ll have to try adding some
emulsifier to a batch of soup that I store in the fridge and see how well
it prevents separation. A big problem is that mixing it vigorously (like
with a stick blender) would also break up the potatoes and peas. If I’m
going to add emulsifier, I’ll have to add it to the hot milk and butter
before adding the potatoes.
This was a very quick-and-dirty experiment, but it demonstrated that a
little bit of soy lecithin will help keep fats from separating in soup. No
difference in taste was detected. I tasted a small amount of the soy
lecithin powder, and it didn’t have a strong taste.
For a late-night snack, I also had some tapioca pudding and banana bread.
Some of the banana bread had to be frozen because it’s not getting eaten
fast enough. Daily total: $2.27.
Thoughts
- The sourdough starter is going well. It smells like sourdough. I’ll
need to feed it with flour (and a bit of sugar) about 12 hours before
making some bread. - You’ll very often see soy lecithin in the ingredients list of anything
that contains fat and liquid, such as salad dressings, soups, broths,
etc. It may also appear in things like macaroni and cheese to keep the
cheese fats from separating from the liquids. Look for it! - I have a recipe for incredibly creamy macaroni and cheese that can be
made with any kind of cheese. Often, melting cheese can make it lumpy and
oily, but a little bit of emulsifier like soy lecithin or calcium citrate
will keep it smooth and creamy. Due to the cost of fancy cheese, I may
not be able to make it during this experiment, though. - I added in the soy lecithin cost ($0.05) even though it was a Christmas
present. At my cost, it would cost $1.02 to add enough emulsifier for the
entire 1.4 gallon batch.
Day 15 Costs
| Item | Cost |
|---|---|
| Cheap Hot Dogs (price per hot dog) | |
| 1 Hot Dog, Bar S @ (8 dogs/ $0.75) | $0.09 |
| White Bread, 1 slice | $0.06 |
| Completed hot dog (1) subtotal | $0.15 |
| 2 hot dog subtotal | $0.30 |
| Potato Pea Soup | |
| Potato pea soup subtotal (3 cups) | $1.05 |
| Soy lecithin, 1.2 g | $0.05 |
| Chicken thigh | $0.43 |
| Flour, spices | $0.03 |
| Chicken thigh subtotal | $0.46 |
| Tapioca Pudding | |
| 1/6 box pudding, Kroger house brand | $0.10 |
| 1/3 cup milk | $0.06 |
| Milk on pudding (36 g) | $0.03 |
| Pudding subtotal | $0.19 |
| Bonus banana bread | $0.16 |
| Butter, 7 g | $0.06 |
| Banana bread subtotal | $0.22 |
| Daily Total | $2.27 |
Lunch was, again, 2 cheap hot dogs on bread. Total cost: $0.30. Dinner
was 2 bowls of potato pea soup (which is disappearing very rapidly!) for
$0.70 and 2 cabbage rolls for $0.94. I was hungry, so for a late-night
snack I had a bowl of rather ordinary ramen ($0.17) with some bok choy
$(0.27) and an egg ($0.04).
Cabbage Roll Cost Breakdown
I’ve avoided calculating the exact cost breakdown for the 61 cabbage rolls
that I made before the experiment. Here it is:
| Item | Cost |
|---|---|
| Krautburgers (Cost for whole batch) | |
| Yeast, 4 packets | $1.99 |
| Milk, 4 1/3 cups | $0.81 |
| Sugar, 1/2 cup | $0.12 |
| Salt, 4 teaspoons | $0.02 |
| Flour, 13 cups | $2.08 |
| Egg yolks, 13 | $0.55 |
| Butter, 17 tablespoons | $2.00 |
| Breading subtotal | $7.57 |
| Ground Chuck, 80% lean, 4 lb @ $3.99/lb | $15.96 |
| Yellow onions, 4 | $1.78 |
| 2 heads cabbage, 4 lb @ $0.79/lb | $3.15 |
| 2 tablespoons vegetable oil, | $0.04 |
| Filling subtotal | $20.93 |
| 61 Krautburgers subtotal | $28.50 |
| 1 Krautburger subtotal | $0.47 |
Since I had been working on the estimate that each krautburger cost
$0.41, this increases my costs somewhat on a few days! Luckily, I just
went back and revised the totals for the 2 other days (day 2 and day 13)
on which I had krautburgers, and was still well under the total on those
days! Whew! I just stressed myself out there for a minute.
Thoughts
- The cabbage roll supply is holding up very well. Making a gigantic
batch of them was a very good choice. - Obviously, the largest part of the cost of the cabbage burgers is
ground beef. If you can find it on sale, it’s an even better deal. You
can also use more cabbage and less beef (by weight, beef costs 5 times
as much as cabbage.) - Making a sourdough starter or feeding the yeast and giving it time to
multiply could have cut $1.50 off of the cost. - I fed the sourdough starter with a cup of flour and a cup of water for
something I’m going to make tomorrow. - If you know me, you know I’m usually grumpy in the morning. I’ve been
especially grumpy in the evenings with this experiment. - The ramen didn’t taste especially fresh. Not sure why.
- I have a hard time going back to ordinary ramen after eating the World’s Best Ramen that I made on day 6.
- Here’s an interesting article. It apparently doesn’t matter
whether you eat 2 meals a day or 6, as long as caloric intake is the same.
Periodic fasting may also be good for you.
Day 16 Costs
| Item | Cost |
|---|---|
| Cheap Hot Dogs (price per hot dog) | |
| 1 Hot Dog, Bar S @ (8 dogs/ $0.75) | $0.09 |
| White Bread, 1 slice | $0.06 |
| Completed hot dog (1) subtotal | $0.15 |
| 2 hot dog subtotal | $0.30 |
| Potato Pea Soup | |
| Potato pea soup subtotal (2 cups) | $0.70 |
| 2 Krautburgers subtotal | $0.94 |
| Not The World’s Best Ramen | |
| Bok choy, 4.3 oz | $0.26 |
| 1 egg | $0.04 |
| Ramen (1 pkg) | $0.17 |
| Ramen subtotal: | $0.47 |
| Daily Total | $2.41 |
For lunch, I had 1.5 fried egg sandwiches and 1/2 of a lovely grapefruit
that were on sale for $0.25.
Dinner was another piece of the salmon that I bought on day
3, prepared about the same way, along with a bowl of potato pea soup.
I slightly overcooked the salmon in an attempt to get the skin crispy (and
splashed hot oil on my hand in the process.)
Sourdough Experiment
I mentioned before that creating your own sourdough starter was a way to
have an active culture of yeast available to make bread more inexpensively.
I looked at a few sourdough recipes, and decided to try and adapt a
non-sourdough recipe for Garlic Knots that I had seen. Take a look at the
pictures in that recipe. It looks good.
I had recently created a sourdough starter, which I fed with a cup of flour
and a cup of water about 12 hours in advance so it would be nice and
active. The sourdough starter had some gentle bubbles in it, so I made a
very simple pizza dough recipe, adapting the recipe from the garlic knots site. It was approximately
1 cup sourdough starter, 2.5 cups flour, 2 tablespoons sugar, 2 teaspoons
salt, 1 fl.oz. olive oil, and water. Since I made the dough the night
before, I followed the usual pizza dough advice and put it into the
refrigerator overnight, and then warmed it the next day and tried to let it
rise for about 5 hours.
In order to try and make it cheaper, and because I didn’t have the
ingredients on hand, I eliminated the pepperoni, cheese, even the onions.
I used garlic powder, onion powder, and a few other spices like oregano.
I also used vegetable oil instead of olive oil. Again, since I was using a
sourdough starter, I didn’t add any yeast.
Unfortunately, when I was ready to eat, the dough still hadn’t risen
appreciably. It had risen a little bit, but I was too impatient to wait
another 5 hours or whatever, so I cooked it anyway.

So…yeah. To make a long story short, the garlic knots didn’t really
rise, and were very dense. The taste was good, and they smelled
amazing, but they were doughy inside and very solid outside. I
made the mistake of putting them back into the oven to try and remove some
of the doughiness inside, but it just made them harder.
What I learned was that I needed a more active sourdough starter, or a
higher proportion of it. Putting the dough in the refrigerator overnight
was probably a mistake too. Ah, well, it was a half-assed experiment.
I’ll try to do better next time.
I know that sourdough can make a gorgeous pizza dough; I made a
batch about a year ago that was the most beautiful, perfect dough you’ve
ever seen. I don’t recall if I added additional yeast, though. I may have.
Thoughts
- I’m really dubious of the “425°F for 25 to 30 minutes” idea from
the original recipe. Even smeared with olive oil, those things were
sizzling within minutes, and I’d think they would be burnt black and hard
as a rock in that amount of time. I had to reduce the temperature to keep
them from deep-frying and to keep the oil from smoking in the pan. - You could probably make these with Rhodes frozen rolls, sort of the way
you make monkey bread. Still, you’d have to drastically reduce
the time and temperature.
Day 17 Costs
| Item | Cost |
|---|---|
| Fried Egg Sandwich (prices are for 1 sandwich) | |
| White bread, 2 slices | $0.12 |
| 1.6 eggs | $0.06 |
| Mayonnaise, 0.75 oz | $0.09 |
| 1 sandwich subtotal: | $0.17 |
| 1.5 sandwich subtotal: | $0.26 |
| 1/2 grapefruit | $0.13 |
| Salmon | |
| 6.25 oz salmon at $1.99/lb | $0.77 |
| Vegetable oil for cooking | $0.02 |
| 1/8 large lemon | $0.11 |
| Salmon subtotal: | $0.90 |
| Potato pea soup subtotal (1 cup) | $0.35 |
| Garlic Knots | |
| 3.5 cups flour | $0.42 |
| 1/4 cup vegetable oil | $0.08 |
| 2 tablespoons sugar | $0.03 |
| Spices (est) | $0.15 |
| Garlic knots subtotal: | $0.68 |
| 1/4 Garlic knots subtotal: | $0.17 |
| Daily Total | $1.81 |
I didn’t eat breakfast or lunch due to the terrible life decision of
purchasing Civilization V. Somehow I stayed up all night playing it.
Dinner was a quick Banquet turkey pot pie ($0.79), half a grapefruit
($0.13), and some Macaroni & White Cheddar that I got from a box (the whole
box was only $0.25, Wild Harvest brand in-store promotion at Albertson’s.)
I also had a few of the Garlic Knots from the day before, which I tried to
revive and soften by microwaving them in a wet paper towel. It didn’t work.
Since dinner was so inexpensive, I had a large frozen burrito for a
late-night snack. (El Monterey XX Large Bean & Cheese Burrito, 10 oz.) I
bought a bunch of these last summer for cheap on an in-store closeout, (I’m
thinking $0.50) but I don’t remember exactly, so I’m going to call it
$1.00, which is the everyday Walmart price. Daily total: $2.30.
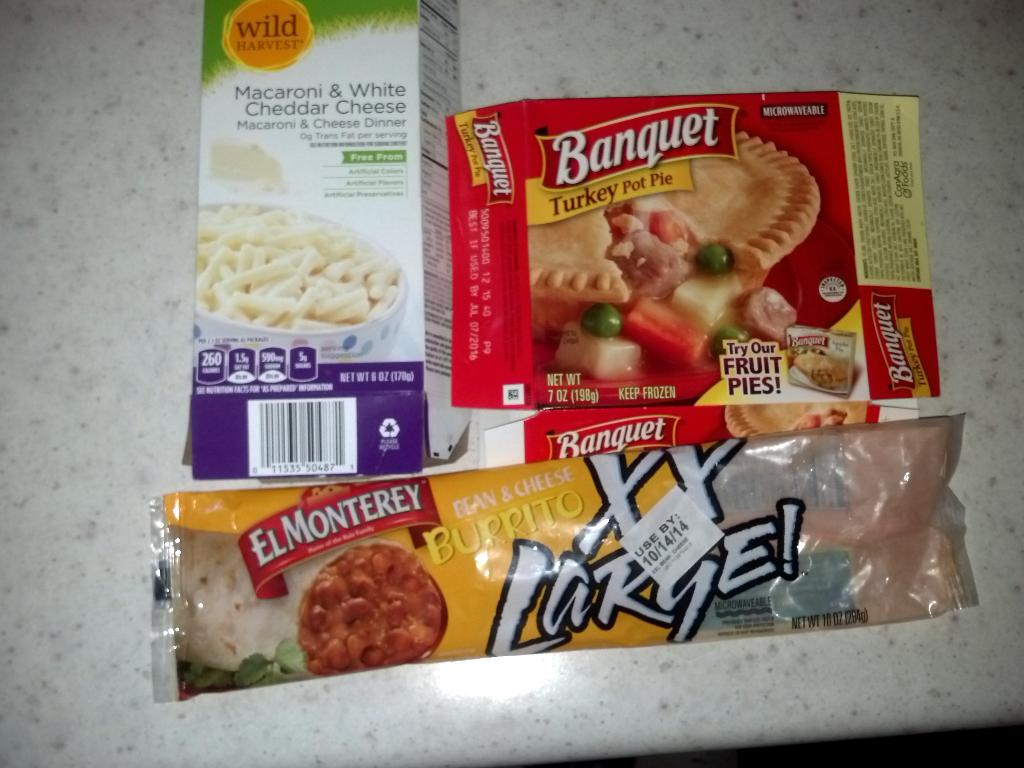
Thoughts
- All of the prepackaged food that I bought was on fairly good discount.
Watch for promotions (and times when a store runs out of freezer space,
which is when I got the burritos.)
Day 18 Costs
| Item | Cost |
|---|---|
| Banquet Turkey Pot Pie | $0.79 |
| 1/2 grapefruit | $0.13 |
| Macaroni & White Cheddar | |
| 1 Box Wild Harvest Mac & Cheese | $0.25 |
| 1/2 cup milk | $0.06 |
| 2 tablespoons butter | $0.12 |
| Mac & Cheese total batch subtotal: | $0.43 |
| 2/3 portion subtotal: | $0.29 |
| 1/8 Garlic knots subtotal: | $0.09 |
| El Monterey frozen burrito (overestimate): | $1.00 |
| Daily Total | $2.30 |
Since I had more beautiful, large, inexpensive chicken thighs ($0.88/lb) in
the freezer, I decided to try my luck again with fried chicken.
I have always been afraid of making fried chicken. It’s hard to cook it
evenly. It’s hard to make sure it’s cooked through. It’s hard not to burn
it. It’s hard not to spatter yourself with oil. It’s hard to keep the
crust on the chicken. However, I’m getting drastically more confident with
cooking it now that I know how easy it is in a deep fryer instead of a
skillet. It’s also much easier to use just one very tolerant part
of the chicken (thighs) so everything cooks evenly and at the same time.
I passed the first chicken test on day 14, so it was
time to take it a step further. To HOT CHICKEN!
Over the last year, I’ve seen more and more “hot chicken” on cooking shows.
I’ve seen chefs who have had their lives changed by trying hot chicken.
It’s especially popular in Nashville, which even has a Hot Chicken Festival and Hot
Chicken Coalition. I’ve never even tried hot chicken, and I’m
not planning on going to Nashville any time soon, so I better try making my
own.
What makes hot chicken hot? Well, according to most recipes, the chicken
is seasoned and fried in more or less the usual manner, but after it’s
fried, it’s always basted with a hot oil and spice mixture which contains
unbelieveable amounts of cayenne pepper, along with other spices like
garlic powder, chili powder, and usually a fair amount of brown sugar to
make a glaze and temper the heat.
Many recipes insist that the hot oil actually has to be lard. I bought
lard on day 11, so I was ready to go!
Most recipes also dredge the chicken in flour twice to get a
thicker, crispier crust, dipping it in an egg-and-milk wash in between.
This is the first time I’ve done a double-dredge. Here’s the process for
hot chicken!
- Brine chicken (I just used salt and cold water for about 2 hours as the
thighs were frozen solid.) - Dry chicken.
- Season chicken (I used the barbecue rub I made on day
6). - Dredge chicken in flour and a bit of salt. Shake off excess.
- Let chicken stand for 5 minutes or more to make a sticky, gummy
coating that won’t break off in the hot oil. - Dip chicken in a wash of approximately equal parts egg and milk. (Some
recipes add hot sauce to the mix.) - Dredge chicken again in the flour mixture. Shake off excess.
- Let chicken stand for 5 minutes or more.
- Deep fry at 325°F (160 °C) for about 18 minutes (or less.
Don’t burn it!) - Brush or dip chicken in spicy coating mixture (see below.)
For the spicy coating, I slowly heated 3.5 oz of lard with a frightening
amount of spices. I used 2 tablespoons of cayenne pepper which is
very intimidating to see being measured out. I also added about 2
teaspoons of garlic powder, 1 teaspoon of chili powder, some salt, and
about 2-3 tablespoons of brown sugar. I let this warm slowly and for a long
time so that the spices could bloom in the oil and impart their flavors to
it. I believe that this tempered the heat of the cayenne pepper
significantly. If I would have eaten that much raw cayenne pepper, it
would have blown my head off. Instead, it developed a rich, smoky, complex
flavor that was absolutely delicious. I think that the lard may have
helped to add rich, meaty flavors here.

Look at that delicious crust. I brushed the first piece lightly with the
hot oil, because I was afraid how hot it would be. It turned out that it
was pleasantly hot, and the brown sugar in the glaze made it absolutely
delicious. The second piece I brushed quite generously. Yum.
I simply can’t overstate how good this was. I’ve made some very good
chicken wings in my life. People have told me they were the best wings
they’ve ever had. They’ve told me that they were the best chicken
they’ve ever had. I’ve even had people tell me it was the best thing
they’ve ever eaten. Once I literally had so many people rave about my
wings that I had a vegetarian decide at that moment to go back to eating
meat, and she did. This chicken is as good as any I’ve ever made, if not
even better. It’s already one of my favorite foods I’ve ever eaten. It is
one of the best things I’ve ever eaten. I literally couldn’t stop talking
about it. The flavor was balanced and rich, spicy and sweet, the crust was
crisp and the chicken was moist. And it was amazingly inexpensive and
filling (the thighs averaged about 8 oz. before cooking.) Eating two
pieces of chicken, I’d never guess for a second that I was trying to eat
inexpensively. Wow. What a meal.
Not bad at all for a day I only spent $2.00 on food! Easily, a
life-changing meal. I can see how professional chefs become obsessed with
hot chicken and need to make it in their own restaurants!
(You may have noticed some other deep-fried treats in the background of
that picture. Those are corn and potato fritters, which are also
delicious. I’ll write about them tomorrow, as I have more hot chicken
to eat tomorrow!)
Breakfast was a big bowl of minute oatmeal ($0.22).
Thoughts
- The biggest mistake that I made was setting the chicken in the basket
of the deep fryer, waiting a minute or two, and then lowering the basket
into the fryer. The crust in the first batch stuck very badly to the
basket, and I broke much of the crust off while trying to free it. - Always lower the chicken slowly directly into the oil (you can put the
basket underneath, but let it cook for at least 20 seconds before it hits
the basket.) - Some recipes for hot chicken use 6 tablespoons or more of cayenne
pepper for a similar recipe size! I found that this would have been
somewhat pointless; the oil was already saturated with a solid layer of
spices on the bottom that had to be stirred up. You could adjust the
amount of cayenne that got onto the chicken by how you scooped up the oil.
The oil on the top had less cayenne. The oil that was dug from the bottom
of the pan was solid with cayenne. You can estimate how hot it’s going to
be from the redness of the chicken. - I’m not sure how to keep the spices suspended in the oil better.
- Don’t burn the spices! Very long, low, slow heat works best.
- Update: Don’t crystallize the brown sugar! I made spicy chicken
livers using approximately the same recipe, and the brown sugar cooked
into a hard candy lump of inedibility, and I had to filter it out. Maybe
just add the brown sugar close to the end of cooking the sauce? - Since the chicken is mostly spiced after frying, you can
adjust the level of spice in each portion to everyone’s liking. - Don’t forget the brown sugar and salt! The balance of the hot and
sweet was what made this so amazing. - Put a little bowl of the spiced oil on the side of the plate for
dipping. You will find yourself dipping. - Hot chicken is usually served on top of a piece or two of soft,
store-bought white bread. And with dill pickle slices. I didn’t do this.
I will tomorrow. - Again, chicken thighs are about the most inexpensive meat you can buy.
At $0.88/lb, this was an incredible deal! I can’t wait until I eat it
again. Oh, yeah, that’s tomorrow because I have more that I
saved!
Day 19 Costs
| Item | Cost |
|---|---|
| Oatmeal | |
| Oatmeal, 0.6 cup (uncooked volume) | $0.14 |
| Milk, 1/4 cup | $0.05 |
| Brown sugar, 1 tablespoon | $0.03 |
| Oatmeal subtotal: | $0.22 |
| Hot Chicken (prices are for 1 piece) | |
| 1 Chicken Thigh | $0.43 |
| 1/4 Egg | $0.01 |
| Milk, 2 floz | $0.03 |
| Flour | $0.03 |
| Spices (est.) | $0.10 |
| Lard | $0.06 |
| Hot Chicken Subtotal, 1 piece: | $0.66 |
| Hot Chicken Subtotal, 2 pieces: | $1.32 |
| Corn ‘n Tater Fritters (1 batch) | |
| Hungry Jack Potato Pancake mix, 1 pouch | $0.63 |
| 1 can corn | $0.25 |
| 1/3 cup flour | $0.04 |
| 1/2 cup milk | $0.06 |
| Corn fritters subtotal: | $0.98 |
| Corn fritters 1/3 batch subtotal: | $0.33 |
| 1/2 grapefruit | $0.13 |
| Daily Total | $2.00 |
Breakfast/lunch was another big bowl of minute oatmeal ($0.22).
For dinner, I had more hot chicken! I saved one piece for today and
slathered it heartily with the hot cayenne sauce. I did it right this time
and served it on a piece of soft, store-bought white bread, and served it
with some dill pickle. (My aunt’s homemade dill pickles!)
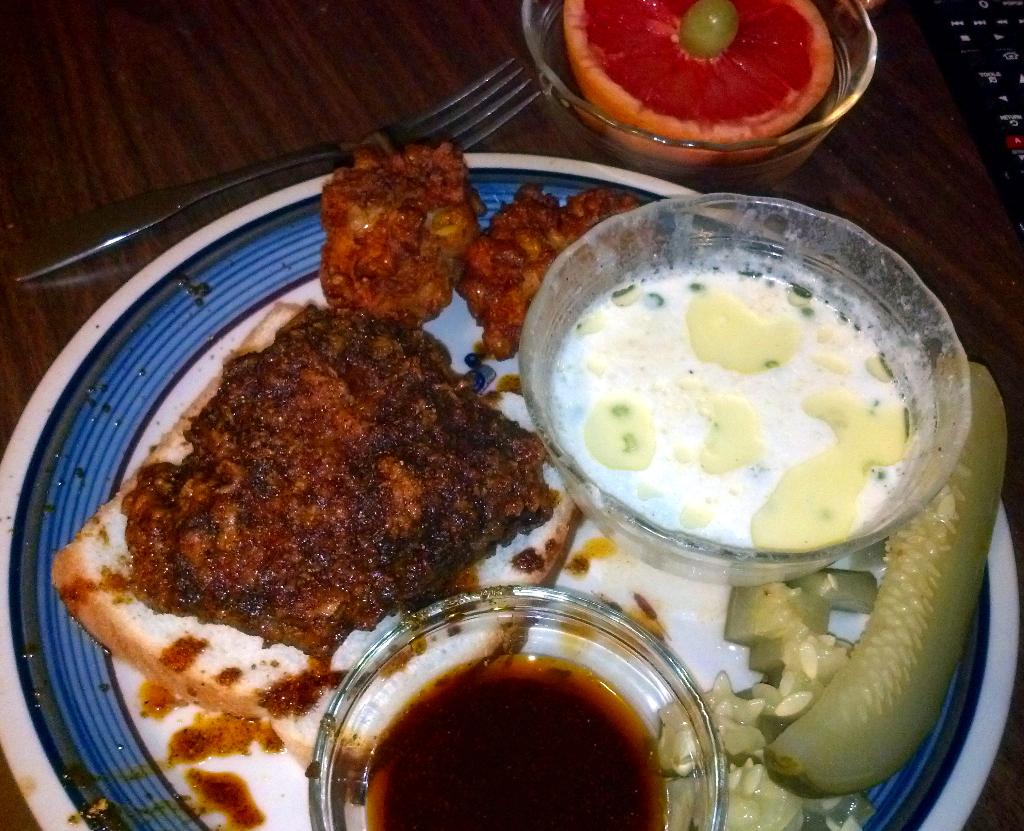
Look at that splattery, messy mess of good food! D for plating, A+
for flavor!
It was unbelievably good and the crust was still crisp, as I wrapped the
chicken in paper towels to absorb moisture before refrigerating it, and
reheated it long and slow in an oven at 225°F, increasing to 250°F
because I didn’t want to wait any longer.
I also had another grapefruit, the last of the potato pea soup, and a
couple more corn and potato fritters! I promised to describe the
potato-corn fritters yesterday. (You can see them at the top of the
plate.) They’re very simple. The recipe comes from the side of a box of
Hungry Jack Potato Pancake mix:
It’s basically one pouch of potato pancake mix (there are 2 pouches per
box) to which you add a can of corn (which I bought earlier for $0.25/can!)
some flour, milk, and an egg. The potato pancake powder has baking soda
for a leavener, so these make a very light airy batter that you then
deep-fry for a few minutes. They’re delicious and light but quite filling.
The recipe is on the side of the box. Dip them in the spicy oil for the
chicken (as seen at the bottom of the picture) and they’re even better.
I have to repeat everything I said yesterday about how good the Hot Chicken
was. It’s absolutely delicious. I can’t wait to have it again. You’ll
note in the picture that it’s even redder today, as I brushed it heavily
with the spicy coating. The bread absorbed some of the drippings and had a
delicious flavor.
Since I was at only $1.70 for the day, I had a late-night snack of a peanut
butter sandwich ($0.29). The thing that surprises and saddens me about
that is that I could have had an egg salad sandwich or a fried egg sandwich
even cheaper! Daily total: $1.99.
Thoughts
- I went to Albertson’s and Dollar Tree today. Surprisingly, Albertson’s
had almost no interesting discounts today (other than still having whole
salmon for $1.99/lb. I didn’t get any.) - Dollar Tree didn’t have any deals on any food I was interested in.
It’s generally a poor idea to go to a dollar store for anything that ever
dips under a dollar; they round everything up to a dollar.
Almost all the items I saw were cheaper at a grocery store. Except
spices. Dollar Tree can be good for spices. It’s where I got the big can
of cayenne pepper that made the hot chicken hot, and I thought would last
forever. - I had an Albertson’s coupon for eggs for $0.99/dozen, which I forgot to
use. I remembered before I left the store, and wasn’t sure if I’d go
through the hassle of getting them reduced. (They were marked as
$1.49/dozen in the store.) It turns out that they had actually charged me
$2.19/dozen, though, so I’m glad I went back and got the refund! They gave
me back $2.40, which is a whole day’s food in this experiment! - When I got home, I found they had charged me $2.29 for a half
gallon of milk (which was marked as $1.79 in the store!) That made me
mad. I got a whole gallon at King Soopers last week for $1.99! - It’s amazing how stressful it can be to find out you were charged more
than you should have been, or more than you expected, due to bad labeling
or your own error. - As expected, the weekly ads have green cabbage and corned beef on
sale for St. Patrick’s Day week. - A couple friends of mine have said that their mothers or grandmothers
would make them a lard sandwich for a snack after school. I saved a bit
of the spicy lard. I may have to try spreading a bit of it on bread
soon. I IS A GOURMET.
Day 20 Costs
| Item | Cost |
|---|---|
| Oatmeal | |
| Oatmeal, 0.6 cup (uncooked volume) | $0.14 |
| Milk, 1/4 cup | $0.05 |
| Brown sugar, 1 tablespoon | $0.03 |
| Oatmeal subtotal: | $0.22 |
| Hot Chicken, 1 piece: | $0.66 |
| White bread, 1 piece: | $0.06 |
| Corn fritters 1/6 batch: | $0.17 |
| 1/2 grapefruit | $0.13 |
| Potato pea soup (5.5 oz) | $0.24 |
| Banana bread | $0.16 |
| Butter, 7 g | $0.06 |
| Banana bread subtotal | $0.22 |
| Peanut Butter Sandwich | |
| White bread, 2 slices | $0.12 |
| Peanut Butter (Jif), 31 g @ ($2.48/lb) | $0.17 |
| Peanut Butter Sandwich subtotal | $0.29 |
| Daily Total | $1.99 |
I’ve been missing potato chips, but if there’s one thing I have a lot of,
it’s potatoes.
And I have a deep fryer that has oil. I have some old potatoes that were
sprouting, but those are great for chips, because they’re already drying
out and fry quickly. I didn’t even bother peeling them.
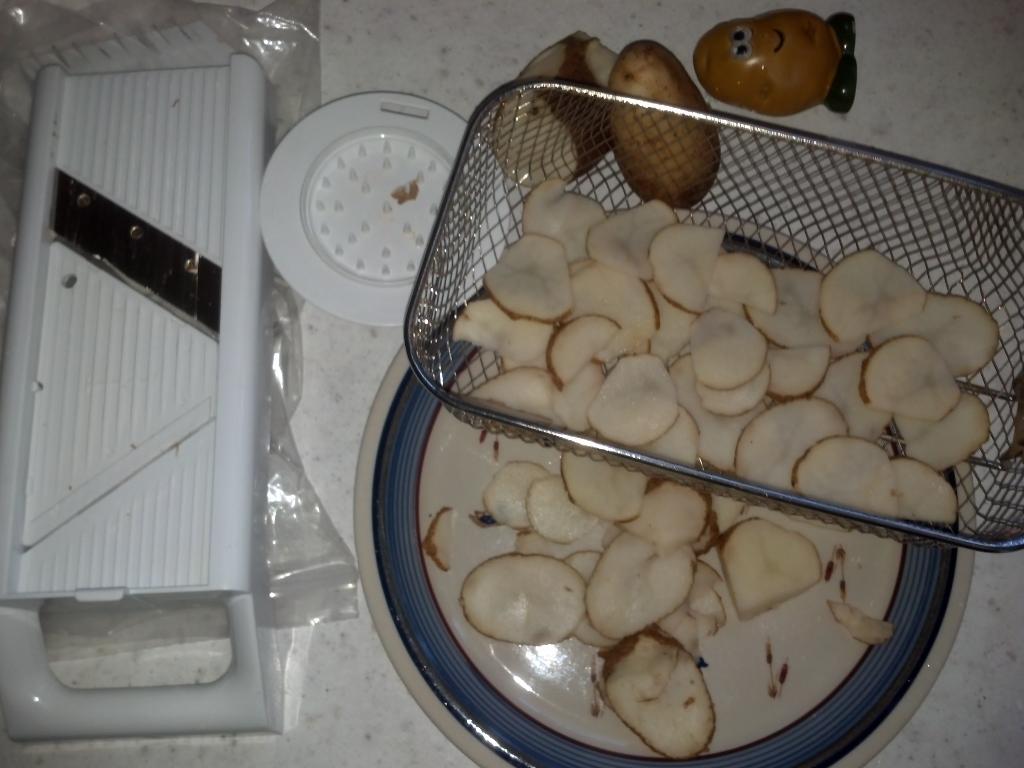
After a quick pass through the mandeline, the potatoes were ready for
frying. Egg salad sandwich and fresh chips!
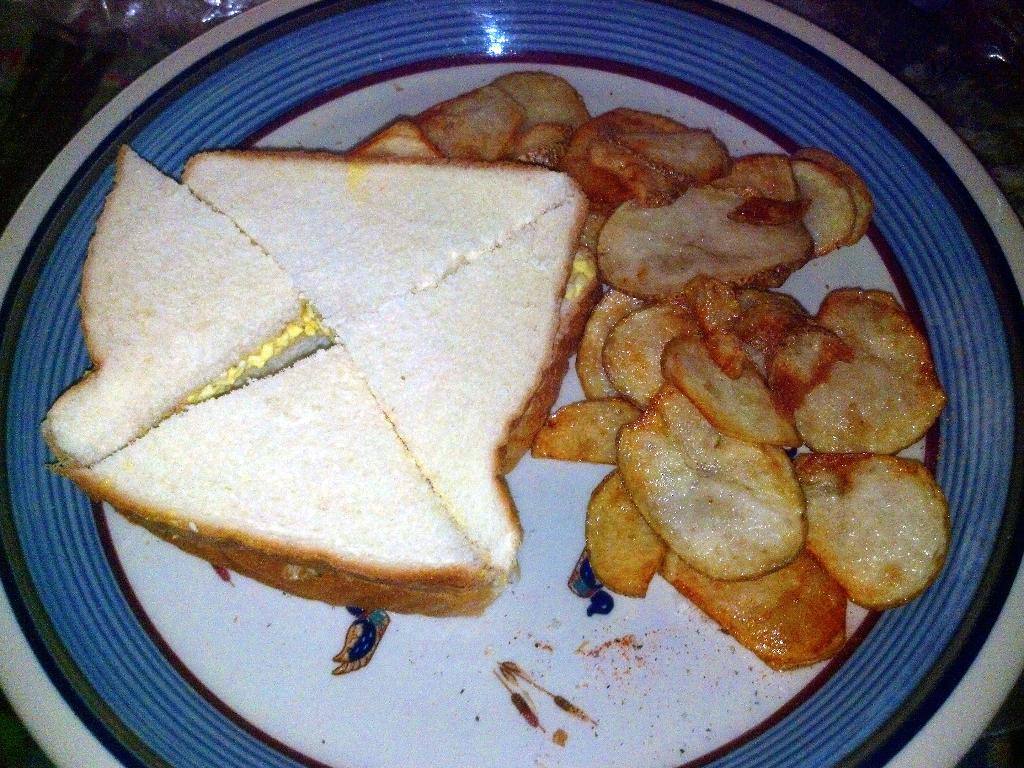
They were so good that I made some more. What made the chips even better
was slicing them thicker and then sprinkling them with the barbecue rub I
made on day 6. That was amazing!
Those two platefuls (about 8 oz of potatoes before cooking) cost about
$0.16 total. Yes! I think the only thing that prevents people from eating
french fries or chips with every meal is that they don’t “keep” well.
They’re terrible cold and they don’t reheat right in an oven or microwave.

For dinner, I made a big pot of spaghetti. Well, rigatoni noodles,
actually. I use the very simple recipe that I grew up with—just
tomato sauce, tomato paste, and ground beef. (Along with garlic powder,
salt, and black pepper.) It only takes about 30 minutes to make, will feed
you for several days, and reheats in minutes. You can even use the sauce
to make pizza. A big plate of pasta + sauce was $1.37. Daily total: $2.21.
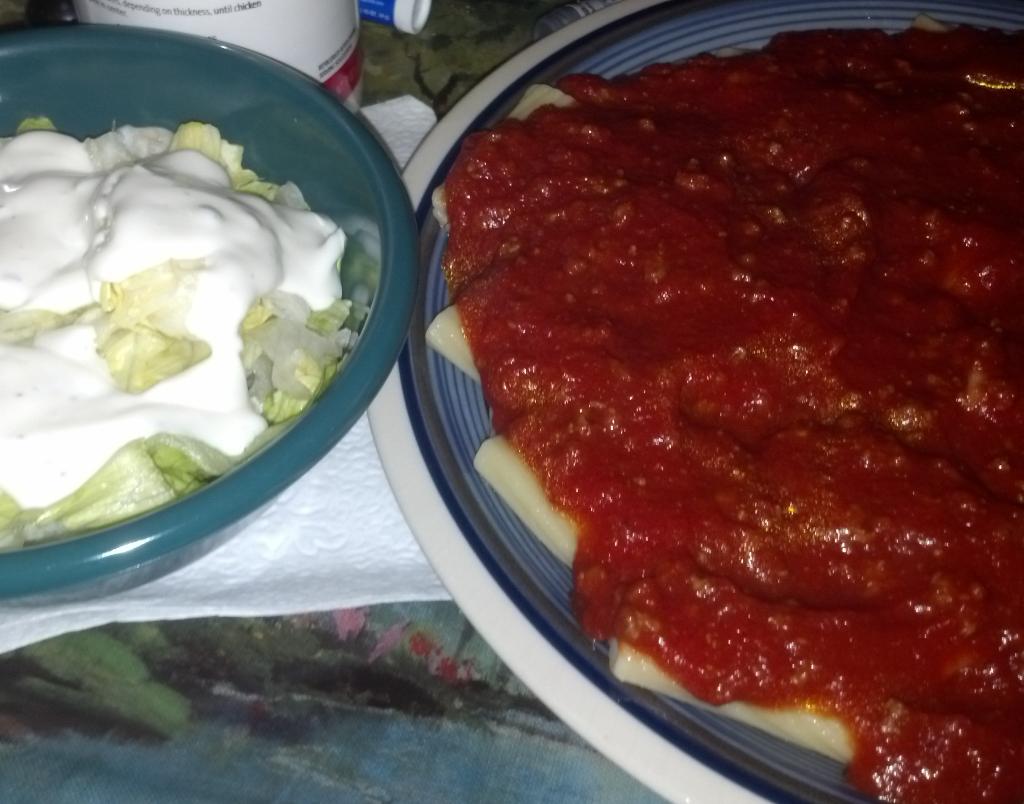
Thoughts
- I forgot to weigh my portion of spaghetti, so I had to wait until the
next day to calculate my costs. - Rule of thumb: my spaghetti sauce costs $0.10/oz. I’ve been eating
about 12 oz per serving. - I looked up pre-made spaghetti sauces on delivery.walmart.com and found that some pre-made
sauces are only about $0.04/oz, even meat sauces. (Update: these are only
“meat-flavored” sauces.) I won’t be switching my
favorite recipe for these, but I wonder how they make them so cheaply.
(For one, the “meat” sauce has less than 2% of beef.) My sauce is thick
and rich because of lots of tomato paste and nice fatty ground beef.
None of the fillers like high fructose corn syrup, soybean oil, and
carrots. - I could have cut the cost of the spaghetti sauce by 43% by eliminating
the meat. I need the protein, though, and the calories I get from using
relatively fatty ground beef (I like 80% lean and 20% fat ground beef, and
I don’t drain off the fat! The fat makes the sauce richer and delicious.
This time, though, I used 85/15 because it was what was on sale.) - You like what you grew up with. Every spaghetti sauce recipe except
this one seems to have weird tastes to me and isn’t as good. Mine’s all
about bright, rich tomato flavor, like the simple sauce that my mom used
to make. It was all tomato sauce, tomato paste, ground beef, and garlic
powder. Not much else. If you grew up with something else, you probably
liked that better. - I could have gotten tomato sauce a bit cheaper at Walmart.
- For some stupid reason, Albertson’s charged significantly more for one
large 29 oz can of tomato sauce ($1.79) than they did for two small 15 oz
cans (which contain 30 ounces total, $0.79/can, $1.58 for both.) I hate
that but I’m glad I noticed. Same brand. - I noticed that this tomato sauce and tomato paste had a bit of citric
acid in them. That’s what makes lemons taste like lemons. I always liked
a bit of acidic brightness in my tomato sauce, and tried different ways of
getting it, including vinegar, which didn’t help. I’ll have to try some
tomato sauce with a little bit of citric acid powder and see how it
tastes. - I make a “parsley sauce” which is made with parsley, mayonnaise, olive
oil, and lemon juice. It’s amazingly good on spaghetti. I
didn’t make it this time, as it’s a bit of a luxury. Maybe citric acid
would give some of the same tang that I like? - Blue cheese dressing is delicious but quite expensive ($0.22 a portion,
and I didn’t even use as much as I normally do.) Salad is just a carrier
for dressing, though, so I shan’t reduce any further. - The rigatoni weighed 2.5 times as much when cooked (having absorbed
water) as it did when dry. No deep thoughts there, but it’s interesting
to know that as a possible rule of thumb.
Day 21 Costs
| Item | Cost |
|---|---|
| Egg Salad Sandwich (prices are for 1 sandwich) | |
| 3/4 Egg | $0.03 |
| Mayonnaise, 16 g | $0.07 |
| 2 slices white sandwich bread | $0.08 |
| 1 sandwich subtotal | $0.18 |
| Fried potato chips | $0.16 |
| Spaghetti Sauce | |
| Tomato Sauce, 6 15-oz cans @ $0.79/can | $4.74 |
| Tomato Paste, 2 12-oz cans @ $1.29/can | $2.58 |
| Ground beef, 85% lean, 1.21 lb @ $4.49/lb | $5.43 |
| Spaghetti sauce subtotal, 130 oz | $12.75 |
| Spaghetti sauce, 1 serving, 12 oz | $1.18 |
| Pasta | |
| Rigatoni, 1.5 pounds (dry) @ $0.89/lb, 59 oz cooked | $1.34 |
| Rigatoni, 8.5 oz cooked | $0.19 |
| Salad | |
| Lettuce, 1/11 head @ $0.99/head | $0.09 |
| Blue cheese dressing, Ken’s 1.45 oz @ ($2.47/(16 oz)) | $0.22 |
| Salad subtotal | $0.31 |
| Bonus banana bread | $0.16 |
| Butter, 3.5 g | $0.03 |
| Daily Total | $2.21 |
Yesterday’s food was so good that I did almost the exact the same thing
today. Egg salad sandwich and potato chips for lunch. It was a great
opportunity to use up more potatoes that look like this:
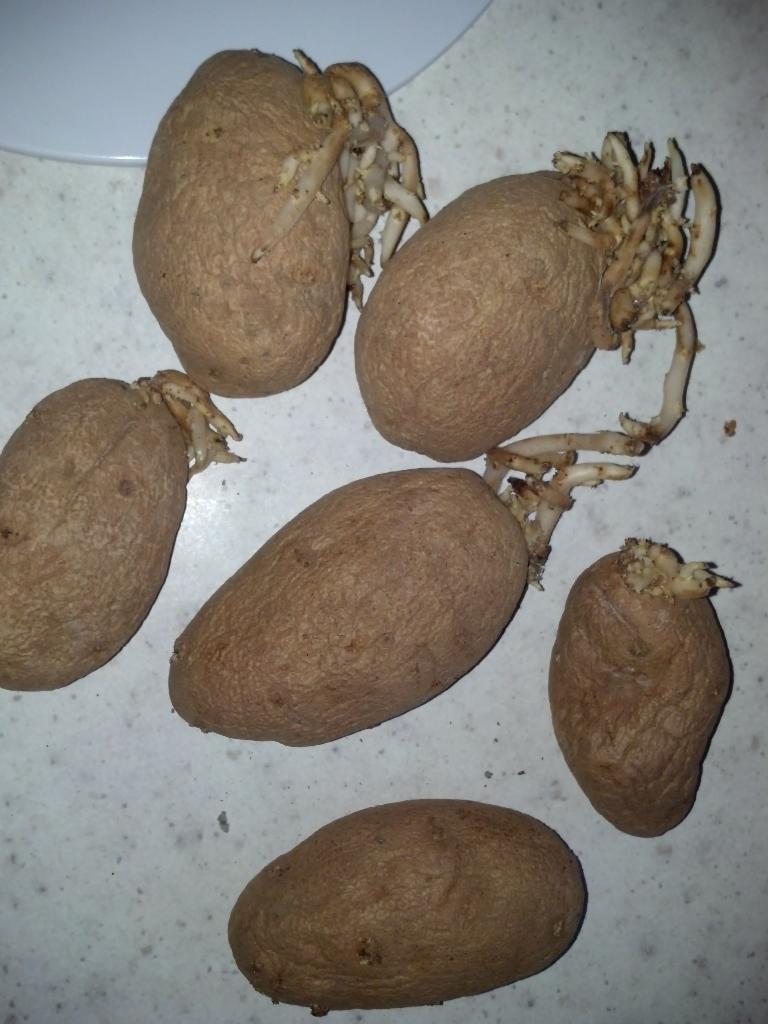
When you see dry old potatoes like that, think “perfect chips and fries!”
Dinner was once again a big plate of spaghetti and a salad. It only took a
couple of minutes to reheat, which is why I like making a huge pot of
spaghetti. Daily total: $2.21.
Day 22 Costs
| Item | Cost |
|---|---|
| Egg Salad Sandwich (prices are for 1 sandwich) | |
| 3/4 Egg | $0.03 |
| Mayonnaise, 16 g | $0.07 |
| 2 slices white sandwich bread | $0.08 |
| 1 sandwich subtotal | $0.18 |
| Fried potato chips | $0.16 |
| Spaghetti Sauce | |
| Spaghetti sauce, 1 serving, 12 oz | $1.18 |
| Pasta | |
| Rigatoni, 8.5 oz cooked | $0.19 |
| Salad | |
| Lettuce, 1/11 head @ $0.99/head | $0.09 |
| Blue cheese dressing, Ken’s 1.45 oz @ ($2.47/(16 oz)) | $0.22 |
| Salad subtotal | $0.31 |
| Bonus banana bread | $0.16 |
| Butter, 3.5 g | $0.03 |
| Daily Total | $2.21 |
Today’s lunch was similar to previous lunches—a braunschweiger
sandwich. Dinner was, once again, a big plate of spaghetti, a salad, and a
piece of spicy bread.
What’s spicy bread? I’m glad you asked. I just invented it. Instead of
making garlic bread, I had saved a bit of the lard-and-cayenne-pepper
coating from the Hot Chicken I had made on day 19.
Instead of buttering my bread, I just warmed a bit of the hot coating and
brushed it on the bread, and put it under the broiler for a couple of
minutes. Wow, was that delicious! It’s definitely spicy, but it goes
great with spaghetti. It would also go well with cheeses.
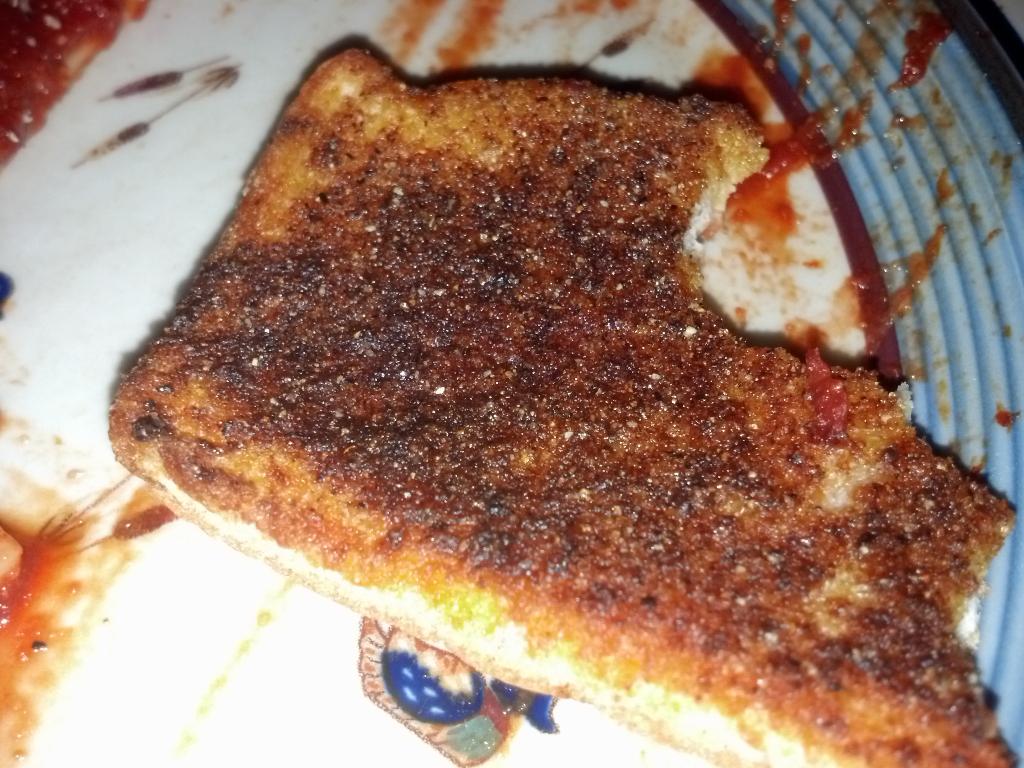
Later that evening, I had a hard-boiled egg ($0.04) and a piece of bread
($0.04). Daily total: $2.24.
Counting Calories
I haven’t really been tracking the amount of energy in the food I’ve been
eating. I should try harder. How is that energy measured? Well, in the
U.S., it’s usually measured in Calories, and in most of the rest of the
world, it’s measured in kilojoules. A food Calorie is equal to exactly
4.1868 kilojoules.
Warning: There are two different units of measure that basically
have the name “calories!” When you’re talking about food, the word
“Calorie” should be capitalized. This is because there happen to be two
different calories: one as used by physicists, (and spelled with a small
“c”) and the one used in food packaging, which a physicist would call a
“kilocalorie,” and is spelled with a capital C. A food Calorie is 1000 of
a physicist’s “calories”. Ugh. Don’t get them confused in calculations.
How is the amount of energy in a certain piece of food calculated? That
has to be pretty difficult.
In the U.S., the “Nutrition Labeling and Education Act” of 1990 requires
that the energy Calories of packaged food is calculated primarily from the
energy-containing components of the food: protein, carbohydrate, fat and
alcohol.
These labels use the Atwater system, which establishes the following
energy densities, in Calories/gram, of those four ingredients:
| Item | Calories/gram |
|---|---|
| Protein | 4 |
| Carbohydrate | 4 |
| Alcohol | 7 |
| Fat | 9 |
This allows simple calculation/estimation of the energy content of food
without complicated experiments (like burning the food in a bomb
calorimeter.)
The trouble is determining what percentage of what is in any given
food, of course.
The U.S. Department of Agriculture’s Nutrient Data
Laboratory Web site provides the “USDA National Nutrient Database for
Standard Reference” which contains detailed nutritional information on over
8,600 foods. You can even search the National Nutrient Database online, or
download the database for your own use.
Counting Calories in Frink
You can use my calculating tool and programming language Frink to calculate the energy
content in food. You first define the energy content:
     protein = 4 Calories/gram
carbohydrate = 4 Calories/gram
fat = 9 Calories/gram
Then, to find how much energy a pound of these contains, you just say
something like:
1 pound protein -> Calories
Which gives you 1814 Calories. Again, note that in Frink we use
Calories with a capital “C” for the food Calorie, which
should not be confused with the physicist’s lowercase
calorie. Frink knows about both. You can also write
kilocalorie or kcal or just use
kilojoules or kJ (note that capitalization is
correct and required.)
So, if you had one pound of each of the following, here’s approximately how
many Calories it would give you, according to the Atwater system:
| 1 pound protein | 1800 Calories |
| 1 pound carbohydrate | 1800 Calories |
| 1 pound fat | 4100 Calories |
| 1 pound alcohol | 3200 Calories |
Thoughts
- I’ve mentioned before that it’s stress-inducing to get back from the
grocery store and find that something cost more than you had thought.
Today, I got a good surprise from Walmart. A big 21-oz link of summer
sausage that was marked on sale as $2.50 (down from $4.98) actually only
cost $1.00! I know what my snacks are going to be. - I must also resist the the temptation to go back just to get more cheap
summer sausage. - Since it’s St. Patrick’s Day week, as predicted, corned beef and
cabbage are on sale. I stopped by King Soopers on the way home and got 2
big heads of cabbage for $0.29/lb, about $1.07 per head. I’m going to
feed a few people with that and some corned beef ($3.00/lb) this weekend. - Sprouts actually had cabbage at $0.20/lb! I didn’t go there, but saw
it in the advertisements. I forgot there was one on the way home.
Day 23 Costs
| Item | Cost |
|---|---|
| Braunschweiger sandwich | |
| Braunschweiger (Kroger house brand), 2 oz @ 2.50/lb | $0.31 |
| White bread, 2 slices | $0.08 |
| Lettuce | $0.03 |
| Braunschweiger sandwich subtotal: | $0.44 |
| Spaghetti Sauce | |
| Spaghetti sauce, 1 serving, 12 oz | $1.18 |
| Pasta | |
| Rigatoni, 8.5 oz cooked | $0.19 |
| Salad | |
| Lettuce, 1/11 head @ $0.99/head | $0.09 |
| Blue cheese dressing, Ken’s 1.45 oz @ ($2.47/(16 oz)) | $0.22 |
| Salad subtotal | $0.31 |
| Hard-boiled egg | $0.04 |
| White bread, 2 slices | $0.08 |
| Daily Total | $2.24 |
Breakfast/lunch was fried eggs (or is it a skull?) and fried potatoes.
That’s only half of the fried potatoes.
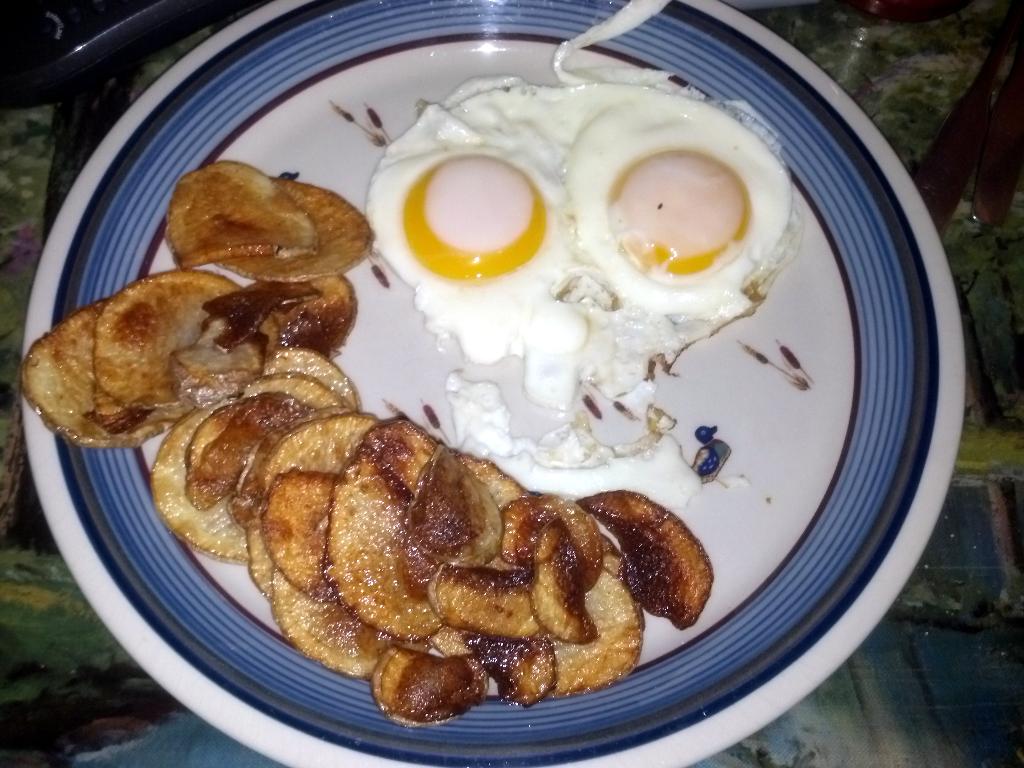
Dinner was the last of the salmon that I bought on day
3 and a big bowl of ramen with bok choy. I added some of my barbecue
rub to the ramen to give it more flavor. The salmon was pan-fried with a
bit of flour for crispy skin.
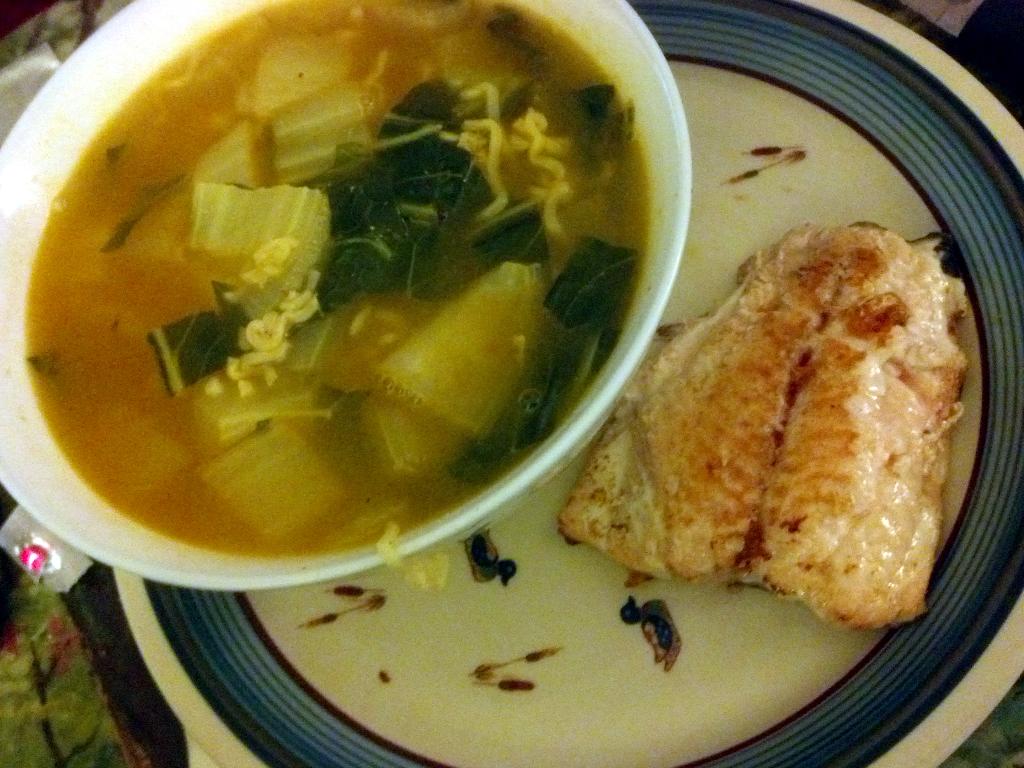
Day 24 Costs
| Item | Cost |
|---|---|
| 2 Fried Eggs | $0.14 |
| Fried potato chips | $0.18 |
| Salmon | |
| 6.25 oz salmon at $1.99/lb | $0.77 |
| 1/8 large lemon | $0.11 |
| Salmon subtotal: | $0.88 |
| Big Ramen | |
| Bok choy, 4.8 oz | $0.29 |
| Ramen (1 pkg) | $0.20 |
| Spices | $0.13 |
| Ramen subtotal: | $0.62 |
| Bonus banana bread | $0.10 |
| Butter, 3.5 g | $0.03 |
| Daily Total | $1.95 |
Breakfast was a quick bowl of quick oatmeal.
Lunch and dinner was a bit of a potluck with friends and relatives, so
according to my “don’t burden others” rule, I didn’t really limit my
expenditures. Nevertheless, I had several foods that were on sale due to
St. Patrick’s Day: Corned beef brisket and cabbage. I also made rye bread
with caraway seeds.
Corned beef was $3.00/lb, which is about as cheap as you’re likely to get
beef. It’s not really my favorite, as there’s some taste in cured meats
that I don’t really like. (Nitrites? Saltpeter?) However, if you cook it
correctly (low and slow in a slow cooker) with enough spices it can be
pretty good.
The night before, I chopped 2 medium onions ($0.50) and put them in the
bottom of the slow cooker on low. I covered the beef with some of my barbecue rub like I made on Day
6. I then put the brisket into the slow cooker and covered it with water,
and added more rub to taste. I then left it to cook overnight (for about
10 hours).
The next morning, I made some easy cabbage with a whole head of cabbage (at
$0.29/pound, a big head of cabbage cost only $1.07,) two cans of diced
tomatoes ($0.50 each) and some more barbecue rub in the pressure cooker.
After the pressure cooker started rattling, I cooked it for 7 minutes.
This made a good side dish, if you like cooked cabbage.

The rye bread was good too. It used a tablespoon of caraway seeds, which
are surprisingly expensive. (The last batch I saw at the grocery store was
about $6.50 for a ~1.5-oz bottle!) As I knew people like my rye bread, I
didn’t skimp. I wouldn’t use caraway seeds otherwise.
I have to admit that I ate quite a bit of the beef at the potluck. And the
fat. And bread. And potato chips. I had been very hungry in the morning,
so it was welcome. Daily cost: exempt.
Day 25 Costs
| Item | Cost |
|---|---|
| Oatmeal | |
| Oatmeal, 0.6 cup (uncooked volume) | $0.14 |
| Milk, 1/4 cup | $0.05 |
| Brown sugar, 1 tablespoon | $0.03 |
| Oatmeal subtotal: | $0.22 |
| Daily Total | Exempt |
Only one meal today: a big plate of leftover spaghetti and rye bread. I
made the rye bread into spicy bread like I made on day
23. More spaghetti is on the way.
Day 26 Costs
| Item | Cost |
|---|---|
| Spaghetti Sauce | |
| Spaghetti sauce, 1 serving, 14 oz | $1.37 |
| Pasta | |
| Rigatoni, 8.5 oz cooked | $0.19 |
| Rye bread | |
| 1 piece (est) | $0.15 |
| Daily Total | $1.71 |
For lunch, I had some corned beef and cabbage leftover from the potluck on
day 25. Since these are leftovers from a shared
potluck, I didn’t try to track it too carefully, but estimated about 6 oz
of corned beef at $3.00/lb, for a cost of $0.94.
For dinner, I had some more leftovers: spaghetti and rye bread. With the
leftover corned beef, I was slightly over my budget at $2.61. I didn’t
want the corned beef to go to waste, and since it was leftover from a
potluck, I think of it as “free food.”
Day 27 Costs
| Item | Cost |
|---|---|
| Corned beef, 5 oz | $0.94 |
| Cooked cabbage | $0.15 |
| Spaghetti Sauce | |
| Spaghetti sauce, 1 serving, 12 oz | $1.18 |
| Pasta | |
| Rigatoni, 8.5 oz cooked | $0.19 |
| Rye bread | |
| 1 piece (est) | $0.15 |
| Daily Total | $2.61 |
Only one meal today: a big plate of leftover spaghetti, rye bread, and a
salad (the lettuce is going downhill rapidly.) I made the rye bread into
spicy bread like I made on day 23. The spaghetti is
almost gone, but not quite. Maybe the reports will get interesting again
when I have to think about food again. It’s been so easy just to reheat a
plate of spaghetti that I haven’t thought about food much.
Day 28 Costs
| Item | Cost |
|---|---|
| Spaghetti Sauce | |
| Spaghetti sauce, 1 serving, 14 oz | $1.37 |
| Pasta | |
| Rigatoni, 8.5 oz cooked | $0.19 |
| Salad | |
| Lettuce, 1/11 head @ $0.99/head | $0.09 |
| Blue cheese dressing, Ken’s 1.45 oz @ ($2.47/(16 oz)) | $0.22 |
| Salad subtotal | $0.31 |
| Rye bread | |
| 1 piece (est) | $0.15 |
| Daily Total | $2.02 |
Only one major meal today: the last of the corned beef, some cabbage, and
fried potatoes. I
like them french-fried potaters, mmmhm. Later that night I had a
piece of cake left over from another potluck event. Total: $1.67
Day 29 Costs
| Item | Cost |
|---|---|
| Corned beef, 5 oz | $0.94 |
| Cooked cabbage | $0.15 |
| Fried potato chips | $0.18 |
| Cake | $0.40 |
| Daily Total | $1.67 |
For breakfast, I just fried a bunch more of them French-fried potaters, mmmhm.
For dinner, I had a big plate of the last of the spaghetti, along with a
salad and some more spicy bread. The big pot of spaghetti went a long
way, and is literally one of the easiest things to make and reheat.
Day 30 Costs
| Item | Cost |
|---|---|
| Spaghetti Sauce | |
| Spaghetti sauce, 1 serving, 14 oz | $1.37 |
| Pasta | |
| Rigatoni, 8.5 oz cooked | $0.19 |
| Salad | |
| Lettuce, 1/11 head @ $0.99/head | $0.09 |
| Blue cheese dressing, Ken’s 1.45 oz @ ($2.47/(16 oz)) | $0.22 |
| Salad subtotal | $0.31 |
| Rye bread | |
| 1 piece (est) | $0.15 |
| Daily Total | $2.02 |

I skipped breakfast/lunch and a Totino’s Party Pizza (cheese) sounded
really good, so I threw one of them in the oven for an early dinner.
The modern world is really pretty amazing. I don’t know how you can make
and package and distribute a delicious pizza in a shiny box for $1.25.
They’re still one of my favorites, you can find them anywhere, and you
can’t beat the price. (Especially when your grocery store puts them on
sale for less than a dollar.)
I remember doing an experiment with my family when I was very young; we
cooked 3 different types of pizzas, and decided which we liked the best. I
remember vividly that the pizzas we tried were Totino’s, Jeno’s, and
John’s. (I haven’t seen John’s for a long time, but I occasionally see
Jeno’s. The spices in Jeno’s sauce are really good, but I like Totino’s
super-thin crust better.) For years, we’d eat pizza on Sunday nights
(mostly Totino’s) and watch TV. (I even remember that we watched a
Wonderful World of Disney while we did the experiment.) There probably
hasn’t been any significant length of time in the past 25 years that I
haven’t had a couple of Totino’s pizzas in my freezer, and I probably eat
one a week. (I am not paid by Totino’s in any way, but if they want to
send me free pizzas for life and stuff, they totally should.)
Late that evening, I was hungry again so I made 2 quick fried egg
sandwiches. The pan was a bit hot so it almost instantly flash-burned the
lower layer eggs to the pan. Grr.
Diatribe: As an engineer, don’t get me started on the stupidity
of any open-loop “control system”. Like a stove burner. A proper
“closed-loop” control system has a sensor so you know, say, how hot your
actual surface is, and can control its temperature, rather than just
pumping a constant level of power into a heating element or a gas burner.
That is literally the worst way to control a system. I know that
professional chefs like gas burners because they rapidly respond to control
inputs, but in other ways they’re the worst possible system because they
always pump the same amount of power into your dish, regardless of what
temperature you want to hit. The human has to be the constant control
system but with no actual data on, say, what the surface temperature of the
pan is. A real control system should let you specify what temperature you
want to hit, and should hold that for you. I’ve built my own temperature
controller, which, given enough time to learn, controls any electrical
system to within about 0.1°F, which I hope to write about in this
experiment. See more below.
Mae Ploy
Even later, I was still hungry so I took a bit of the leftover rigatoni and
made one of my favorite 1-minute dishes with it: Mae Ploy noodles.
If you don’t know of Mae Ploy Sweet Chilli Sauce, you need to know about
it. It’s a chef’s secret weapon. (I have a hard time typing “chilli” with
two “L”s, but that’s the way it’s written on the label, so I’m going with
it.) It’s usually just called “Mae Ploy” by chefs, even though the Mae
Ploy company makes many other products. You will find it in all good
grocery stores, and you will often find it, often incredibly cheap, at the
front of good Asian markets. In fact, many good Asian markets will have
big bottles of Sriracha sauce, big bottles of Mae Ploy Sweet Chilli sauce,
and big bags of rice stacked in front, inexpensively, on pallets. It is
assumed that you will want all of these things. For better prices than
you’ll find anywhere else. Stock up. Their wisdom is correct.
Mae Ploy noodles are simply:
- Cooked Pasta
- Butter
- Mae Ploy
- Black Pepper (or red chili flakes)
You just throw that in the microwave for about a minute (depending on how
cold your initial ingredients are, it may be half that) and it’s
delicious.
Mae Ploy is awesome on many foods, including pizza crusts, chicken, pasta,
fried egg sandwiches, toasted cheese sandwiches (although Sriracha is even
better,) cooked potatoes, meats, shrimp (especially with butter and Sriracha
sauce) and more. It’s not too hot, it’s not too sweet, it’s just perfectly
balanced. (And as an amateur gardener who grows primarily tomatoes and
peppers, I can’t imagine how hard/expensive it is to grow enough peppers
for a single bottle.) This is not the cheapest ingredient per ounce if you
don’t find a good supplier, so be careful. (As you can see below, I
(probably overestimated) 2 floz for my dish, which at Walmart’s prices,
costs $0.39.)
Simple pasta recipes are so easy that the New York Times declared a rather
simple (but with expensive ingredients like Parmigiano-Reggiano cheese)
recipe for Pasta with Fried Lemons and Chili Flakes as their most-popular recipe of the year. (I haven’t made it, but friends have and say it’s great.)
Thoughts
- I really want to write about the temperature controllers that I’ve
built. They’re super-awesome and help you precisely control the
temperatures for cooking beef, fish, pork, chicken, eggs, tempering
chocolate, making hollandaise sauce, and anything else that requires
precise temperature control. - My temperature controller is often called a “sous vide” controller,
which is a French term meaning “under vacuum” which refers to the way that
meat is often cooked in a vacuum bag in a water bath. My controller is
even more flexible than that; it can control any resistive electrical
heating apparatus that you plug into it. It’s one of the most
revolutionary and awesome cooking methods you will ever use. I have a
chuck roast in the freezer that I may cook for 48 or 72 hours (!) to
demonstrate its awesomeness. - Have you ever cooked anything for 48 hours? I do regularly, and having
been raised on some strict food safety rules, it freaked me out to hear of
such things! Now it’s my happening and it freaks me out. (Yeah, that
was way before Austin Powers borrowed the phrase.) (I later learned more
about bacteria kill temperatures. In short: no food pathogens live above
131°F and almost all die way below that.) See the Meat Science section above for hints on what’s
happening. - I just learned of this today: It’s a temperature-controlled grilling
surface that costs a lot more than my temperature controller and does a
fraction of what my temperature controller can control. A trial project
called Cinder. Interesting for food geeks. Can you cook
chuck roast safely for 72 hours in it? Not a chance. Could my temperature
controller cook chuck roast deliciously and safely for 72 hours?
Absolutely! I’ve done it many times. Could my temperature controller do
the same as the Cinder device (much more cheaply) if you plugged a George
Foreman grill into it? Certainly, given the right thermocouple. I may
post my plans for my device. - I received a George Foreman grill as a present once. It was obviously
obtained from Goodwill or re-gifted. It burned the outside of everything
to the point of smoke and carbon, while the inside stayed raw. It went
back to Goodwill after the first use. I think it must have been a
defective unit in some way; the temperatures were too high to have ever
been reasonable for most food. I considered mine Dangerous to Meat and
Economy.
Day 31 Costs
| Item | Cost |
|---|---|
| Totino’s Party Pizza | $1.25 |
| Fried Egg Sandwich (prices are for 1 sandwich) | |
| White bread, 2 slices | $0.10 |
| 1.5 eggs | $0.06 |
| Mayonnaise, 0.75 oz | $0.09 |
| 1 sandwich subtotal: | $0.25 |
| 2 sandwich subtotal: | $0.50 |
| Pasta w/Mae Ploy | |
| Rigatoni, 8.5 oz cooked | $0.19 |
| Mae Ploy Sweet Chilli Sauce, 2 oz (est.) @ ($1.96/(10 floz)) | $0.39 |
| Butter, 2 tablespoons | $0.12 |
| Mae Ploy Noodles subtotal: | $0.70 |
| Daily Total | $2.45 |
I happened to be watching an episode of Simply Ming in which he and
one of his guest chefs cooks several dishes with offal. Offal are the
parts of an animal that aren’t skeletal muscles, such as liver or kidneys.
(It’s also called “organ meats” or “variety meats” or “giblets” in poultry.)
I remembered that I had a tub of chicken livers (20 oz, $1.69) in the
freezer, so my task was to try and cook them in an interesting way.
You may or may not like liver. It definitely has a strong, distinct
flavor. If you like it, it’s a filling and iron-rich treat. I’ve always
liked it, if it’s prepared and cooked correctly. The chicken livers I have
were about $1.35/lb so they aren’t cheaper than many chicken parts. If you
happen to come across liver on sale, it can be rather economical.
First, I soaked the livers in milk. This is a “traditional” method for
reducing some of the stronger tastes of the liver. I don’t know if it
actually works better than some other liquid (such as water or brine) but
some blood did come out into the milk. I then rinsed the livers in water
and drained them well.
The best liver I ever made was during this experiment last year; I heavily
seasoned some cow’s liver and coated them in panko breadcrumbs (these are a
crisp Japanese type of breadcrumbs) mixed with seasoning and fried in a
skillet. The crispness of the breading complemented the softness of the
liver, and made it easier to eat a lot. So I decided to try a crispy
coating this time.
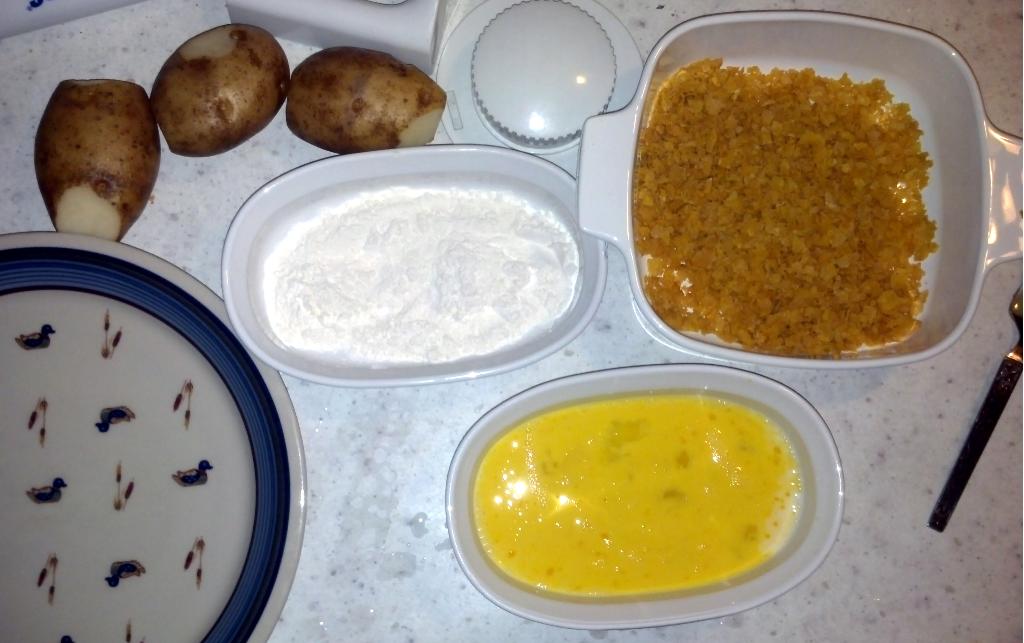
I do have some panko breadcrumbs in my cupboard, but I also had an old box
of Corn Flakes (part of a Christmas present from over a year ago,) which I
wanted to try to use as a coating. My mom used to make chicken coated with
Corn Flakes, but I never could get them to stick during frying. I decided
to adapt the recipe for Hot Chicken that I made on day
19. The only difference was that the final dredge was in crushed Corn
Flakes instead of flour.
I was worried that cooking liver in my deep-fryer would leave flavors in
the oil, (which I want to keep using) so I decided to cook them in a
skillet instead.

(The cooking process reminded me of why I don’t like trying to cook fried
chicken in a skillet. Oil spatters everywhere, it’s hard to control
temperature, the food cooks unevenly and burns on the bottom, and it’s a
lot harder to clean up.)
After taking them out, I brushed the livers with the Hot Chicken sauce like
I made on day 19.
The livers were quite good! They had no smell, but they did taste like
liver! The crunch of the Corn Flakes was nice, and the spicy sauce was
delicious. I ate a lot of them (but not even all of the 10 oz that I
cooked,) and was quite satisfied. Due to the difficulty of preparation and
cleanup, though, I’ll probably choose a simpler recipe for cooking the rest
of the livers. I also cooked a couple of potato chips. The liver was so
filling that I only ate about 6 ounces of the 10 ounces I prepared.
For a late snack, I made some more Mae Ploy noodles
like I described yesterday.
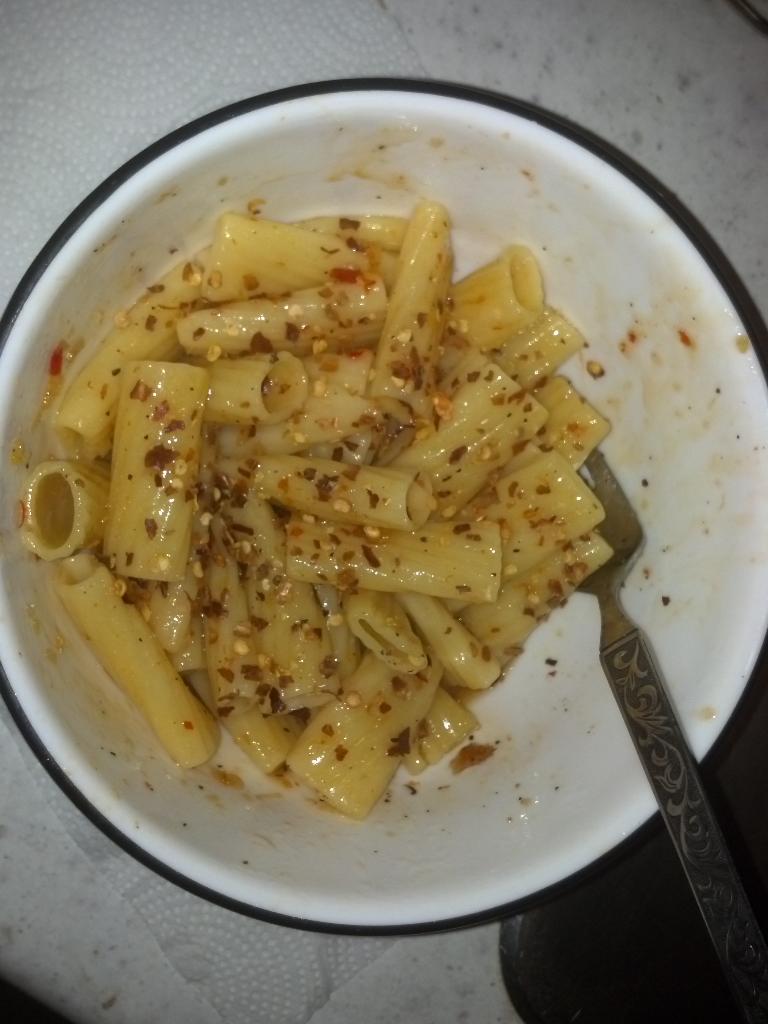
The red pepper flakes came with a pizza that I had some time in the past.
Daily total: $1.50.
Thoughts
- I remembered to weigh the Mae Ploy today; it was 2.6 ounces which cost
$0.49 at my estimated cost. That’s quite expensive. Even more expensive
than I thought. - The Corn Flakes stayed on the livers quite well. Unfortunately, after
cooking the first batch, they burned quite badly in the oil so I had to
strain them out. I don’t know how they’d fare in a deep-fryer.
Day 32 Costs
| Item | Cost |
|---|---|
| Chicken Livers (price for 10 oz) | |
| Chicken Livers, (10 oz @ $1.69/(20 oz)) | $0.84 |
| 1 Egg | $0.08 |
| Milk, 2 floz | $0.03 |
| Flour | $0.03 |
| Spices (est.) | $0.10 |
| Lard | $0.06 |
| 10 oz subtotal | $1.14 |
| 6 oz subtotal | $0.68 |
| Fried Potatoes | |
| Potatoes, ~4 oz | $0.10 |
| Vegetable oil | $0.02 |
| Potatoes subtotal | $0.12 |
| Pasta w/Mae Ploy | |
| Rigatoni, 8.5 oz cooked | $0.19 |
| Mae Ploy Sweet Chilli Sauce, 2.6 floz @ ($1.96/(10 floz)) | $0.49 |
| Butter, 2 tablespoons | $0.12 |
| Mae Ploy Noodles subtotal: | $0.70 |
| Daily Total | $1.50 |
Since I had some cooked chicken livers left over from yesterday, I had them
and some more inexpensive macaroni and cheese for dinner. (I got it at
$0.25/box earlier). Later, I had a big bowl of oatmeal.
Since I was still at only $1.02 for the day, I made myself a dang
quesadilla (shredded cheese microwaved on a flour tortilla) and had 3.8
ounces of the big summer sausage I got for the amazing price of $1.00 for
21 ounces. Daily total: $1.41. Liver is quite filling and satisfying!
Day 33 Costs
| Item | Cost |
|---|---|
| Chicken Livers (price for 10 oz) | |
| Chicken Livers, (10 oz @ $1.69/(20 oz)) | $0.84 |
| 1 Egg | $0.08 |
| Milk, 2 floz | $0.03 |
| Flour | $0.03 |
| Spices (est.) | $0.10 |
| Lard | $0.06 |
| 10 oz subtotal | $1.14 |
| 4 oz subtotal | $0.45 |
| Macaroni & White Cheddar | |
| 1 Box Wild Harvest Mac & Cheese | $0.25 |
| 1/2 cup milk | $0.06 |
| 2 tablespoons butter | $0.12 |
| Mac & Cheese total batch subtotal: | $0.43 |
| 2/3 portion subtotal: | $0.29 |
| Oatmeal | |
| Oatmeal, 0.57 cup (uncooked volume) | $0.14 |
| Milk, 1/4 cup | $0.05 |
| Brown sugar, 3 tablespoon | $0.09 |
| Oatmeal subtotal: | $0.28 |
| Quesadilla | |
| Flour tortilla | $0.08 |
| Cheese, shredded, 20 g @ ($2.88/lb) | $0.13 |
| Quesadilla subtotal: | $0.21 |
| Summer sausage, 3.8 oz @ $1.00/(21 oz) | $0.18 |
| Daily Total | $1.41 |
I still had chicken livers left over (20 ounces goes a long way!) so I
decided to finish them off and try to simplify my spicy liver recipe a bit.
(I’m not using my own kitchen for most of the next week or two, so I have
limited ingredients and utensils.) There were 3 or 4 parts that caused
a hassle, created a mess, added cost, and added time. I removed these from
the list:
- Soaking the livers in milk.
- Dredging the livers in flour.
- Waiting 5+ minutes for the flour to get gummy.
- Crushing up Corn Flakes.
Instead, I just rinsed the livers in water, put some black pepper on them,
dunked them in a mixture of 1 egg and 2 floz of milk, dredged them
in some panko bread crumbs, and put them immediately into a frying pan with
a bit of oil. (Again, panko are a Japanese style of bread crumbs which are
light but crisp.)
These came out quite nice. The recipe was much simpler, and they were my
favorite so far.
Oh, I didn’t mention that I dipped each nugget into some of the
hot chicken sauce from day 19! That made them amazing.
Cooking the livers a bit longer reduced a bit of the liver flavor. Simply
rinsing in cold water worked just as well as soaking in milk. The best
liver I’ve made so far. Panko bread crumbs are great; they added a nice
crispness and were very simple. I had Kikkoman brand on hand, which are
great. See below for the price difference between panko and Corn Flakes.
I ate somewhere around 10 oz (probably a bit less) of livers and was quite
satisfied.
Later, I made a batch of rice in the slow cooker. The largest batch it
could accommodate was about 1.5 cups of rice and 3 cups of water. It takes
about 2 hours for the rice to get done at this altitude and with that slow
cooker. Since I didn’t bring butter or spices with me, I had to
compromise. I had a bit of the spicy lard sauce that I used for the livers
left over, so I added about a tablespoon of that to the batch. It was
enough to give the rice a bit of flavor. Daily total, $1.67.
Thoughts
- Either I’m getting more used to the liver taste, or I’m getting better
at making it. I didn’t even think “liver” while I was eating it. I just
thought “yum.” - As I’ve mentioned before, liver is very filling. That 20-oz tub that I
bought lasted for 3 days and made very nice meals. - I think that a nice crispy coating really complements liver. When I
used to cook cow liver, I never breaded it. This is much better. - Are Corn Flakes much cheaper than Panko? Here are the Walmart prices
per ounce:Item Cost, cents per ounce Kellogg’s Corn Flakes, 12 oz box 21.0 Kellogg’s Corn Flakes, 18 oz box 16.3 Kellogg’s Corn Flakes, 24 oz box 15.3 Great Value Corn Flakes, 18 oz box 11.0 Great Value Panko, 8 oz box 16.0 Kikkoman Panko, 8 oz box 18.5 Dynasty Panko, 8 oz box 25.0 Progresso Panko, 8 oz box 28.5 Kellogg’s Corn Flakes Crumbs, 21 oz box 18.9 Did you notice that last entry? When I was looking up prices, I saw that
you can get Kellogg’s Corn Flake Crumbs already crushed up. If
you want to go the Corn Flake route, they’re not much more expensive than
crushing up your whole Corn Flakes.I haven’t tried the Great Value brand Panko (and I didn’t notice them at
the store.) I like the Kikkoman brand a lot. It’s good to know that
it’s not significantly more expensive than using Kellogg’s Corn Flakes. - Hmmm… as I was mentioning “light but crisp,” I need to think about
Rice Krispies next time. They have a great light texture, and you probably
wouldn’t need to crush them up. I don’t know how they’d hold up to getting
moistened or to sustained frying. I seem to recall my mom making Rice
Krispie chicken as well as Corn Flake chicken. I’ll have to ask. - Shopping Tip: Walmart is pretty good at marking the price per
ounce by each item (or price per pound for most meats). I try to buy
things that are 12.5¢ per ounce or cheaper (which corresponds to
$2.00 per pound) which allows me 1.25 pounds of food a day. - Rice is one of the most inexpensive foods you can buy. The 3 pound bag
that I bought was 3.1 cents per ounce. I didn’t bring a scale with me,
but the Food density database gives the density of raw white
rice as 0.82 g/ml so I estimated the total rice cost at $0.36. I ate 1/3
of it. - Rule of thumb: 1 cup of raw rice costs $0.25. This makes about
3 cups of cooked rice. - Reheating the hot chicken sauce (which is basically lard, brown sugar,
cayenne pepper, and garlic powder) doesn’t really work well in the
microwave. That’s because when lard is rendered, almost all of
the water is driven out of it. (This is a big part of the reason you don’t
even need to refrigerate lard; there’s no water for bacteria to grow in!)
However, microwave ovens are designed to work at a resonance frequency of
water molecules (approximately 2.4 GHz.) They don’t heat up lard very
efficiently. Microwaves heat up the water in your food, which in turn
heats up everything else. So I added a little bit of water to the sauce
(which starts out solid) before microwaving it carefully! Very
carefully! Water turns into steam at temperatures where oil is still very
much liquid, and that can literally explode through and disperse
the oil that floats on top into the water.
Day 34 Costs
| Item | Cost |
|---|---|
| Chicken Livers (price for 10 oz) | |
| Chicken Livers, (10 oz @ $1.69/(20 oz)) | $0.84 |
| 1 Egg | $0.08 |
| Milk, 2 floz | $0.03 |
| Spices (est.) | $0.10 |
| Panko, Kikkoman brand, ~1.5 oz | $0.28 |
| Lard | $0.06 |
| 10 oz subtotal | $1.39 |
| 1 small banana @ $0.54/lb | $0.16 |
| Rice, 1.5 cups raw | $0.36 |
| Rice, prepared | $0.12 |
| Daily Total | $1.67 |
For breakfast, I had a small banana ($0.16). Lunch was 2 tuna sandwiches
($0.85) and a bowl of ramen with bok choy ($0.40).
I had a Banquet Chicken Fried Chicken frozen dinner (with mashed potatoes
and corn.) It was okay, and for $0.75, I can’t complain. (I got these a
few weeks before at Albertson’s for a “buy 10 items for $0.75” promotion.
I also had 1/2 of a grapefruit ($0.21) and some more of the rice I cooked
the night before ($0.12). Daily total: $2.49.
Thoughts
- At this time of year (the week before Easter,) ham is usually on sale.
I saw an Albertson’s coupon for ham at the excellent price of $0.97/lb.
However, these are usually big, unsliced hams. I’d have a hard time eating
it all by myself, so I would have to butcher it and freeze part of it.
This is hard to do if it’s already frozen solid! - Albertson’s has their good deals again this week. I’ll likely go
shopping soon. The most important deal might be ground beef at $2.49/lb
with a coupon. I’m craving a hamburger.
Day 35 Costs
| Item | Cost |
|---|---|
| Banquet Chicken Fried Chicken meal | $0.75 |
| Ramen with Bok Choy | |
| Ramen | $0.20 |
| Bok choy, 3.2 oz | $0.20 |
| Soup subtotal | $0.40 |
| Rice | $0.12 |
| 1 small banana @ $0.54/lb | $0.16 |
| 2 Tuna Sandwiches | |
| 4 slices white bread | $0.23 |
| Tuna, 1/2 can | $0.38 |
| Mayonnaise, 2 oz | $0.24 |
| 2 Sandwiches subtotal | $0.85 |
| 1/2 grapefruit | $0.21 |
| Daily Total | $2.49 |
I had a quick lunch of 2 tuna sandwiches ($0.85). I also had a big glass
of Squirt soda. ($0.21)
Since I had been craving a hamburger, I had a cabbage roll for dinner (see
day 2) for $0.47. I’ll say it again that making a huge
batch of these was a great idea. I also had 2.4 ounces of cottage cheese,
1/2 grapefruit, and a half portion of rice.
Since I was only at $1.99 for the day, I had a late-night snack of two
cheap hot dogs on white bread for a cost of $0.30. Oh, and a bit of
kimchi. Daily total: $2.41.
Thoughts
- Soda is quite expensive, but 2-liter bottles are pretty efficient. The
bottle of Squirt was $0.88, so 12 fluid ounces of this (the size of a
typical soda can) would cost about $0.16. - I drove past every fast food place in the world today. I’d like to do
a day or two where I just eat fast food and see if I can make ends meet. - I was going to research value menus at fast food restaurants, but found
an article called “How to Eat at McDonald’s When You’re Monumentally Broke”. They break the foods down by both price/mass and price/calories. The winner for dinner is probably the McDouble burger for $1.00 which gives 390 calories. The sausage biscuit gives 430 calories for $1.00 for breakfast. - Here’s also a partial breakdown for Burger King. Their
calories-per-dollar winner appears to be the Chick’N Crisp sandwich (which
I’ve never had) which gives 470 calories for its price of $1.00. - I love Burger King’s double cheeseburgers for $1.49, but even those are
a bit too expensive for me for this experiment. I can still eat 3 of my
own cabbage rolls for that cost. - How much does it cost me to make a burger? I’ll have to see. I have a
simple, foolproof recipe that I like to make for little burgers. - The cheap hot dogs tasted quite good. Walmart’s Great Value brand
white bread has an excellent texture and was soft and fresh.
Day 36 Costs
| Item | Cost |
|---|---|
| 2 Tuna Sandwiches | |
| 4 slices white bread | $0.23 |
| Tuna, 1/2 can | $0.38 |
| Mayonnaise, 2 oz | $0.24 |
| 2 Sandwiches subtotal | $0.85 |
| Squirt, 16 floz @ ($0.88/(2 liters)) | $0.21 |
| 1 Cabbage Roll | $0.47 |
| Cottage Cheese, 2.4 oz @ ($1.25/lb) | $0.19 |
| Rice | $0.06 |
| 1/2 grapefruit | $0.21 |
| Cheap Hot Dogs (price per hot dog) | |
| 1 Hot Dog, Bar S @ (8 dogs/ $0.75) | $0.09 |
| White Bread, 1 slice | $0.06 |
| Completed hot dog (1) subtotal | $0.15 |
| 2 hot dog subtotal | $0.30 |
| Homemade Kimchi | $0.12 |
| Daily Total | $2.41 |
For breakfast, I had a quick banana.
Split Pea Soup
I wanted to make something that would
last for several days, so I made a gigantic batch of split pea
soup. Like more than 3 gallons of it! Split pea soup is one of my
favorite soups. Unfortunately, I didn’t find split peas on sale (they were
actually quite expensive most places I’ve seen in the past month) but
Walmart had them for $1.37/lb.
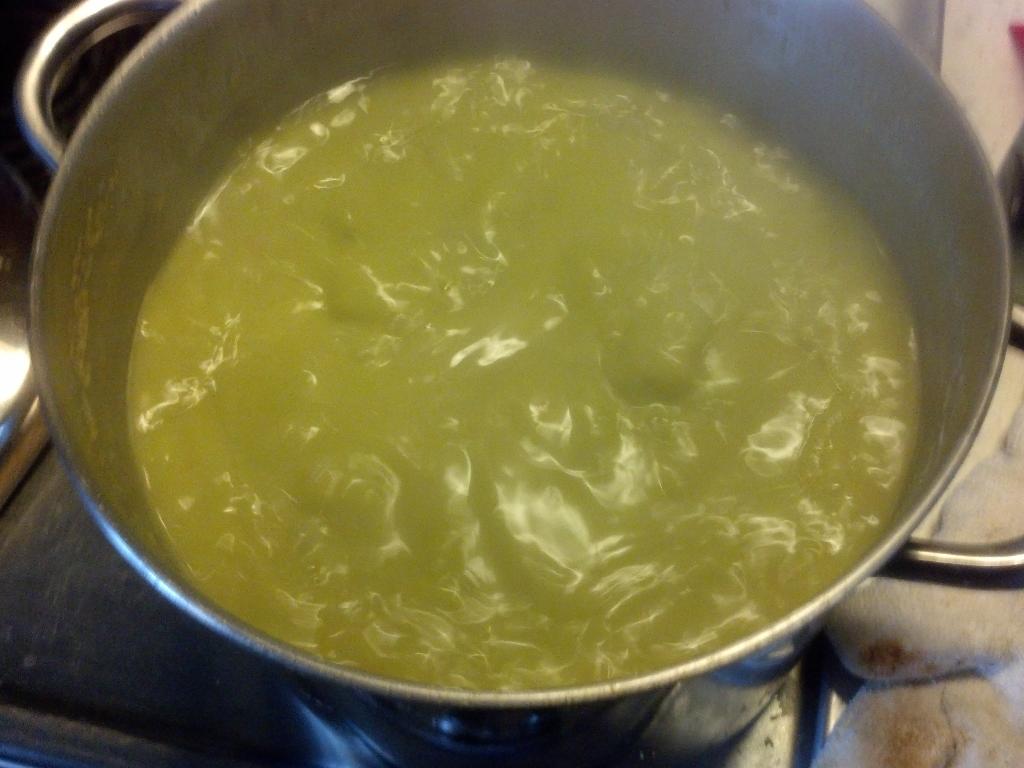
Here is the basic ingredient list for a gigantic pot of split pea soup.
(The recipe actually comes from the back of a package of Hurst’s HamPeas.) I didn’t use their peas, (sorry, guys) but they come with a little packet of artificial ham flavor. You will need a huge stockpot.
- 12 quarts water
- 4 medium onions, shredded
- 4 medium carrots, shredded
- 5 pounds dry split peas
- 1/2 lb butter
- 1 teaspoon baking soda (optional)
- Salt and Pepper to taste
Bring the water to a boil, and add the rest of the ingredients, cover, and
boil until the peas are broken down. (Your boiling time will be different
than mine as I live at an altitude of over 5600 feet, so water boils at the
lower temperature of 204°F (95°C), and boiling dry beans and peas
and pasta takes significantly longer.) You will need to boil it for at
least an hour. For me, it takes at least an hour and a half.
Stir frequently.
Tip and Warning 1: Based on a suggestion from the people at
Cook’s Illustrated, baking soda can help reduce cooking times for beans and
lentils by helping to break down the skins. I added the baking soda
early in the process, and it immediately started to make the soup foam,
which progressively got worse until it boiled over and I had to lift it off
the heat. Ugh. I too-late tried the home-beer-brewer’s trick of spraying
the foam with a sprayer bottle of water, but the foam was too active and I
was too late. Be prepared for boilover. Luckily, after the protein foam
boils off or is skimmed off, you’re okay for the rest of the boil.
Tip and Warning 2: Keep stirring! And keep boiling! While the
recipe on the HamPeas bag tells you to reduce the heat and simmer after 30
minutes, I have found that unless you keep up the convection of an actively
rolling boil, your soup tends to stick to the bottom of the pan and burn.
I burned a giant batch of this soup last year while doing this experiment.
That was not fun. (I’ll note that adding some peanut butter to the soup
reduced the burnt flavor.)
The whole enormous batch of split pea soup (and believe me, it is
enormous,) cost about $9.07 for about 53 cups. That’s a price of
$0.17/cup. I ate 3 cups with dinner, and then, when trying to find enough
space to store it all, ate 2 more cups.
Fish Tacos
To go along with the soup for dinner, I made some simple fish tacos. The
cheapest fish that I saw was a bag of frozen Whiting, for about $2.80/lb.
While the soup was cooking, I cooked the fish in a glass dish with some
oil, vinegar, water, and spices in a toaster oven at 300°F (150°C).
It took about 20 minutes. The texture of the fish was nice, but it really
smelled and tasted fishy! Some of the fishiest fish I’ve ever had.
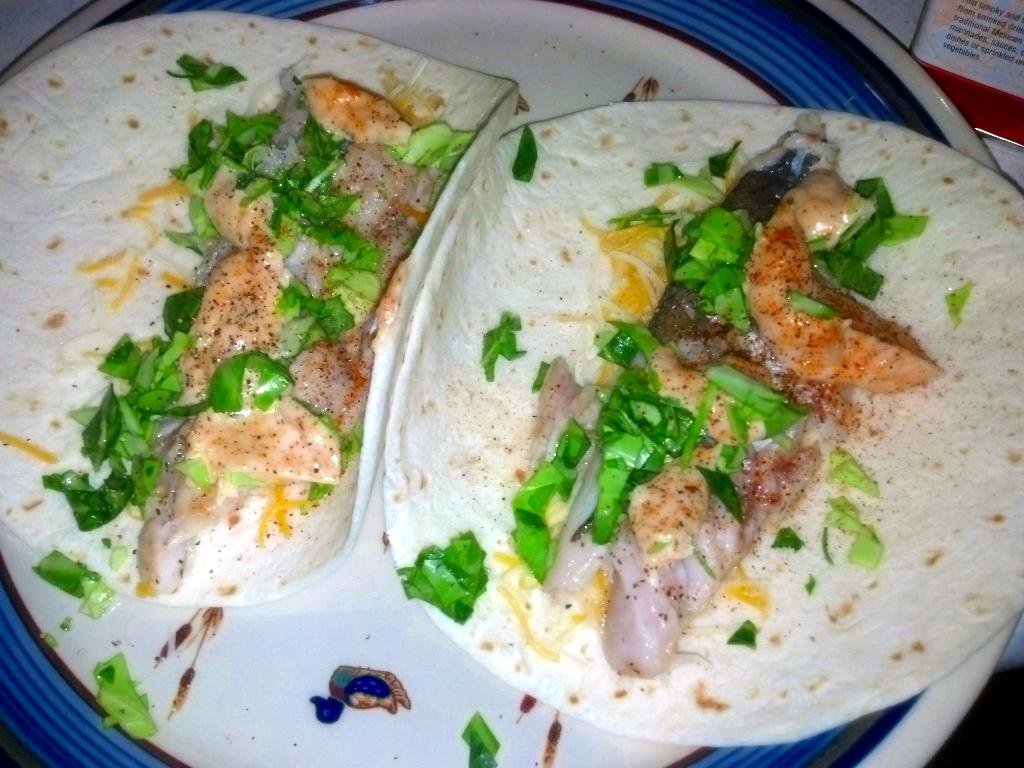
I also made a mayonnaise-based sauce to go on the fish tacos. This was
mayonnaise, a bit of citric acid powder (to make it taste lemony without
watering it down too much,) garlic powder, paprika, chili powder, and salt.
This was a quite nice sauce which hid most of the fishy taste.
I didn’t brine the fish or remove skin first; this may have helped to
reduce fishy taste.
The tacos also had a small bit of cheese and some cabbage. The cost of 2
tacos was $0.85, with $0.65 of that being due to the fish.
Oh, and there was also a batch of brownies! A box of brownie mix was
$0.99.
Thoughts
- Campbell’s Split Pea soup, prepared, costs about $0.62/cup compared to
the $0.17/cup that my soup costs. A real savings. I can eat 3.6 times as
much for the same price. - I usually use chicken bouillon when making this soup, but I eliminated
it to try and save a bit of money. See my tips for buying cheaper
bouillon in the Buying Spices section. - I didn’t use ham in my soup. Right now (around Easter) ham is often on
sale, but I’d rather have it on the side, and I think that the soup lasts
longer without the ham. - I froze several containers of soup, as it freezes and reheats very
well.
Day 37 Costs
| Item | Cost |
|---|---|
| 1 small banana @ $0.54/lb | $0.16 |
| o |
|
| Split Pea Soup, ~12 quart batch | |
| Carrots, 6.55 oz | $0.30 |
| 3 Onions, 16.60 oz | $0.92 |
| Dry Split Peas, 5 lb | $6.85 |
| Butter, 1/2 lb | $1.00 |
| Full batch subtotal, approx 53 cups | $9.07 |
| 1 cup subtotal | $0.17 |
| 5 cup subtotal | $0.85 |
| Fish Tacos, 2 tacos | |
| Fish, Whiting 3.7 oz @ ($6.99 / (40 oz)) | $0.65 |
| Cabbage | $0.02 |
| 0.5 oz cheese at $2.88/lb | $0.09 |
| 2 6″ flour tortilla | $0.15 |
| Mayonnaise, 0.75 oz | $0.09 |
| 2 taco subtotal | $1.00 |
| Brownies, 1 batch | |
| Brownie Mix, Pillsbury Chocolate Fudge | $0.99 |
| Oil, vegetable, 2/3 cup | $0.24 |
| 2 Eggs | $0.16 |
| Brownie 1 batch subtotal | $1.39 |
| Brownie, 1/15 batch subtotal | $0.09 |
| Squirt, 16 floz @ ($0.88/(2 liters)) | $0.21 |
| Daily Total | $2.31 |
For breakfast, I had a huge bowl of oatmeal. Monkey
oatmeal!

However, the big excitement for the day was that I had some incredibly
cheap chicken thighs that I was going to fry for real buttermilk fried
chicken!
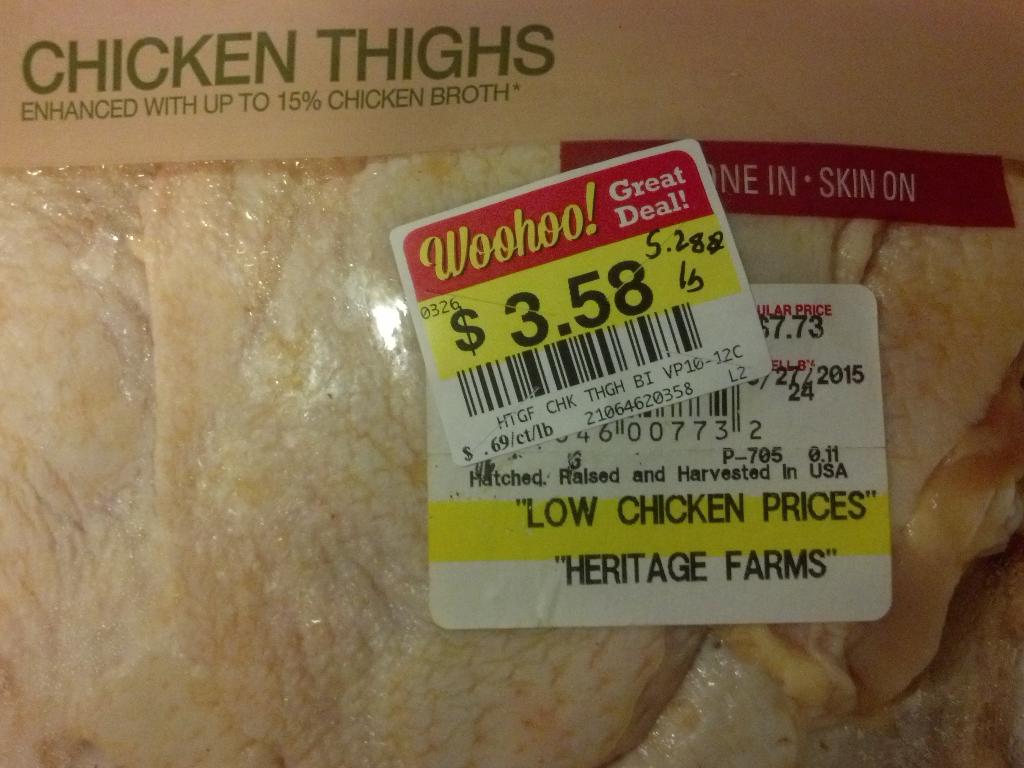
Woohoo! Expired meats! Okay, they weren’t expired at all, but rather put
on even deeper discount because the “sell by” date was the next day. The
price was $3.58 for almost 5.3 pounds of chicken thighs; this is $0.68 /
lb, the cheapest meat I’ve found so far! And that includes bologna or hot
dogs! That’s only $0.36 per thigh.
Surprisingly, I was walking by the dairy case and there was a carton of
buttermilk that was similarly discounted; $1.10 for a quart of buttermilk.
(It usually costs at least twice that.) So, for the first time in my life,
I decided to make real buttermilk fried chicken. 7 of the 10 pieces of
chicken went into buttermilk in the refrigerator overnight. I also added a
good amount of salt to the marinade.
A book that I recently bought, and I really like, The Science of Good Cooking, found that it was
necessary to use buttermilk and a large amount of salt when
marinating for fried chicken. The lactic acid in the buttermilk helps to
tenderize the meat, and the salty liquid acts as a brine to add moisture to
the meat.
I seasoned the meat with a bit of my spice rub and then dredged it in
flour with 1.5 teaspoons of baking powder. The baking powder produces
gases in the hot oil, which will make the breading light and crunchy. I
let the flour sit on the chicken for 5 minutes to get sticky and gummy, and
then back into the buttermilk and back into the flour.
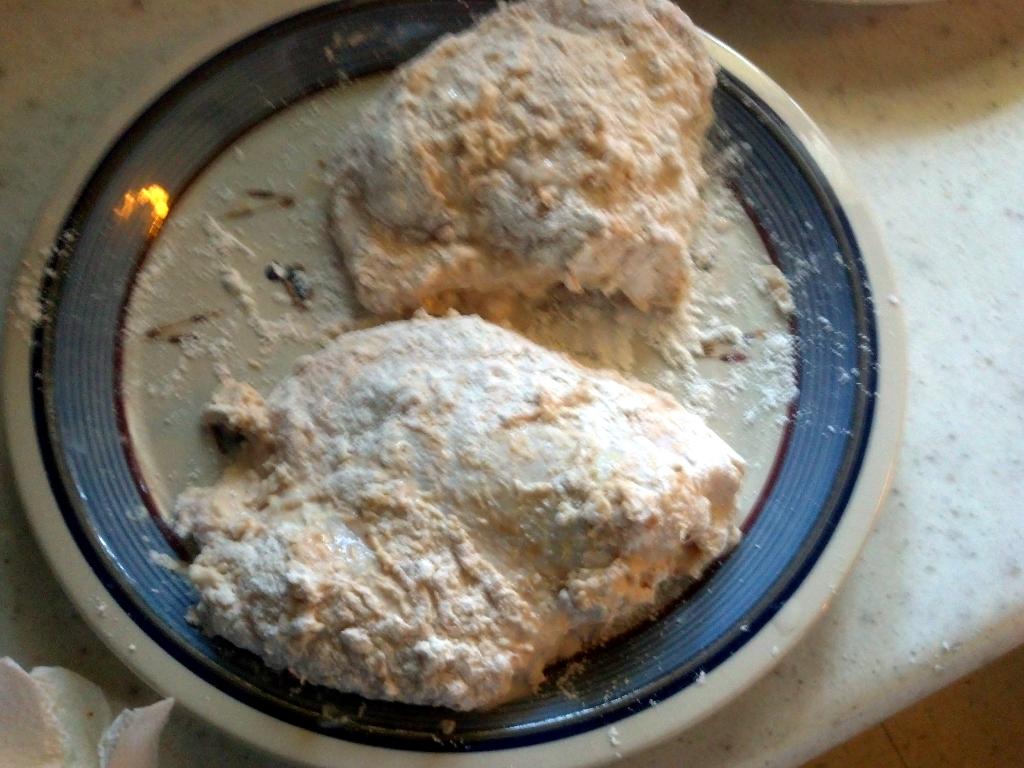
Then, into the deep fryer at 325°F (160 °C) for 20 minutes.

The chicken came out quite a bit darker than the chicken that I cooked the
other day. I could have had the thermostat set a little higher. The other
option is that I added a bit more oil to the deep fryer. Perhaps the
larger volume kept the temperature from dropping as much when the chicken
was added. I also refrained from doing the double dredge for the last
pieces, as the breading was huge on the first few pieces.
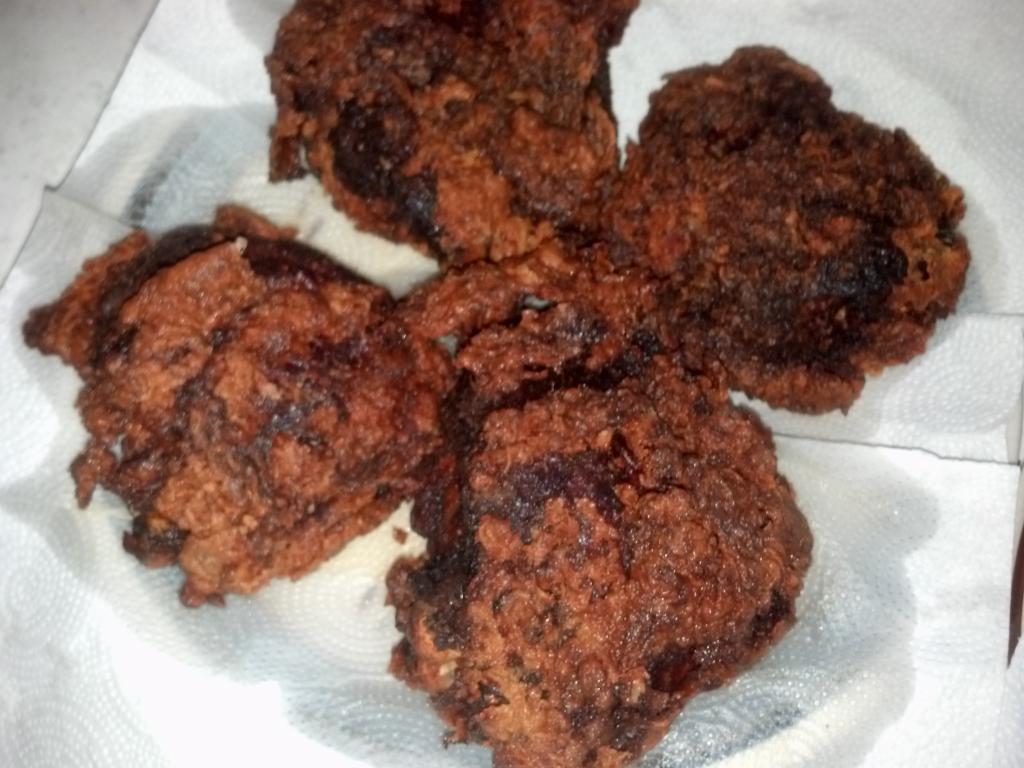
The tragedy of this whole story is that, because it’s a Friday during Lent,
I chose not to eat the chicken that day! However, since I’m not going to
in my own kitchen for a while, I have lots of good chicken to eat!
Instead, for dinner, I had two cups of split pea soup and a small frozen
bean and cheese burrito. I also had a couple of brownies that a friend
gave to me.
Thoughts
- Although that may look like a fancy deep-fryer, I got it on
clearance a few years ago from Wal-mart at $19.99. It works well but is a
bit of a pain to clean. - I should probably reduce the cooking time for the chicken. It’s hard
to know when it’s done inside, though. These are big thighs.
Each averaged over 8 ounces. - Split pea soup is good hot, warm, or at room temperature. When it gets
cold, though, it congeals into a slippery-smooth mass.
Day 38 Costs
| Item | Cost |
|---|---|
| Oatmeal | |
| Oatmeal, 0.6 cup (uncooked volume) | $0.14 |
| Milk, 1/4 cup | $0.05 |
| Brown sugar, 1 tablespoon | $0.03 |
| Oatmeal subtotal: | $0.22 |
| Split Pea soup, 2 cups | $0.34 |
| Frozen burrito | $0.25 |
| Daily Total | $0.81 |
For lunch I finally had a piece of the fried chicken (cold.) It was quite
good! It probably cooked a bit too long, as the breading had a bit of an
overcooked taste. Overall, good, though! I could have used a bit more
seasoning in the flour itself. I forgot to put salt in the flour.
I also had a piece of bread and a couple (free) brownies.
Overall, though, I was saving space for all-you-can-eat sushi that night.
That was a social event so, according to my rules, I won’t count it. I
expected that I would eat two tons of sushi, but I guess my stomach has
shrunk and I only ate one ton.
Thoughts
- With a coupon, all-you-can-eat sushi and beverages was less than $25
per person, which is a great price for all-you-can-eat sushi, especially
when you can have anything from the menu, but one meal costs more than 10
days of food on this experiment. - I also stopped at an Indian market next to the sushi place and got a
few spices and dried beans.
Day 39 Costs
| Item | Cost |
|---|---|
| Fried Chicken (prices are for 1 piece) | |
| 1 Chicken Thigh | $0.36 |
| Flour | $0.03 |
| Spices (est.) | $0.03 |
| Buttermilk | $0.10 |
| Fried chicken subtotal | $0.52 |
| White bread, 1 slice | $0.06 |
| Daily Total (excluding sushi) | $0.58 |
For lunch, I had a bologna sandwich (the first I’ve had in about 30
years). I have to say that it wasn’t great. It was cheap ($1.00/lb) but,
geez, the fried chicken that I made was even cheaper than that. With a bit
of planning, I could do much better. I didn’t have any lettuce or cabbage
or horseradish or cheese. It was just white bread, bologna, mayonnaise,
and mustard. It wasn’t very tasty. The split pea soup was good, though!
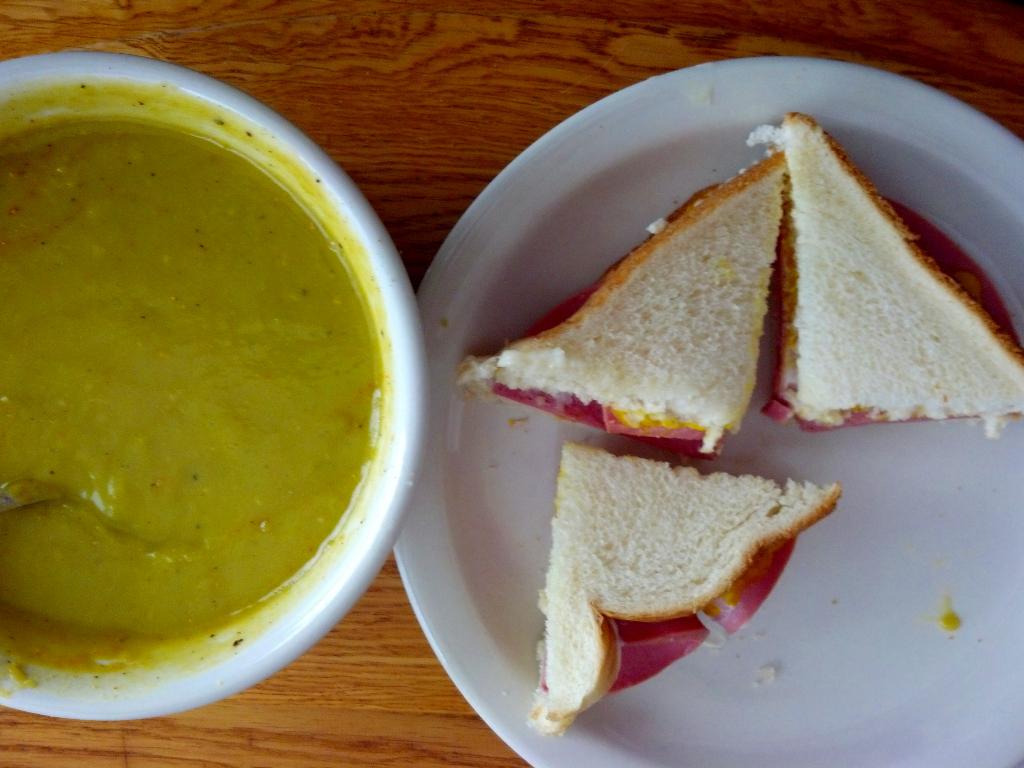
I am now ready to admit that I definitely overcooked the breading
on the chicken. I actually picked some of it off and didn’t eat it. And
crispy chicken skin is one of my favorite things in the world. Nothing
makes me feel like I’ve failed like overcooking and ruining good food. I’m
still surprised that the chicken I cooked on day 14
and day 19 was cooked at supposedly the same
temperature and for the same amount of time, but was cooked properly. I’m
still trying to figure that one out. Next time, I won’t rely primarily on
a timer, but watch the chicken more carefully.
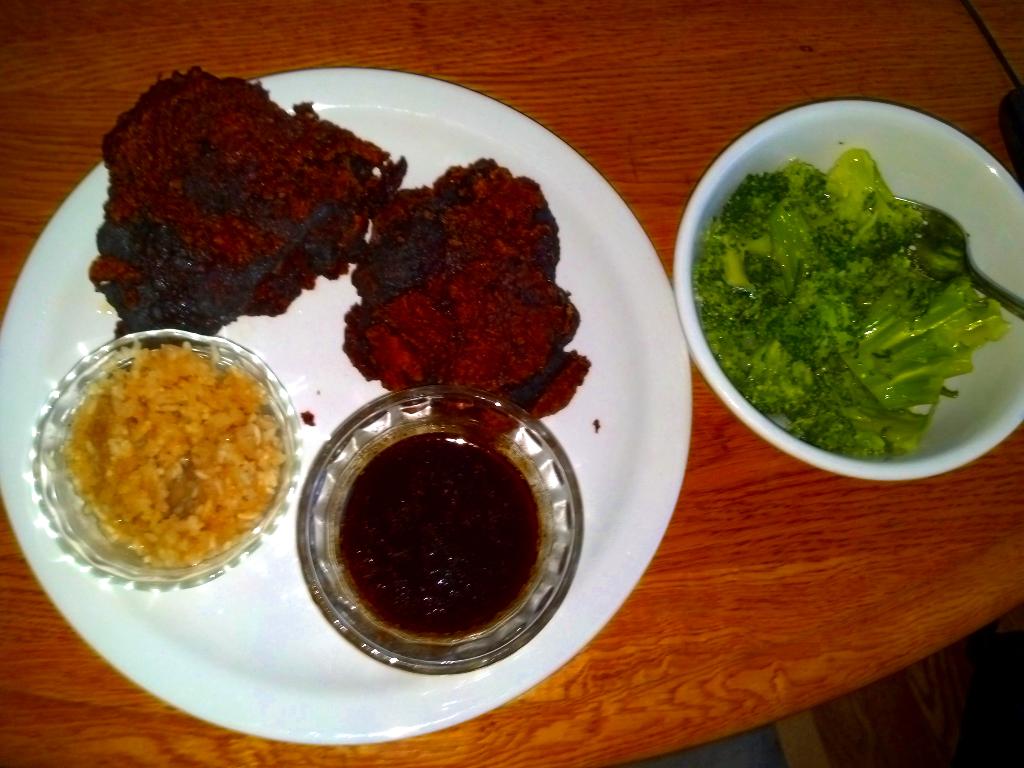
That evening, I had another bowl of split pea soup. It’s good at any
temperature!
Day 40 Costs
| Item | Cost |
|---|---|
| Bologna sandwich | |
| White bread, 2 slices | $0.12 |
| 2 slices bologna @ ($1.00/(13 slices)) | $0.15 |
| Mayonnaise, 0.75 oz | $0.09 |
| 1 sandwich subtotal: | $0.36 |
| Fried chicken, 2 pieces | $1.04 |
| Broccoli, ~6 oz @ $1.00/lb | $0.37 |
| Split Pea soup, 3 cups | $0.51 |
| Rice, prepared | $0.06 |
| Daily Total | $2.34 |
I skipped breakfast and lunch, but had two pieces of my dark fried chicken
and broccoli for dinner. Those are big pieces of chicken!
Later, I had a big bowl of split pea soup. It’s an easy, quick meal!
Day 41 Costs
| Item | Cost |
|---|---|
| Fried chicken, 2 pieces | $1.04 |
| Broccoli, ~5 oz @ $1.00/lb | $0.31 |
| Split Pea soup, 2 cups | $0.34 |
| Daily Total | $1.69 |
I looked at my cheap leftover ingredients which included: chicken thighs,
potatoes, canned tomatoes, and buttermilk. So I decided to make chicken
tikka masala! I bought all of these ingredients on deep discounts, so it
should be very cost-effective!
Do you eat a lot of chicken tikka masala? Do you see it a lot? It is
literally the most popular restaurant dish in the U.K.
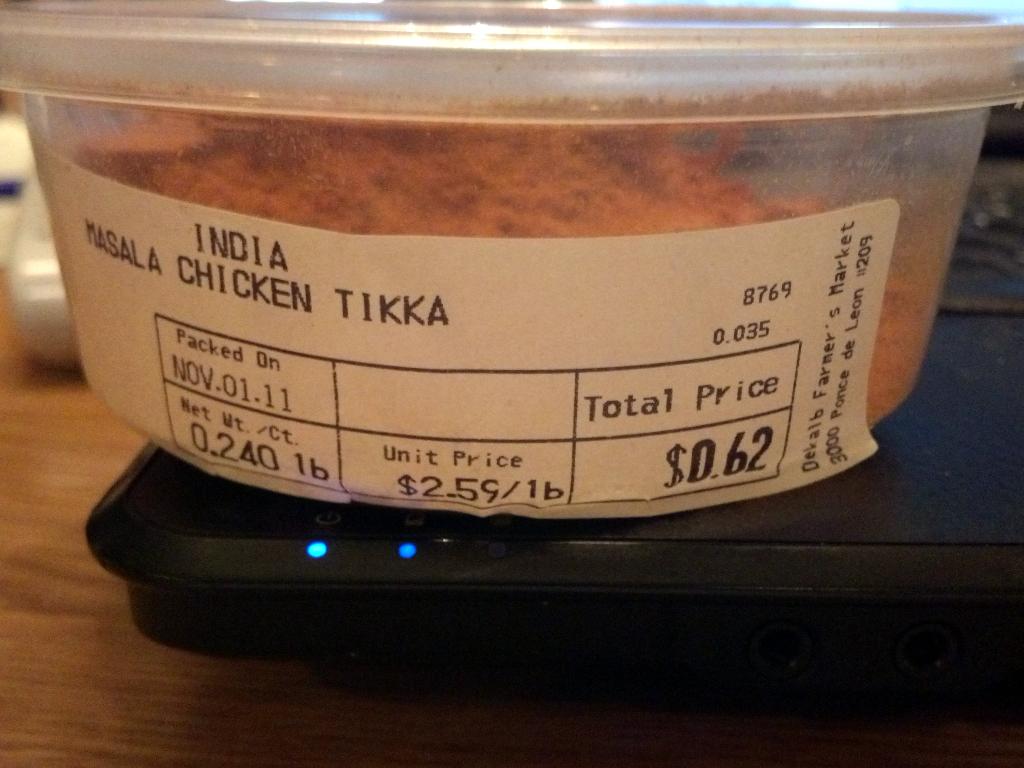
I’ve had a quarter-pound tub of pre-mixed tikka masala spices that I bought
about 3 years ago when visiting the amazing Dekalb Farmer’s Market in
Decatur, Georgia. (Thanks for taking me, Ann!). The whole tub of spices
only cost $0.62, which is an incredible deal (especially when you compare
it to a jar of premixed tikka masala sauce, which is expensive.) I ended
up using about 1/3 of the tub.
I peeled, diced, and boiled 4 small potatoes (approx 1 lb.) While the
potatoes were boiling, I fried 3 chicken thighs in a pan with some oil,
then boned them when they were just barely cooked, and finished cooking
them through in the pan. I also cut and fried an onion.
Tikka masala is usually made with yogurt, but I had cheap buttermilk that
smelled great, so I decided to use that instead. I also put in two cans of
diced tomatoes that I had bought for $0.50/can. As it cooked, I spooned in
spoonful after spoonful of tikka masala spices until the level of spice was
right. I also thought it needed some acid, so I added about an ounce of
lemon juice (from a bottle.) It wasn’t quite as creamy as I’d like, so I
found the end of a tub of Greek yogurt (Great Value brand, ~3 oz) and added
that.
I then added the cooked, drained potatoes, fried onion, and the cooked
chicken to the pot and let it just simmer for a few minutes. (You don’t
want to overcook the chicken. Chicken thighs are cooked right at around
161°F (72°C). It also needed a bit of salt. I also added the oil
from cooking the chicken to the pot for a bit of richness (and calories,
and not wasting food.)
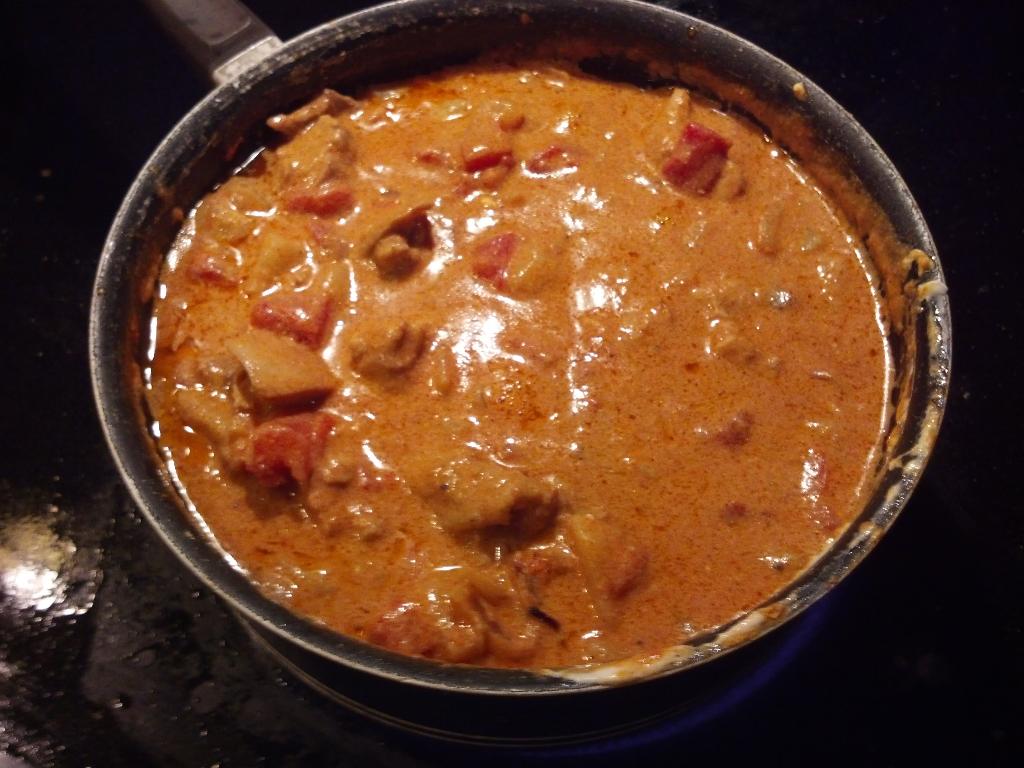
That’s a big pot of Tikka Masala! Probably about 3 quarts. And very
inexpensive. The whole pot cost about $3.83, and I probably only ate about
1/4 of it.
I had also made some rice in the crock pot. I let it go too long as it was
very mushy. But you gotta serve tikka masala on rice!
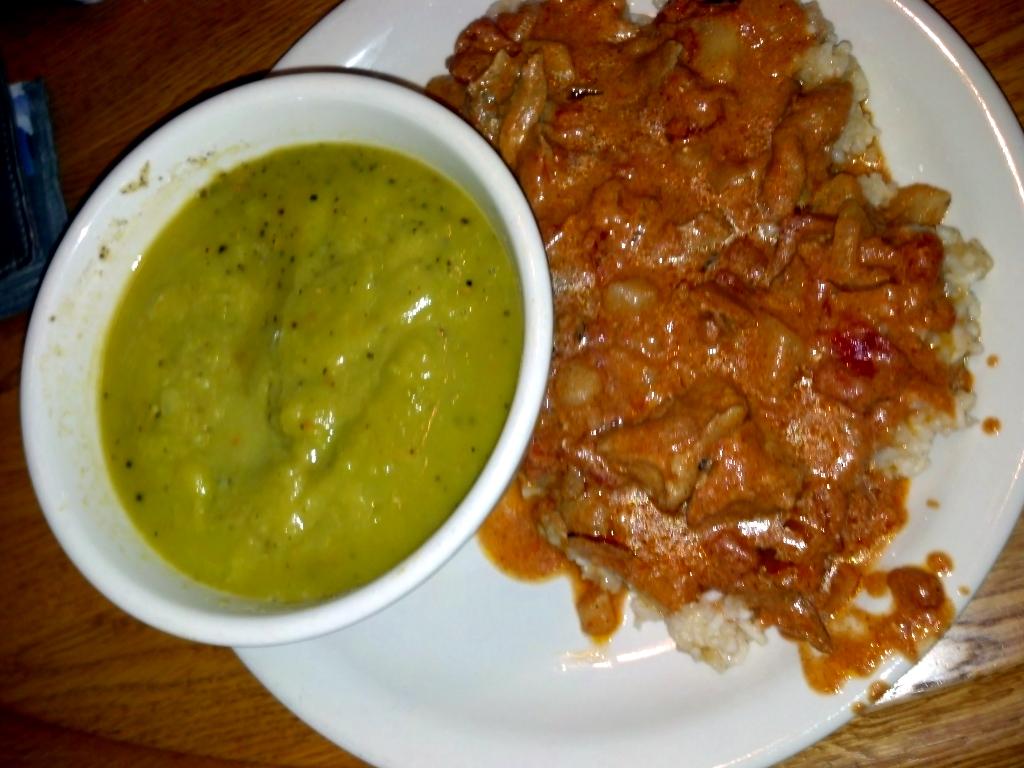
The tikka masala came out great! The spice mix was very nice and I’m glad
I finally got to use it (after 3 years.) I probably only ate about 1/4 of
the tikka masala, which should last about 3 or 4 meals! A great
combination of inexpensive ingredients came together to make a great meal.
Lots of protein, lots of flavor, lots of complexity. A great deal, too!
It might even last me through the end of this experiment (although I
generally don’t like chicken after about 3 days.)
I ate two big servings of the chicken tikka masala, rice, and a bowl of
split pea soup. I also had a free brownie. Late that night, I had a cheap
($0.25) frozen burrito.
Daily total: $1.52
Thoughts
- The tikka masala would be good with some sour cream added, too. One of
my favorite dishes of all time is beef stroganoff, and it sort of reminded
me of that. I probably can’t afford to make beef stroganoff on this
budget (mushrooms are not exactly cost-effective, and that’s the best
part!) - I didn’t skin the chicken before frying it. I should have removed it
before adding it to the pot, but I was hungry and in a hurry. It didn’t
get crisp enough to be good. - Crispy chicken skins are one of my favorite foods. If you salt them
and bake them in an oven until they get crisp, they’re amazing. If I ever
start a restaurant, I’m going to give everyone a chicken skin chip when
they come in. They will buy more. - I’ve heard that a tiny bit of baking soda will help make chicken skin
brown and crisp better. I haven’t tried it, though. - I’m still offended by something that happened 20 years ago. I was at a
party, and someone stripped all the skin off of a roast chicken and
threw it away, assuming nobody would want it! Ah, Boulder. What an
offensive waste of food, though. Not preparing and eating chicken or
turkey skin correctly is a huge loss. You can render off most of the fat
if you want. - Every year, we have a party to deep-fry Thanksgiving turkeys. Turkeys
are cheap at that time, and the oil usually costs more than several
turkeys, so we invite everyone to bring their own turkey and fry it. The
skin is the best part. One of my friends ate most of the skin off of her
turkey, as it’s never as good the next day. That was the right thing
to do. - I’m glad that the tikka masala spice mix was good. Not too much of any
ingredient that disagree with me (like turmeric.) I made some achar
(Indian pickles) before the start of this experiment, and the spice mix
that I got was so unbelievably bitter with turmeric that it was
coming out of my pores and I had to throw most of it out. - The only thing that this meal needed was a nice crisp but moist piece
of naan (a crisp piece of indian bread.) If you’re out of naan, you can
toast a flour tortilla in a toaster oven. - Having a big batch of split pea soup is great. It’s incredibly
filling, cheap, delicious, and easy to reheat and enhance any meal. - If you’re ever in the Atlanta area, I recommend going to the Dekalb Farmer’s Market.
Everything about it is amazing. There were three things I wanted to wanted
to do in Atlanta:- Go to The Varsity and have a
hot dog (the Slaw Dog was my favorite; I was sorta disappointed by the
meat sauce on the chili cheese dog). Thanks for taking me, Ann! - Go to the Dekalb Farmer’s Market. It’s amazing. Thanks, Ann! I
always go to these incredible markets in distant cities (Uwajimaya in Seattle is another
favorite) and I’m sad that I can’t take most of the foods with me
because I don’t have a refrigerator or freezer. - Drive a Chrysler that’s as big as a whale. My rental car was
actually a Chrysler! (And my flight actually left from gate B-52 in
Denver!)
- Go to The Varsity and have a
Day 42 Costs
| Item | Cost |
|---|---|
| Tikka Masala (1 batch) | |
| Chicken thighs, 3 pieces | $1.08 |
| Potatoes, 1 lb @ $0.30/lb | $0.30 |
| 1 medium onion | $0.25 |
| Tikka Masala Spices | $0.30 |
| Buttermilk, 1/3 quart | $0.37 |
| Greek Yogurt, (Great Value brand, 3 oz) | $0.40 |
| Lemon juice, 1 oz | $0.08 |
| Diced tomatoes, 2 cans (14.5 oz, $0.50 each) | $1.00 |
| Oil | $0.05 |
| 1 pot subtotal | $3.83 |
| 1/4 pot subtotal | $0.96 |
| Rice | $0.06 |
| Split Pea soup, 1.5 cups | $0.25 |
| Frozen burrito | $0.25 |
| Daily Total | $1.52 |
Well, since I still had a ton of chicken tikka masala, rice, and split pea
soup, that became dinner. Later that night I had Second Dinner, which was
more tikka masala. I still have a lot of tikka masala left over.
I believe I overestimated how much tikka masala that I eat with each meal,
so I may go back and change my estimates. I’m not in my own kitchen, so I
don’t have a scale to easily measure. It goes a long way.
Thoughts
- Some just-warm split pea soup is a nice counter to a spicy dish. The
tikka masala isn’t too spicy, so I may want to add a bit more of the spice
to the remaining meals and see if I like it better hot.
Day 43 Costs
| Item | Cost |
|---|---|
| Tikka Masala, ~1/4 pot subtotal | $0.96 |
| Rice | $0.06 |
| Split Pea soup, 2 cups | $0.37 |
| Daily Total | $1.39 |
I still have a lot of chicken tikka masala and rice, so that was a quick
lunch. Today I ate the last of the split pea soup.
Although I have chicken tikka masala left over, frankly, I was getting
tired of it, so I had a Totino’s Party Pizza for dinner.
Thoughts
- I considered just trying to buy fast food today, but I have leftovers
that need to get eaten. - I’m getting very close to the end of this experiment! I can’t just
throw away leftovers after the experiment and be honest. So,
whatever I cook, I have to try and eat! - At some point, I miscalculated the number of days between the start and
end of this experiment, so I’m going to be doing this for 46 days, instead
of the 45 days that I’ve been saying.
Day 44 Costs
| Item | Cost |
|---|---|
| Tikka Masala, ~1/4 pot subtotal | $0.96 |
| Rice | $0.06 |
| Split Pea soup, 1 cup | $0.17 |
| Totino’s Party Pizza | $1.25 |
| Daily Total | $2.44 |
Since it’s Good Friday, I chose not to eat the chicken tikka masala, but
grabbed some quick fish sticks. It’s been a long time since I’ve had fish
sticks. I chose the package that had the most mass per dollar, which was
Van De Kamp’s crunchy fish sticks.
The fish sticks were good enough, but not very cost-effective. 11 very
small fish sticks was exactly 1/4 of the box, (about 6 ounces) and they
didn’t fill me up very much. Those 11 fish sticks cost $1.25. Not a very
smart purchase, but I was hungry and in a hurry. I should have followed my
first instinct and made tuna fish sandwiches. I considered making fish
sandwiches or fish tacos out of these, but, again, I’m not at home and
don’t have the ingredients on hand to make a proper sauce, so I just did
something quick. They were not on a good sale, either.
I also had an ordinary bowl of shrimp-flavored ramen. Nothing too
exciting.
Later that evening, I had the last of my broccoli with a bit of
cheese (which was an indulgence.) I have no idea how much the cheese cost
so I made an estimate of $7.00/lb. I could only do this because I was
still well under budget for the day. Cheese is expensive.
Thoughts
- Up until today, I had done a good job of shopping somewhat carefully
and with a plan. My choices today for fish sticks were not optimal. I
didn’t really try. Don’t shop hungry! Since I’m not at home, I didn’t
have any of my own food to fall back on. - It’s very clear to me from this experiment that the best way to eat
efficiently is to watch for items that are on deep discount, and plan your
meals around what’s available cheaply. - Walmart prides themselves on having low prices every day, and not
having sales on items. This is good for average day-to-day shopping, but
almost all of my good deals during this experiment were found from deep
discounts, primarily from Albertson’s. - Average prices and prices on staple items may be cheaper at Walmart,
and I’ve found the quality of their Great Value house brand to be
extremely good on most items. Unfortunately, you’ll very likely never
find a good sale on meat or fish like you will at a store with an in-house
butcher. It’s actually my least-favorite place to buy meat. - I just realized that I should have made fishstick kitties!
Day 45 Costs
| Item | Cost |
|---|---|
| Fish sticks, 11 Van de Kamp’s @ ($5.00/(44 sticks)) | $1.25 |
| Ramen | $0.20 |
| Broccoli | |
| Broccoli, ~4 oz @ $1.00/lb | $0.25 |
| Cheese, ~1 oz @ $7.00/lb? | $0.44 |
| Broccoli subtotal | $0.69 |
| Daily Total | $2.14 |
For the last day of the experiment, I skipped breakfast and lunch, and had
a simple dinner of fishsticks, urad dal, and half of a grapefruit. The
urad dal (see Day 9) was cooked with a bit of bouillon
powder (and I got it a bit too salty.) It wasn’t as good as the batch that
I cooked in leftover pork broth.
I also made some quick sauce for the fishsticks with a bit of ketchup and
horseradish.
Thoughts
- I went to bed a bit hungry again, and had trouble sleeping. I thought
about food all night. - It would have been more cost-efficient for me to buy the whole salmon
again for $1.99/lb (they were available,) but fish sticks are pretty
easy. I’ll have to look for fish sticks at low cost for future
reference.
Day 46 Costs
| Item | Cost |
|---|---|
| Fish sticks, 9 Van de Kamp’s @ ($5.00/(44 sticks)) | $1.02 |
| Urad Dal ~2 oz of dry @ $3.99/(2 lb) | $0.25 |
| 1/2 grapefruit | $0.21 |
| Ketchup & Horseradish (est.) | $0.15 |
| Daily Total | $1.63 |
- Overall, I think this experiment was a success. I made my price
targets, and experimented with good food! My average cost was well under
$2.50 / day, and I ate some of my very favorite foods, and discovered new
favorites! That’s exciting! - Recommendations: If you want to try
some of my favorite recipes, I’d recommend you try:- Cabbage Rolls!: Described on Day 2
(description), Day 13 (recipe), and Day 16 (cost breakdown.) These are one of the most
delicious and convenient foods I know how to make. If you can find
ground beef on sale, make a ton of these and freeze them. You
will thank me. - Hot Chicken!: Chicken thighs were literally the cheapest meat
that I found during this experiment; even cheaper than terrible bologna
that was made out of lips and hooves. Chicken thighs are also one of the
most delicious meats. And Hot Chicken is unbelievably delicious. See Day 19 for more on Hot Chicken! When you see
inexpensive chicken thighs, make this. - Split Pea Soup!: The richest and most satisfying of all the
soups. (And one of the very cheapest!) If you see split peas at a
reasonable price, make a lot of this. Eat it. Freeze it. Have it for
months. See Day 37 for the recipe. Many, many
people have asked me for the recipe. It’s not hard. - Pork Shoulder!: This is one of the cheapest cuts of meat that
you can buy, but one of the most luxurious if you cook it low and slow.
You can turn it into into pulled pork barbecue, pork tacos, pork
sandwiches, Pork Pancakes, and more.
The leftover
broth alone will make the best damn ramen that you’ve
ever seen. See day 4 for the original description
and pork soft tacos. Don’t miss the Meat
Science section to explain why pork shoulder magically turns from
tough and gristly into luscious and juicy after 9 hours of cooking. It
will change your life. You’ll want my spice rub recipe.(Also, did you know that when you buy “country-style pork ribs” that
they’re usually just pork shoulder cut into rib-like shapes? I bought
an electric smoker at a garage sale for $12.50 and I use it to smoke
pork shoulder “ribs”.) - Tuna Casserole!: Whenever you see cheap cans of tuna, think
of this. It’s an old recipe that is absolutely delicious and a favorite
of many families for 80 years. The description is on day 10 and the recipe on day 11.
- Cabbage Rolls!: Described on Day 2
- $2.50 / day is a somewhat difficult target to hit. I knew that and I
expected it. It’s very easy for one ill-chosen ingredient to make you
exceed your budget. However, it can definitely be done. I’m glad that I
chose a difficult target. - I’m very lucky that I don’t have to limit my food expenses
severely. I’ve mentioned, though, that as an engineer, I like constraints
because it limits the number of decisions I have to make. - Planning ahead and thoughtful shopping is important.
- Looking at weekly food advertisments is important.
- Keeping alert for bargains at the grocery store (especially discounted
about-to-expire meat) is important. - Buying items on deep discounts and planning your menu around these
items is one of the best ways to reduce your costs. Think of it as an
Iron Chef episode: “I have a bunch of this cheap ingredient, now what can
I make with it?” - Whenever I have found great prices on things, I’ve bought a lot of them
for food banks. Unfortunately, this doesn’t work for frozen/refrigerated
items. - Don’t forget to contribute to your local food banks or missions. I’ve
been contributing heavily each time I buy food. - Learning “rules of thumb” for how much things cost allows you to
estimate the costs of a dish in your head, and in a grocery store.
Learning some of these rules of thumb in the first days was one of the most
important things that helped me estimate better. - During the experiment, I craved cheese and beef the most. On Easter,
the day after the experiment, I made my patented wee cheeseburger
“sliders”. These are really good but are just on the edge of
cost-effectiveness. I didn’t go nuts and eat anything expensive after the
experiment, but boy, did I appreciate that slight bit of freedom! On the
other hand, my Cabbage Rolls are probably every bit as
good, and cheaper. - Oh, yeah, when making my cheeseburgers, I
remembered to save the broth that came from meat juices cooking
with onions. Yum! Will I put it in ramen or urad dal? - I’ve learned to try and use all parts of the foods I cook. I
paid for this fat, senator! - You pay less for ground beef with more fat. Yet ground beef with more
fat has more energy. Keep that fat. Use
that fat. Harness its energy to make you stronger than you can possibly
imagine. (I meant to write a whole entry on this, but I didn’t.) - I’m also thinking of other food-based projects. I’ve always wanted to
cook one meal a week using only solar power. (I designed and built a big
reflector once but it blew apart in the wind.) - I feel I’ve only scratched the surface of awesome cheap foods to make.
Where are the fried rice and pressure-cooker stew and 50-pound-zucchini
and fast food and sourdough and kimchi recipes? I’m learning as I write
this. I want to add more. - Thanks to everyone who contributed food suggestions. I’d like to
incorporate them into further entries. - I plan to continue this as I find more interesting recipes and cheap
foods. - Please try your own experiment and let me know how it goes! It may
be for 46 days, or one day.
Thanks for reading this. I hope I helped someone find a new food that they
love, and can share with others. I will be adding to this page as I
discover new inexpensive, amazing recipes.
Alan Eliasen, eliasen@mindspring.com
Twitter: @aeliasen
Back to Alan Eliasen’s website
Back to Alan Eliasen’s technical blog